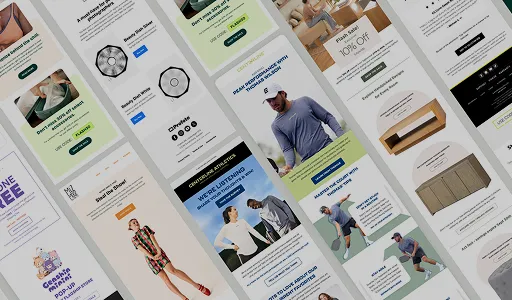

Klaviyo flows generate around 41% of email revenue from just 5.3% of sends, with revenue per recipient roughly 18 times higher than campaigns. A brand’s fifteen flows typically fall into six stages of the customer relationship: first contact, abandonment recovery, post-purchase, retention, loyalty, and re-engagement. Each stage serves a different purpose and includes its own set of automations
Quick Overview
Klaviyo Email Flows Checklist: Triggers, Timing, and KPIs for Every Flow
| Flow | Trigger | Suggested Length | Initial Timing | Essential Filter | Useful Split | Primary KPI |
| Welcome Series | Joins list | 3-5 messages | Immediately or tested delay | Has not purchased | New subscriber vs. existing customer | Placed order rate |
| Zero-Party Data | Newsletter signup | 1-2 messages | Immediately | Has not completed survey | Quiz responder vs. non-responder | Survey completion rate |
| Browse Abandonment | Viewed product | 1-2 messages | 2-4 hours | Has not added to cart | Product category | Click and conversion rate |
| Abandoned Cart | Checkout started | 2-3 messages | 1-4 hours | Has not purchased | Cart value | Conversion rate |
| Transactional | Placed order / shipped | 2-3 messages | Immediately | None | Domestic vs. international shipping | Open rate |
| Thank You Flow | Completed checkout | 1-2 messages | Immediately to 1 day | None | New vs. repeat buyer | Open rate |
| Product Review | Delivered order | 1-2 messages | 5-10 days post-delivery | Has not left a review | Product category | Review submission rate |
| Cross-Sell | Recent purchase | 1-2 messages | 14-30 days | Has not repurchased | Purchased category | Click and conversion rate |
| Replenishment | Estimated usage window | 2-3 messages | Based on product usage cycle | Has not reordered | Product SKU | Reorder rate |
| Back-in-Stock | Restock of wishlisted item | 1 message | Immediately on restock | Item is in stock | Wishlist vs. general interest | Click-through rate |
| VIP Customer | Lifetime spend or order count threshold | 1-2 messages | Immediately on threshold | None | Spend tier | Repeat purchase rate |
| Milestone | Birthday / anniversary | 1 message | On date | None | New vs. long-term customer | Open rate |
| Price Decrease | Tracked product price drop | 1 message | Immediately on drop | Opted into alerts | Product category | Conversion rate |
| Win-Back | Last purchase age | 2-3 messages | Based on buying cycle | No recent purchase | RFM or product | Reactivation rate |
| Sunset | Unengaged for set period | 2-3 messages | 1 day, 1 week, 2 weeks | No recent engagement | Engagement score | List cleanliness / unsubscribe rate |
What Are Klaviyo Email Flows?
A Klaviyo email flow is an automated sequence of emails that sends based on something a customer does, or doesn’t do, rather than something you manually schedule. Sign up for a list, and a Klaviyo email flow starts. Abandon a cart, and a different flow picks it up a few hours later. The flow runs on its own once it’s live, following the trigger, timing, and filters you set up when you built it.
This is different from a Klaviyo campaign, which you write and send by hand to a segment of your list on a specific date. A Klaviyo automation flow, by contrast, is built once and keeps running in the background, reacting to individual customer behavior for as long as it stays active. That’s the entire value proposition. One welcome flow can greet a thousand new subscribers a month without anyone touching it after the initial setup.
Benefits of Klaviyo Email Flows
Here’s what we tell clients when they ask why Klaviyo automation flows are worth the setup time.
Klaviyo Email Flows earn more per email, by a wide margin
Klaviyo’s own 2026 benchmark data puts revenue per recipient on flows at roughly 18 times what campaigns generate. Flows make up only about 5.3% of total sends across the accounts Klaviyo measured, yet they’re responsible for around 41% of total email revenue. Top-performing flows push that even further, with the top 10% hitting revenue per recipient as high as $7.79. We see this pattern in almost every account we audit. The campaigns get the attention. The flows quietly do the heavier lifting.
You don’t need to watch it around the clock
A welcome flow greets a new subscriber at 2 am on a Sunday the same way it would at 10 am on a Tuesday. Once it’s live, it just runs. That consistency is tough to match with a manually scheduled campaign.
Personalization without extra manual work
An abandoned cart flow can reference the exact product someone left behind at the exact price they saw it, without a person writing a custom email for every shopper who does this. According to Klaviyo’s benchmarks, abandoned cart flows average $3.65 in revenue per recipient, compared to $0.11 for standard campaigns. Most of that $3.54 difference comes down to relevance. The flow email references a specific product someone actually looked at. The campaign email goes to everyone.
Brands can build loyalty in moments that aren’t about selling
Birthday emails, anniversary flows, and thank you sequences keep a brand present in someone’s inbox without asking for a sale. We’ve seen this directly. Boie’s thank you flow, split between new and repeat customers, pulled some of the highest open rates in the entire account, well above what their promotional campaigns brought in.
Klaviyo automation flows cut down on support tickets
Order status updates and shipping confirmations answer the question before a customer has to ask it. Post-purchase flows carry an average open rate around 61.68% industry-wide, the highest of any flow category, because people are actively checking on something they’re waiting for.
Essential Klaviyo Automation Flows Every Business Needs
Most Klaviyo accounts we open up are running two or three of these flows and calling it done. The gap between that and a full setup is that nobody circled back after the welcome series went live. Here’s every flow we build for clients, starting with the one that runs the moment someone hands you their email address.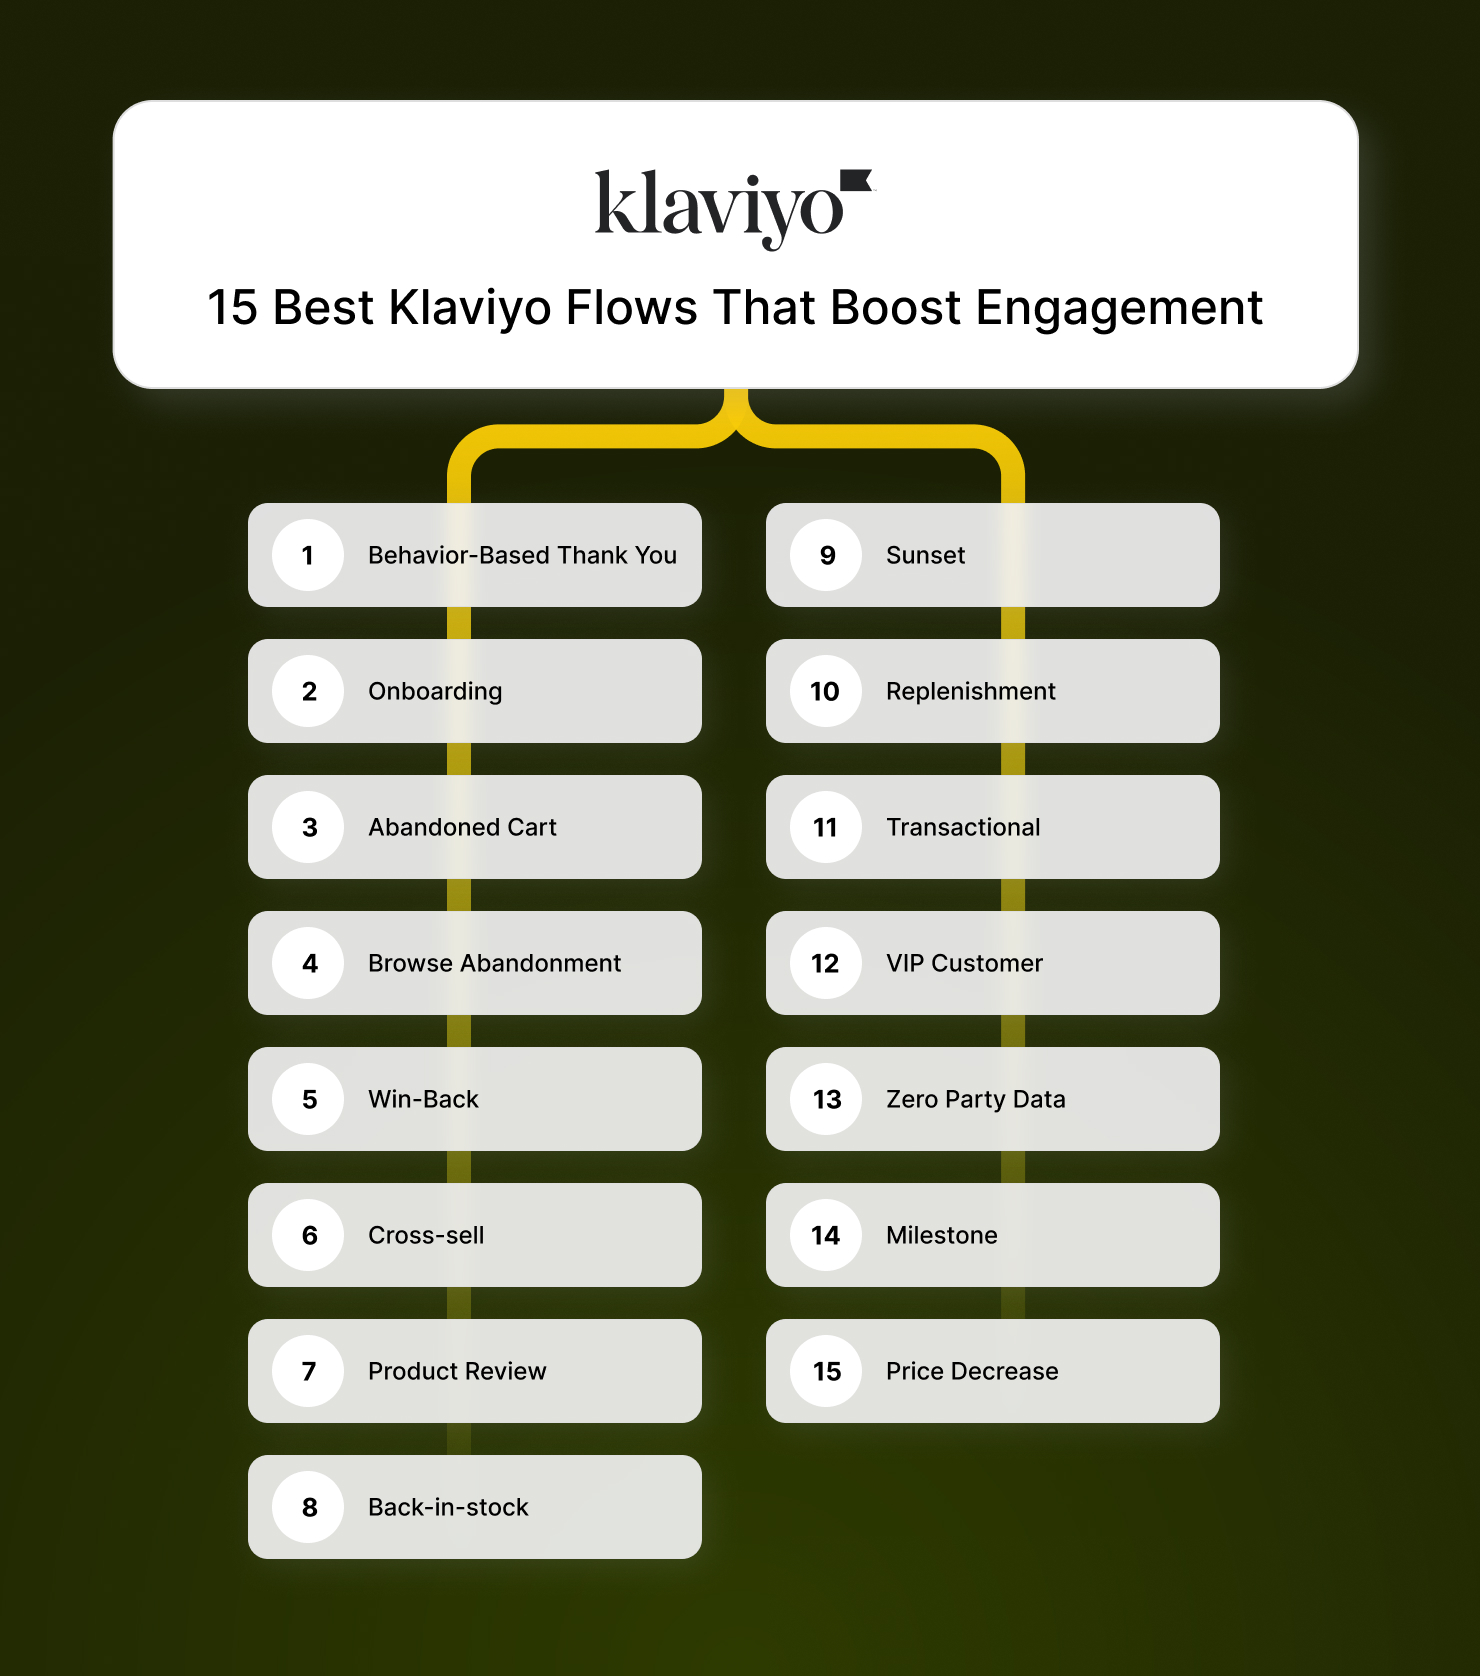
Stage 1: First Contact
1. Welcome Series
What starts it: someone subscribes to your list or, in some setups, makes a first purchase before ever landing in your marketing flow.
This is the flow that sets the tone for everything after it, so we rarely launch it as a single email. Three to five emails over a week or two gives you room to introduce the brand, show product, and make an offer without cramming all three into one send.
When we took on Boie, a sustainable personal care brand, their list sat at 2,000 to 3,000 subscribers with almost no automation running. Part of scaling that list past 100,000 involved a welcome email that went out a day after signup. It walked new subscribers through why Boie’s products were made the way they were and how to get the most out of them before asking for a sale. That email ended up converting at 1.8%, which produced five-figure revenue on its own.
London Store, a multi-market fashion retailer selling across the UK, US, EU, and Italy, needed something different. One welcome flow wasn’t going to work across four markets with different currencies, shipping expectations, and languages. We built a separate welcome automation for each market. That decision, paired with market-specific cart abandonment flows, contributed to a 1,100% increase in email revenue over nine months compared to the prior fifteen.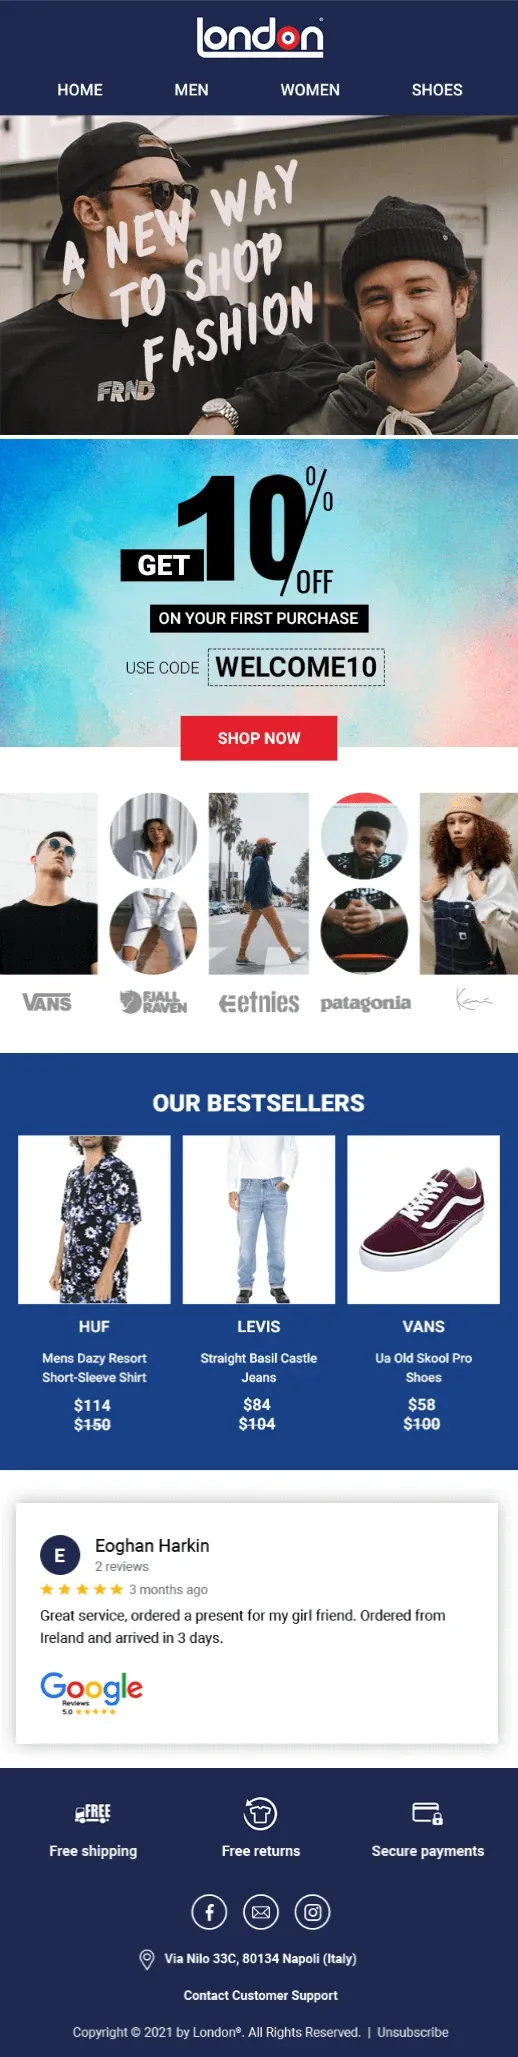
2. Zero-Party Data Flow
What starts it: a newsletter signup, sometimes gated behind a short quiz
This flow asks customers directly what they want. A short survey in exchange for a discount gets you preference data you can use for segmentation down the line, and people hand this information over more willingly through email than most brands expect.
Anthropologie’s version keeps it simple. Short survey, clear headline, discount waiting at the end. No extra steps between signing up and getting the reward.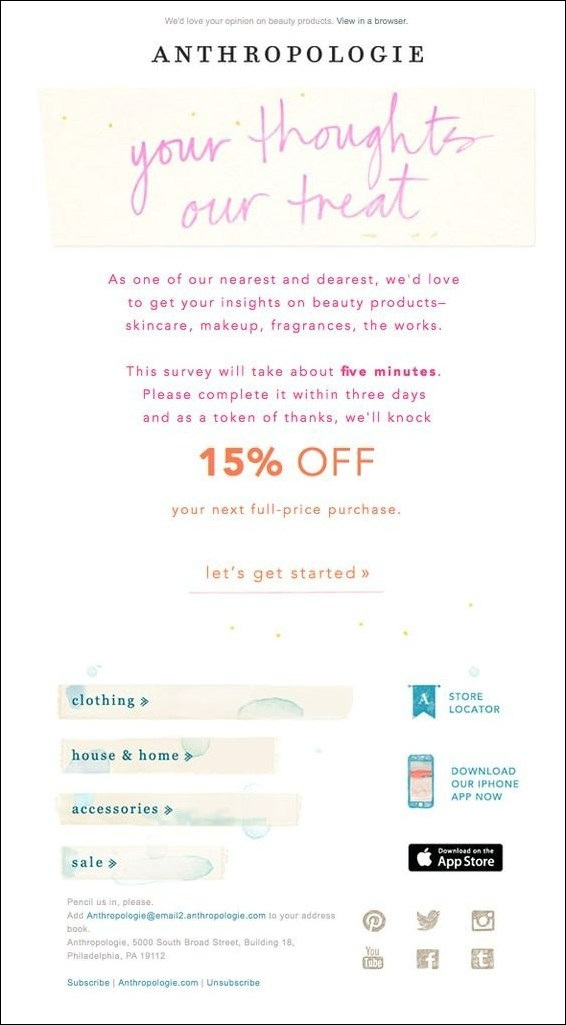
Stage 2: Abandonment Recovery
3. Browse Abandonment Flow
What starts it: time spent on a product page with no add-to-cart action.
Browsing is a lighter signal than a cart, so we keep this flow shorter and softer than cart recovery. For Boie, we set this to fire two hours after someone left a product page and leaned on a scarcity angle since their products genuinely did sell out from time to time. That single email pulled a 38% open rate, 6% click rate, and 4.8% conversion rate.
Not every brand can honestly claim scarcity, so we’d only use that angle where it’s true. Discounts, bundled reviews, or a simple “still thinking about this?” message work just as well when scarcity doesn’t apply.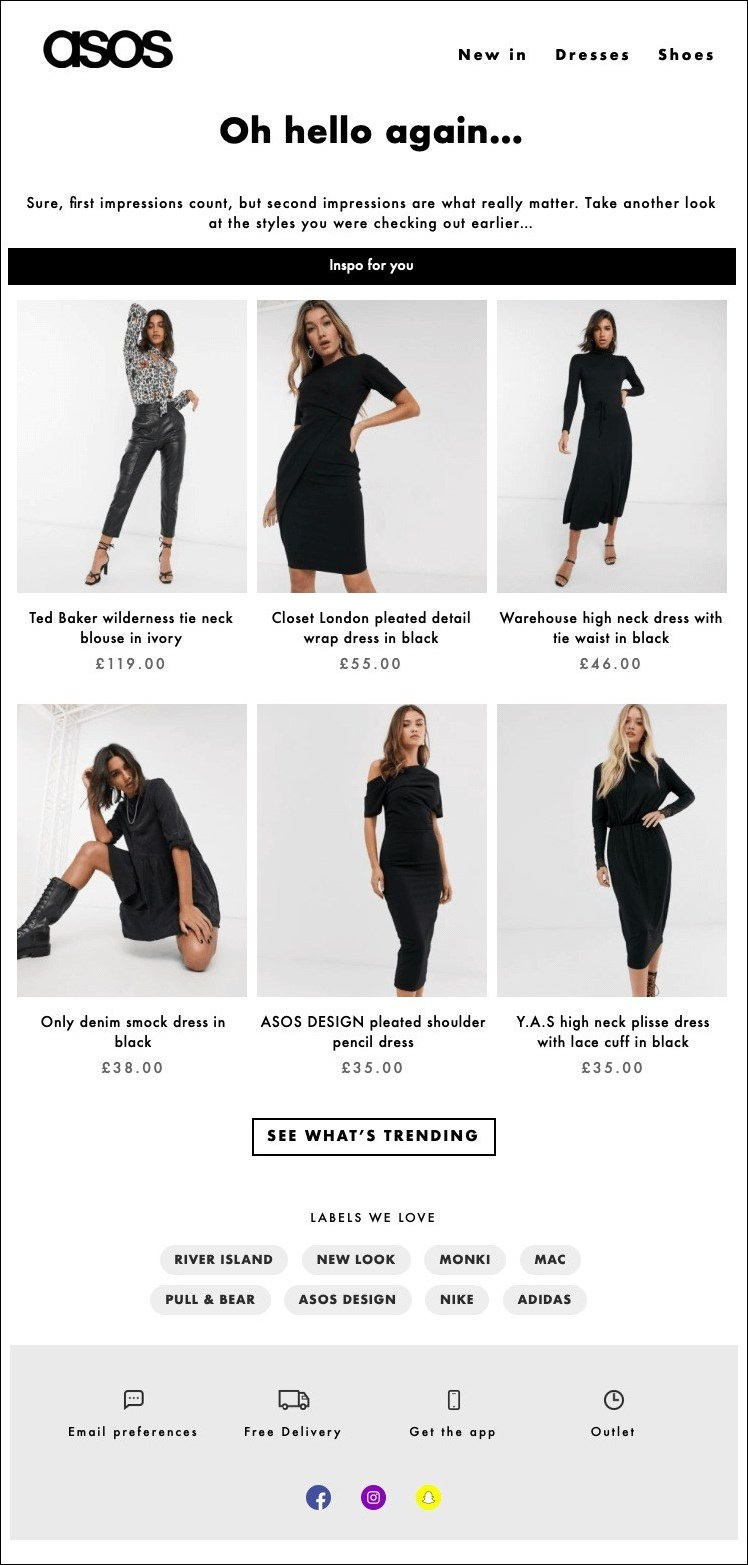
Asos shares a catalog of products based on the customer’s browse history and includes essential product labels for customers to explore. The message is friendly, straightforward and encourages subscribers to shop.
4. Abandoned Cart Flow
What starts it: checkout started, but the purchase was not completed.
Roughly 70% of shoppers abandon their cart at some point, and cart recovery flows convert at an average of around 18.64% across the merchants we’ve studied. It’s usually the single highest-earning flow in an account.
For Boie, we ran two emails. The first went out an hour after abandonment, a plain reminder with a link back to the cart, and pulled a 38% open rate and 4.8% conversion. The second went out a day later with a 10% discount attached and actually beat the first on opens at 43%, though conversion dipped slightly to 4.4%. More incentive doesn’t always mean a better result, and we’ve seen accounts where the discount email underperforms the plain reminder.
London Store built cart abandonment separately for each of its four markets. Combined with market-specific welcome flows, June 2021 alone brought in 86% more email revenue than the brand had generated across the entire previous fifteen months.
Stage 3: Right After Purchase
5. Transactional Flow
What starts it: an order is placed, then updated as it ships and arrives.
These aren’t exciting emails to design, but they get opened. Klaviyo’s benchmark data puts post-purchase open rates around 61%, higher than nearly any other flow category, because people are actively checking on something they paid for.![]()
Imbodhi pairs its delivery confirmation with a link to product FAQs, which quietly cuts down on support tickets while keeping the customer in the loop.
6. Behavior-Based Thank You Flow
What starts it: a completed checkout, separate from the transactional receipt itself.
We sent two different Thank You emails for Boie. One for new customers, one for repeat buyers, since a returning customer being thanked the same way as someone on their first order feels a little hollow. Both versions carried some of the highest open rates across the whole account. It’s an easy flow to skip because it doesn’t look like it drives revenue directly, but it’s doing real work on the loyalty side.
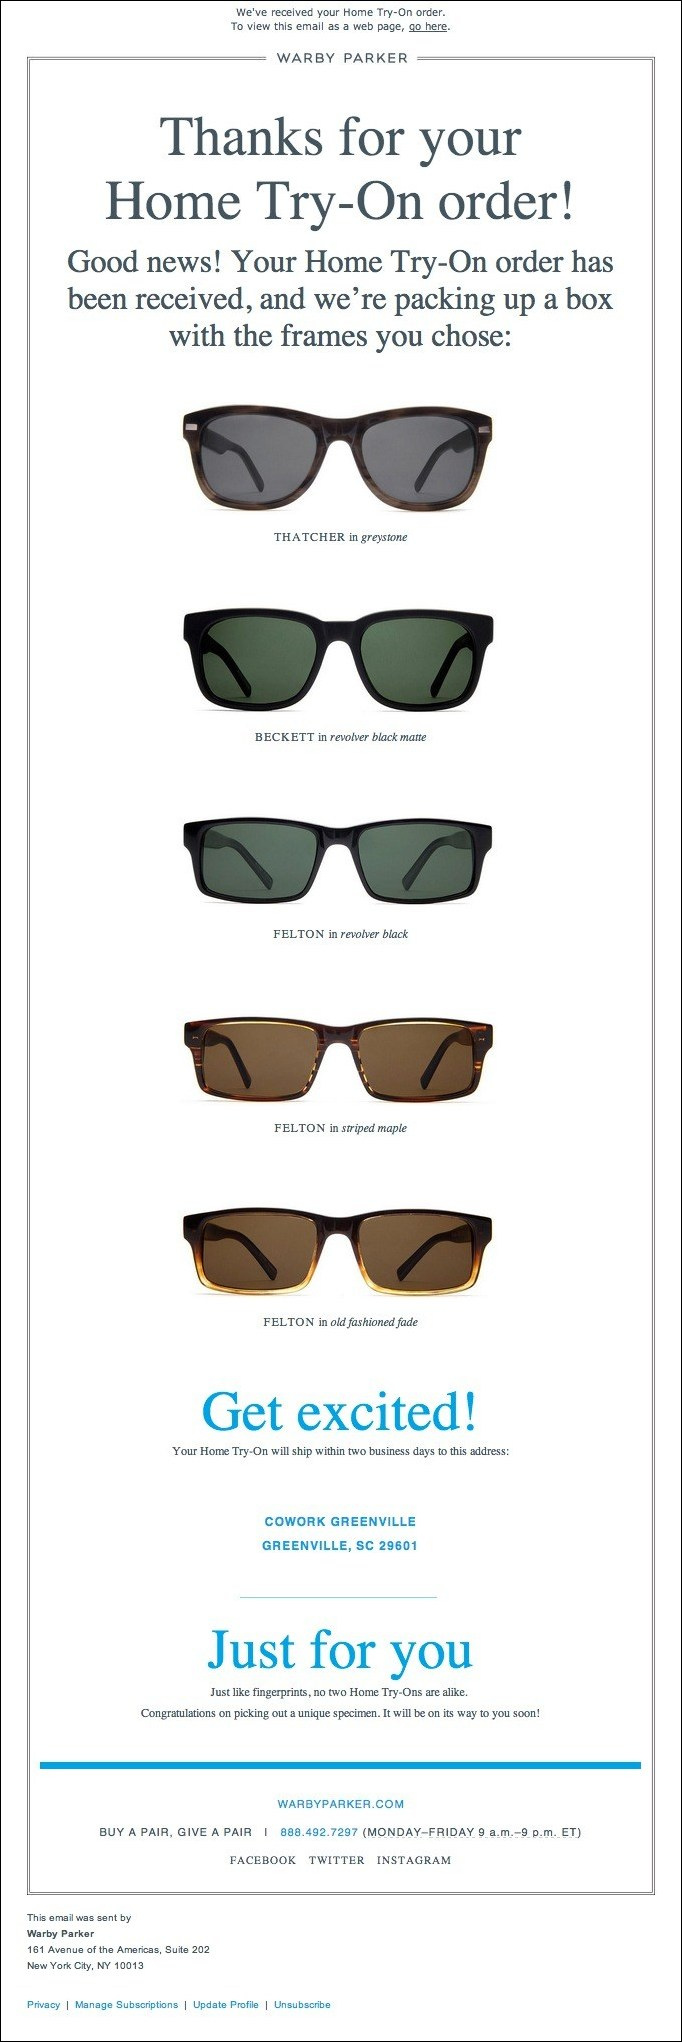
Warby Parker’s version lists every ordered item clearly, links out to social, and hands the customer a fast path to support if anything’s wrong with the order.
Stage 4: Retention and Repeat Purchase
7. Product Review Flow
What starts it: a recent purchase, timed to when the product’s actually had a chance to be used.
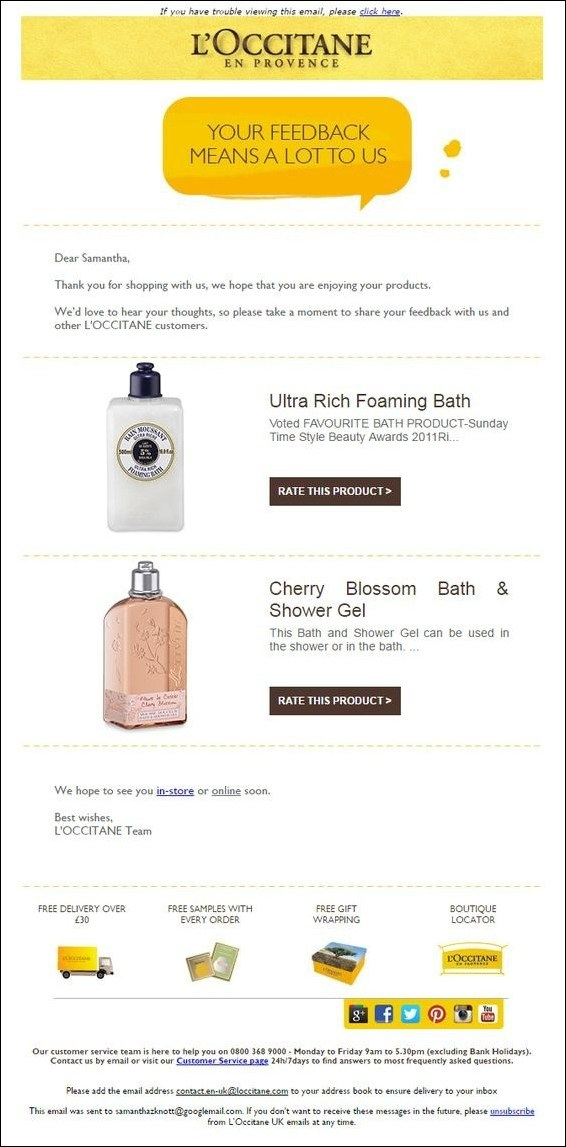
L’Occitane’s version lists all recently purchased items with a dedicated call to action for each, so someone who bought three products can review all three without hunting for extra links.
Timing here depends heavily on the product. A skincare serum needs weeks before someone has a real opinion. A phone case doesn’t. We calibrate this per product line.
- Cross-Sell Flow
What starts it: a recent purchase or a product review.
Boie only sold four products total, which made this flow simple to build but honestly modest in results. We sent an email 30 days after purchase promoting the three items a customer hadn’t bought, reasoning that anyone interested in one hygienic care product was probably open to the others. It pulled a 36% open rate but only a 0.1% conversion rate. Not every automation is a home run, and a low-conversion flow with a decent open rate can be practical if it costs nothing to run.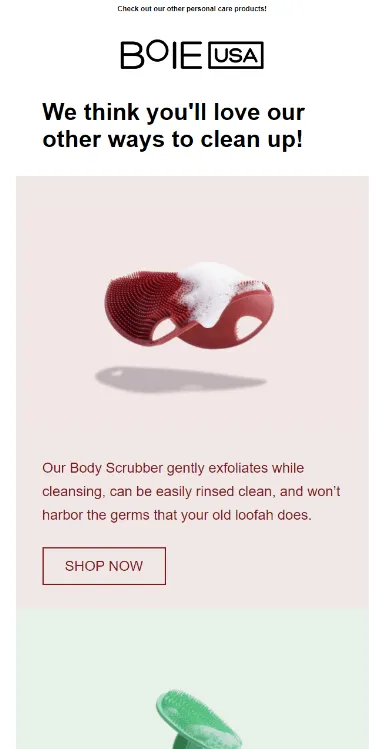
Larger catalogs tend to do better with this flow since there’s more room to match a genuinely complementary product to what someone already bought.
- Replenishment Flow
What starts it: an estimated usage window closing, calculated from the average time a product lasts.
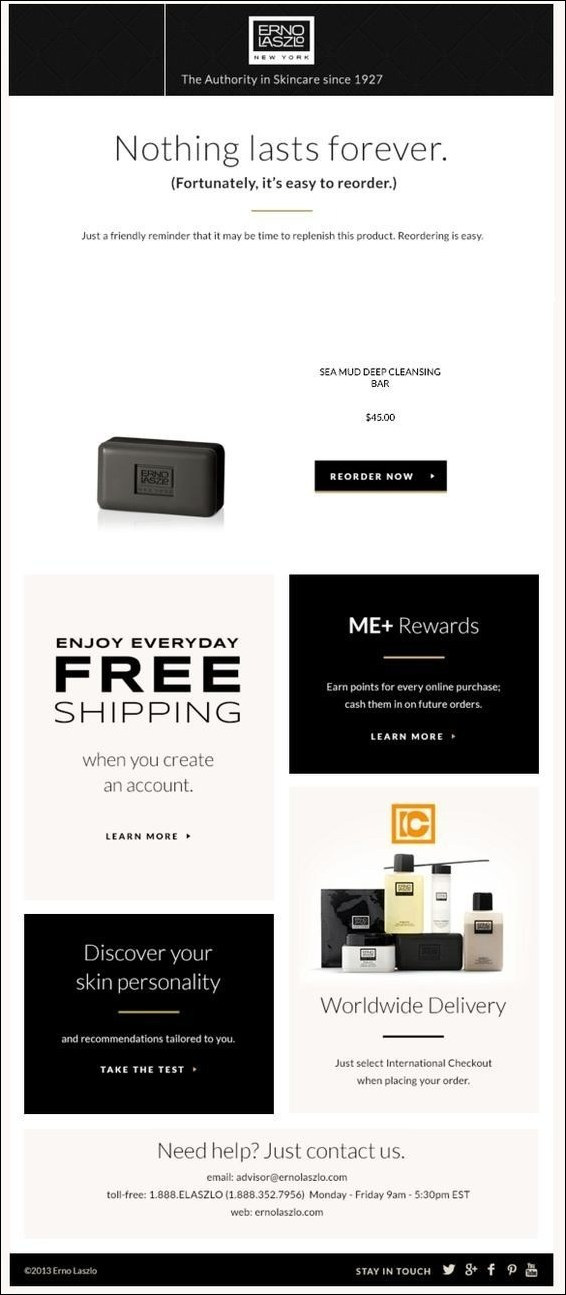
Built for anything that runs out on a schedule. Coffee, skincare, supplements, razors. Erno Laszlo pairs its reorder reminder with shipping details up front, which removes a decision point right when someone’s weighing whether to reorder or just deal with running out for a while.
10. Back-in-Stock Flow
What starts it: a customer opts in for a notification when the item comes back into stock.
Boie ran out of certain items periodically given their materials, so shoppers could sign up to be notified the moment stock returned without checking back manually. Back-in-stock emails kept those customers in the loop, and it’s one of the lower-effort flows to maintain once it’s built.
Hightide adds a smart layer on top of this by surfacing related products alongside the restock notice, which works as a quiet cross-sell riding on the back of the alert.
Stage 5: Loyalty and Recognition
11. VIP Customer Flow
What starts it: lifetime spend or order count crossing a set threshold.
Customers who’ve placed several orders and spent real money with a brand notice pretty quickly if they’re getting the same generic emails as someone on their first purchase. A VIP flow is how you signal that their loyalty registered somewhere. Early access, a standing discount, or just an email that acknowledges their history with the brand, all of it works better than staying silent about it.
Organics Ocean’s VIP email keeps the message focused on member benefits instead of trying to sell immediately. It clearly explains what’s included in VIP status, highlights the exclusive offer, and uses a single primary CTA rather than competing promotions. That simplicity makes it easy for loyal customers to understand why the email matters.
12. Milestone Flow
What starts it: a birthday or account anniversary, pulled from a date property.
A birthday email doesn’t need much strategy behind it. Wish the customer well, attach a small discount if you want, and let the goodwill do the work. Purchase anniversaries and sign-up anniversaries work the same way, and we’ll often build both into an account alongside the birthday flow.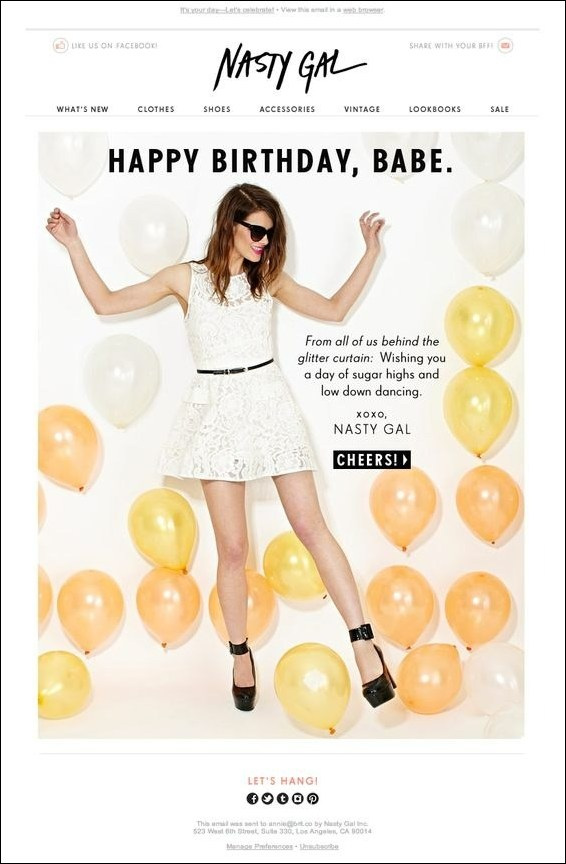
Nasty Gal’s birthday email just wishes the customer well and offers a small perk, nothing more. No hard sell attached to it. We’ve tested heavier versions of this flow with bigger discounts, and the plain, no-agenda version tends to hold its own against them, probably because it doesn’t read like every other promotional email hitting the same inbox that week.
13. Price Decrease Flow
What starts it: a tracked product’s price drops, usually requiring the customer to have opted into price alerts first.
This one reaches a smaller audience than most flows here since it depends on an opt-in, but the people who do sign up are motivated. Columbia Sportswear built a version of this around a weekend Black Friday sale, listing discounted items and adding free shipping to push order values up alongside the price cut itself.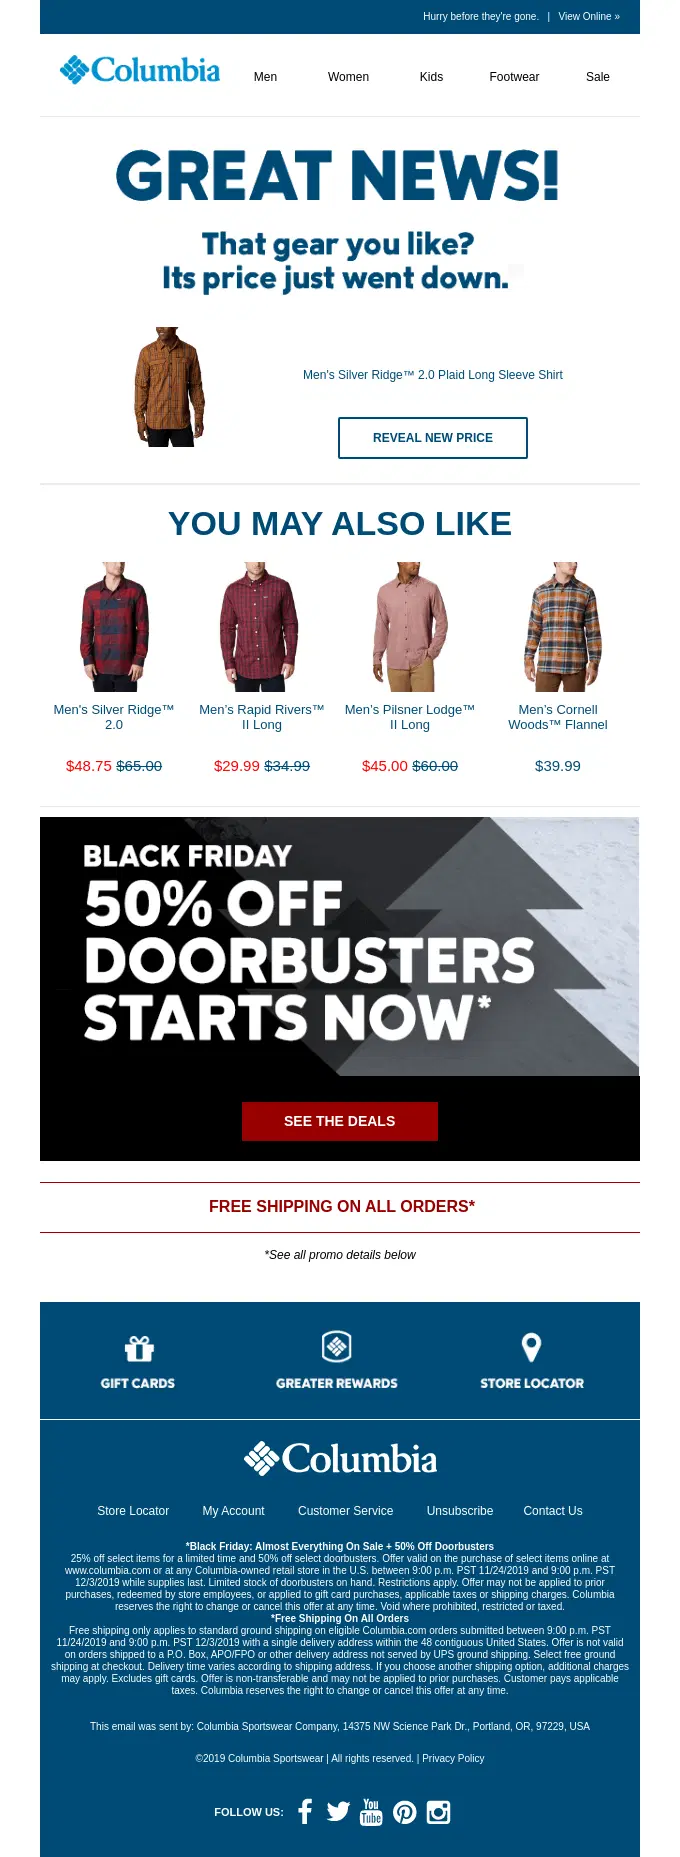
Stage 6: Re-Engagement and List Health
14. Win-Back Flow
What starts it: no purchase for a set window, typically somewhere between 60 and 90 days depending on the brand’s normal repurchase cycle.
We usually open with something low-pressure, a look at what’s new since they last shopped. If that doesn’t bring anyone back, the next email carries a real offer. For accounts where win-back matters a lot to revenue, we’ll follow up a non-response with a short survey asking what happened.
15. Sunset Flow
What starts it: a subscriber going unengaged for an extended stretch, often 90 to 120 days.
An unengaged segment drags down deliverability for the rest of the list, and under Klaviyo’s current pricing, an inactive profile still costs money to keep around. 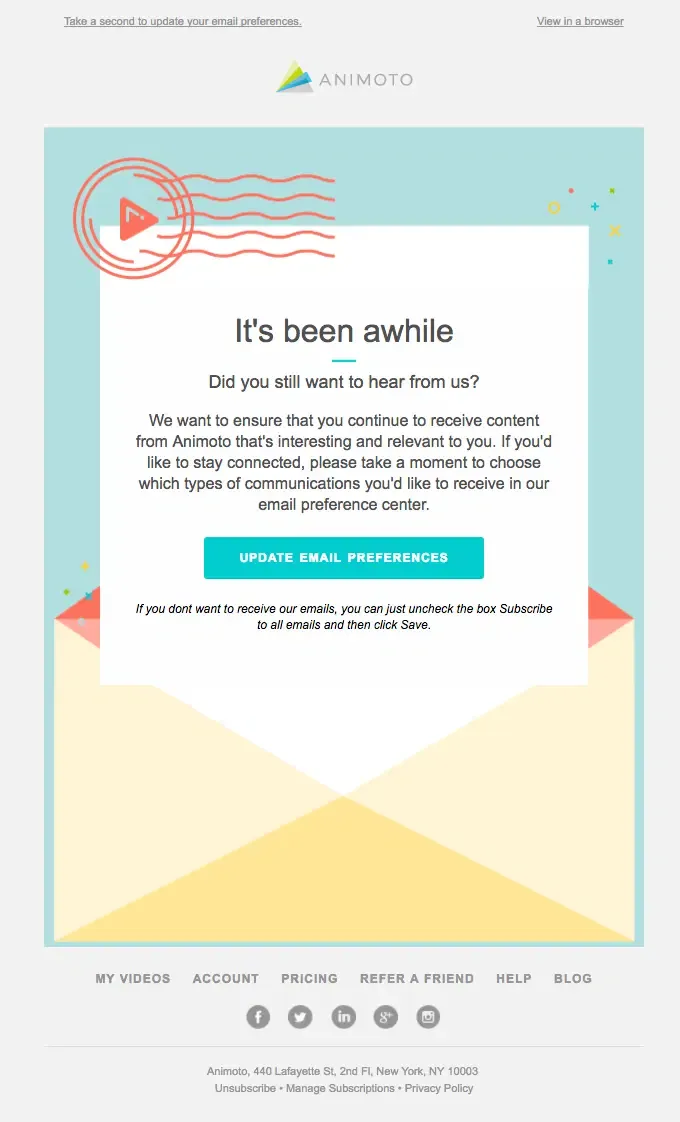
Animoto asks directly whether someone still wants to hear from the brand and makes staying subscribed a one-click decision. Silence after that is the answer, and we remove them from the active list.
Setting Klaviyo Email Flows Up
The Flows tab sits on the left sidebar once you’re logged into your Klaviyo dashboard. Once your ecommerce platform is connected, everything below happens from that one screen. If you’d rather have this handled for you, this is part of what our Klaviyo email marketing services cover.
Start With the Pre-Built Templates
Klaviyo drops six ready-made flows in front of you by default:
- Welcome series
- Thank you series
- Abandoned cart
- Product review
- Browse abandonment
- Win-back
These have been tested across thousands of accounts, and the default copy is a reasonable first draft. We’ve never handed a client a Klaviyo account and told them these six cover it. At our Klaviyo email marketing agency, most accounts we build out end up running ten or more.
Browse Ideas for Everything Else
Click “Browse Ideas” to reach the Klaviyo automation flow library. By default, it only shows flows compatible across every platform and capable of sending both email and SMS, so a template you’re looking for can seem to be missing until you know to dig further. You can filter by ecommerce integration, search by name, or scroll down to “Browse by Goal” to find flows by outcome.
If nothing in the library fits, “Create from Scratch” opens a blank canvas. Klaviyo walks you through the build with a guided wizard, so this isn’t as intimidating as it sounds even for someone new to the platform.
Naming and Choosing a Trigger
Creating a flow from scratch starts with naming it and attaching a tag, which matters more later than it feels like it should. An untagged flow list becomes unreadable within six months once an account has ten or more running.
Clicking a trigger option opens a side panel where you refine it further, adding the specific list, segment, metric, or date property it should key off. You’re choosing from five trigger types:
- List — fires when someone joins a specific email list. This is how nearly every welcome series works.
- Segment — fires when someone enters a segment. We use this for anything condition-based, like a VIP tier defined by spend.
- Metric — responds to a tracked event such as Placed Order, Checkout Started, or Viewed Product. One metric can launch more than one flow at once. Placed Order, for example, can kick off a post-purchase sequence immediately while separately starting the delay timer for a product review request.
- Date Property — fires on a specific date pulled from a profile, which is how birthday, anniversary, and subscription reminder flows run.
- Price Drop — fires when a tracked product’s price falls by a set percentage, and almost always requires the customer to have opted in first. This trigger is only available on Shopify, BigCommerce, WooCommerce, and Magento 2 integrations, so it’s not universal.
Match the trigger type to what’s actually happening. We’ve seen clients try to force a metric trigger to do a list trigger’s job because it feels more sophisticated, and it just adds complexity without adding value.
How Klaviyo Checks Someone Against a Flow
This part trips people up. Klaviyo doesn’t check a subscriber against your trigger and filters just once at entry. It re-checks them before every single component fires, all the way through the flow. If someone stops qualifying partway through, say they complete their purchase midway through a cart abandonment sequence, they’re automatically pulled out, and the remaining emails never send.
This protects against sending an abandoned cart reminder to someone who already checked out five minutes earlier. It also means your filters have to hold up at every step in the sequence, since a subscriber can fall out of qualification halfway through.
Building the Klaviyo Flow With Components
Every flow is built from three component types, dragged onto the canvas from the sidebar. A component gets a green border once it’s positioned correctly.
- Action — does something once triggered, almost always sending an email, sometimes updating a profile property. Use the action panel to attach the email, turn on Smart Sending, and enable UTM tracking, which we treat as non-negotiable so revenue attribution holds up in analytics later.
- Time — adds delay between steps. In a typical welcome flow, we might set a 3-day delay after the first email and a 4-day delay after the second. Delays can be set in minutes, hours, days, or months and can be restricted to specific days of the week if you want emails landing only on weekdays, for instance. To adjust a delay once it’s live, switch that component to manual first. The change won’t retroactively affect subscribers already partway through the flow, only new entries going forward.
- Logic — branches the flow. A trigger split routes people based on an action they take. A conditional split routes based on a rule you set, like cart value above or below a threshold.
Before you rearrange anything: if you reposition a component within a flow that’s already live, it gets skipped entirely. Repositioning is safe to do in draft or manual status, not once a flow is running.
Setting Statuses
Every component carries a status:
- Draft — still being built, invisible to subscribers, nothing fires
- Manual — finished but not yet trusted; you walk it through by hand before letting it run unattended
- Live — confirmed and running without anyone watching it
We don’t flip anything to live until we’ve been the test subscriber ourselves at least once. Once every component’s ready, “Update Action Statuses” in the flow builder’s upper right corner lets you switch everything to live in one action instead of clicking through each component individually, which matters once a flow has six or more messages in it.
Reviewing Performance
Once a flow’s been live for a stretch, open the flow builder and click Show Analytics. You’ll get opens, clicks, conversions, and revenue per recipient at both the flow level and the individual email level, with an adjustable timeframe. “View All” opens a full recipient activity report if you need to see individual subscriber behavior.
If a flow’s underperforming, you don’t have to scrap the whole thing. “Cancel All” pulls every scheduled message if you need to stop it entirely, or you can cancel individual messages one at a time while leaving the rest of the sequence running. We’ll usually isolate whichever single email in the sequence is dragging performance down and rebuild just that one.
Klaviyo Email Flows Best Practices
Give each flow one clear job before you build it
“More revenue” doesn’t tell you how to design the branches. Decide whether a given flow exists to recover a sale, deepen a relationship, or just collect information, and let that decide the content.
Branch by purchaser status where it’s practical
A first-time buyer and a fifth-time buyer shouldn’t get the same thank-you email, and Boie’s split between the two is a small example of how much that distinction can matter for email open rates.
Review flows on a set schedule
Products get discontinued, promotions expire, and a flow still referencing last season’s item chips away at trust every time it sends.
Don’t treat email as the only channel available inside a flow
SMS can carry a time-sensitive step, like a final cart reminder, more effectively than another email would.
Keep revisiting your segments as the list grows
Whatever made sense at a few thousand subscribers usually needs revisiting well before you hit six figures.
Conclusion
Fifteen flows is a lot to build well in one sprint. Most brands don’t get there by launching everything at once, and honestly, they shouldn’t try to. Reading the analytics afterward and knowing which email in a six-message sequence is actually the weak link takes longer to get good at than setting up the flow in the first place.
If you’re newer to email marketing and want that side handled by people who look at this data every day, outsourcing your email marketing to a team that already knows where things tend to break is usually faster than learning it account by account. That’s the work we do at our email marketing company every week.
FAQ
How many flows should a new brand start with?
Three. Welcome series, abandoned cart, and post-purchase. These cover the highest-intent moments in the customer journey, and getting a clear read on those three tells you whether the rest of your setup is worth building out yet.
What’s the difference between a Klaviyo flow and a Klaviyo campaign?
A campaign is something you write and send manually to a segment on a specific day, like a Black Friday promotion. A flow runs on its own once it’s built, responding to whatever a customer does. Most accounts we manage lean on both. Campaigns carry the big promotional pushes and one-off announcements. Flows handle the ongoing, individual moments, a cart left behind, a birthday, a customer going quiet for two months. Trying to run a store on campaigns alone means someone has to remember to send an abandoned cart reminder by hand, which doesn’t scale past a handful of orders a day.
What metrics actually matter when judging a flow’s performance?
Open rate tells you if the subject line and sender reputation are doing their job. Click rate tells you if the content inside is landing. Revenue per recipient is the number we weigh most heavily, since it ties the flow directly to money. A flow can have a strong open rate and still be underperforming on revenue, which is usually a sign the offer or the product match is off even though the subject line worked. We also watch unsubscribe rate on longer sequences like win-back and sunset, since we don’t want Klaviyo email flows to slowly damage your list health.
How do I stop the same customer from getting flooded with emails across different flows?
Klaviyo flow’s Smart Sending feature caps how many emails a person can receive within a set window, usually somewhere between 16 and 24 hours, and it’s worth turning on once an account has more than a handful of trigger emails running at once. Overlap happens more than people expect. A customer can trigger a browse abandonment email and a cart abandonment email within an hour of each other without anyone intending that. Beyond Smart Sending, we’ll also add filters that exclude someone from a lower-priority flow if they’re already mid-sequence in something more urgent, so a win-back email doesn’t land in the same inbox as an active cart reminder.
Should every abandoned cart email include a discount?
In Boie’s case, the discount email actually pulled a lower conversion rate than the plain reminder that went out first, even though it had a higher open rate. We test this per account rather than assuming a discount always helps.
How long should a win-back flow wait before sending?
Depends on how often your customers normally buy. A coffee subscription brand and a furniture retailer have nothing in common on this front, so look at your own repurchase data before locking in a window.
What’s the most common mistake in Klaviyo flows you see across accounts?
Copy that reads like it was written for no one specific. The segmentation can be flawless, and a flow still won’t convert if the email sounds like a template.