In today’s digital age, effective communication with customers and potential leads is essential for all forms of businesses seeking growth. Email marketing has proven to be one of the most influential channels for reaching out to target audiences and fostering meaningful relationships with clients.

Among the plethora of email marketing solutions available, Brevo, now Brevo, stands out as a powerful and versatile platform, providing businesses of all sizes with the tools they need to streamline their email campaigns and marketing automation. Founded in 2012, Brevo has risen to prominence as an all-in-one marketing automation platform that enables businesses and organizations of all sizes to interact, communicate, and create long-term relationships with their consumers. 

As a comprehensive solution, Brevo offers a wide range of tools, including email marketing, SMS marketing, transactional emails, marketing automation, and CRM features. With its user-friendly interface and powerful functionalities, Brevo provides marketers and entrepreneurs with a seamless and efficient way to create and manage personalized campaigns, optimize customer interactions, and drive their business growth. 

Whether you’re a small business owner looking to expand your reach or a seasoned marketing professional aiming to enhance customer engagement, Brevo’s robust set of features and resources offers an ideal platform to strategize, execute, and measure the success of your marketing efforts. From designing eye-catching emails to tracking performance metrics, Brevo’s versatile toolkit streamlines marketing operations, making it an indispensable asset for businesses seeking to thrive in today’s competitive digital landscape.

So, let’s dive into the world of Brevo and discover how this powerhouse of a platform transforms mundane email campaigns into captivating experiences that resonate with audiences. But that’s not all! Buckle up as we also explore how Brevo seamlessly extends its competence beyond email marketing, turning businesses into dynamic marketing juggernauts across various channels.

Sendinblue (Brevo) Integrations

CMS and Ecommerce Integrations

One of the standout features of Brevo is its seamless Content Management System (CMS) and ecommerce integrations. It allows users to effortlessly connect their website’s CMS and ecommerce platforms with Brevo, creating a cohesive ecosystem for marketing campaigns.

The CMS integrations sync website content, including blog posts and landing pages, with sendinblue’s email marketing and automation tools. This enables businesses to create and distribute tailored email campaigns based on user interactions. 

Besides, The ecommerce integrations extend marketing potential even further by effortlessly linking with major ecommerce platforms, allowing personalized email marketing based on consumer behavior. 

Robust analytics and reporting capabilities help track campaign performance and customer engagement, enabling data-driven decisions for better outcomes. Overall, Brevo’s CMS and ecommerce integrations streamline data flow, enhance efficiency, and boost customer engagement to achieve marketing goals more successfully.

1. PrestaShop
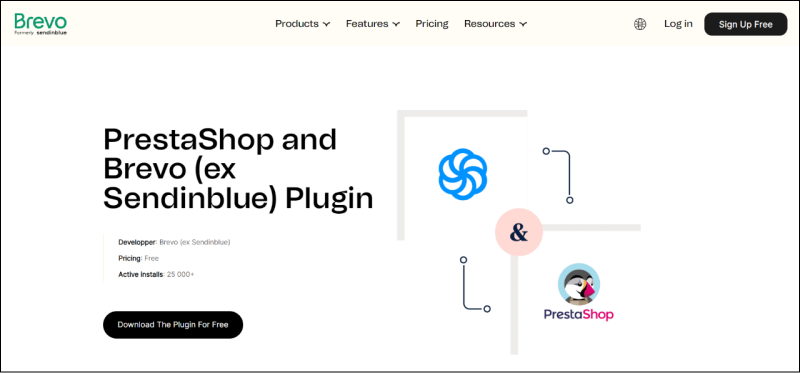
PrestaShop EXAMPLE

PrestaShop is a highly flexible and scalable open-source ecommerce platform. Brevo integrates with it to help online store owners manage their customer communications. 

You can synchronize your PrestaShop customer data with Brevo, create email marketing campaigns, and automate your email workflows based on customer behavior.

Setup process
  • Create a free account or log in to your Brevo account. 
  • Access your PrestaShop website as an administrator. 
  • Within PrestaShop, navigate to the “Plugins Section”.
  • Click on “Add New” and then choose the Brevo plugin. 
  • Proceed by adhering to the provided plugin guidelines.

2. WooCommerce
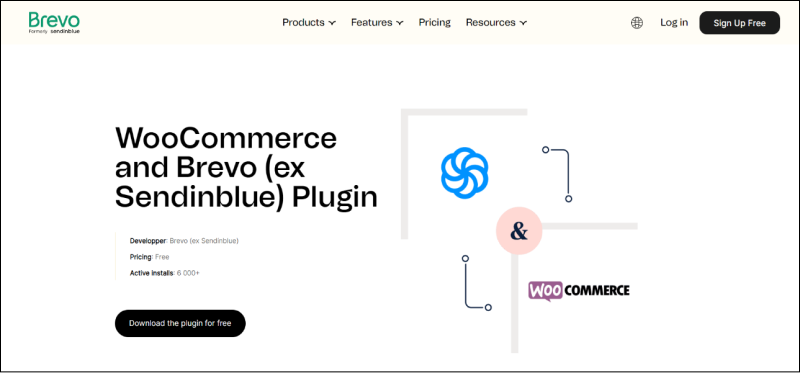
WooCommerce (sENDINBLUE INTEGRATIONS)

WooCommerce is another popular open-source ecommerce platform. 

With the Brevo integration, you can connect your WooCommerce store to automate various email marketing activities, such as abandoned cart reminders, order confirmations, and customer feedback requests.

Setup process
  • Create a free account or log in to your Brevo account. 
  • Access your WooCommerce website admin account and navigate to Extensions > Add >. 
  • Choose the Brevo plugin for WooCommerce.
  • Adhere to the plugin’s guidelines to enable it.

3. Shopify
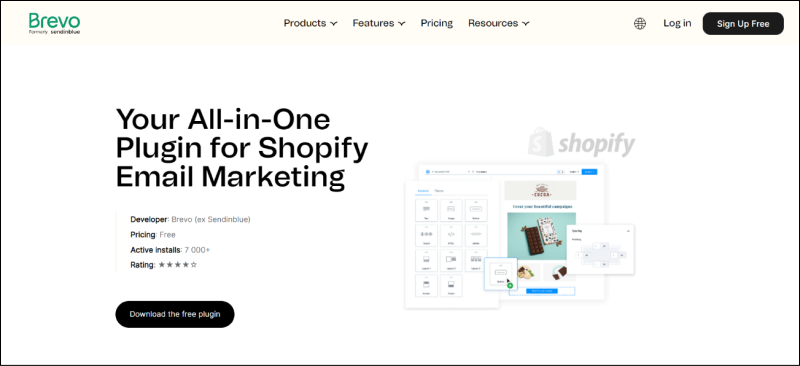
Shopify EXAMPLE

Shopify is one of the leading ecommerce platforms, and Brevo offers an integration to help Shopify store owners manage their email marketing efforts. 

You can sync customer data, create targeted email campaigns, and track the performance of your marketing activities.

Setup process
  • To commence, select the “Add App” option located in the Shopify marketplace. 
  • Sign in to your existing Brevo account or create a new one.
  • Grant permission for Shopify to link with your Brevo account.
  • Incorporate the Brevo app into your store and establish a connection between your Shopify store and Brevo.

4. Magento
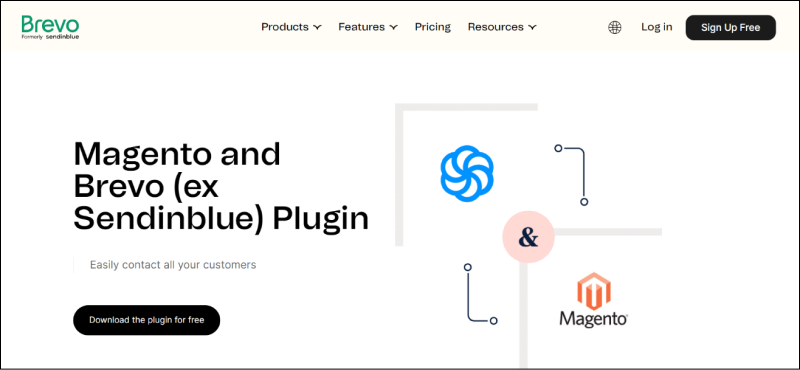
Magento EXAMPLE

Magento is a powerful ecommerce platform. Integrating it with Brevo enables you to automate email marketing campaigns and manage customer data effectively. 

You can segment your audience, send personalized emails, and track the results within both platforms.

Setup process
  • Create a free account or log in to your Brevo account. 
  • Access your Magento website as an administrator. 
  • Within Magento, navigate to the “Plugins” section.
  • Then click on “Add New” and choose the Brevo plugin. 
  • Proceed by adhering to the provided plugin guidelines.

5. NopCommerce
nopCommerce example

An integration between nopCommerce and Brevo involves syncing customer data between the two platforms. This includes customer names, email addresses, purchase history, and other relevant information. 

With the integration, you can use customer data from nopCommerce to create targeted email campaigns in Brevo. 

For example, you can send abandoned cart reminders, order confirmations, product recommendations, and promotional emails to different customer groups.

Setup process
  • Select the “Configure” option. 
  • The window labeled Configure – Brevo will become visible.
  • Create your free Brevo account.
  • Input the API v3 key from your Brevo account on the SMTP and API page.
  • Execute a click on the “Save” option.
  • After completing these steps, your account particulars will become visible.
  • Navigate to the “Contacts” section to harmonize your nopCommerce customers with your Brevo account.

6. WordPress
WordPress example

Brevo offers a plugin for WordPress, allowing you to easily synchronize your WordPress user data and email lists with Brevo. 

This integration enables you to create and send email campaigns directly from your WordPress dashboard and manage your subscribers efficiently.

Setup process
  • Access the WordPress admin panel using administrator credentials. 
  • Navigate to the sidebar and select “Plugins” > “Add New”. 
  • Use the search function to locate the Brevo plugin. 
  • After finding it, press “Install Now” and subsequently “Activate”.
  • Next, in the sidebar, choose “Brevo” > “Home.” 
  • Within the provided field, input your API v3 key. 
  • Click on the “Login” button to proceed.

CRM Integrations

Brevo is a highly useful platform to streamline Customer Relationship Management (CRM) for businesses. With its unique CRM integration capability, it fosters seamless connections between Brevo and various CRM systems. This centralizes and syncs customer data across platforms, ensuring consistent and up-to-date information. 

The CRM integrations facilitate easy import/export of customer data, contact lists, and segmentation information between Brevo and the preferred CRM software, eliminating manual entry and reducing errors. Subsequently, it saves time and effort for marketing and sales teams. 

Further, these integrations empower targeted marketing campaigns based on real-time customer data, tailoring messages for higher engagement. They ensure proper storage of all customer interactions in the CRM system that aids in understanding customer behavior, identifying upsell/cross-sell opportunities, and refining strategies.

1. SugarCRM
SugarCRM example

SugarCRM’s integration with Brevo (via Zapier) provides an all-in-one and efficient way to enhance customer relationship management and marketing efforts. This integration allows for the synchronization of customer data, enabling personalized and targeted marketing campaigns. 

Users can effortlessly transfer contacts, track interactions, and automate marketing workflows, ultimately leading to improved engagement, better customer insights, and more effective marketing strategies.

Setup process
  • Log into Zapier or create a new account.
  • Use the provided link to access the pre-configured zap.
  • Establish a connection between SugarCRM and the pre-configured zap by clicking the “Connect” option. 
  • You’ll need the URL for your SugarCRM connection, as well as your username and password.
  • Choose the specific list that you want to work with.
  • Proceed by clicking “Save + Continue”.
  • Next, log in to Brevo by inputting the API key provided.
  • Select the appropriate list where you intend to add your new contacts within Brevo.
  • In the “Email” section, click on “Insert Fields” and pick out the attribute that corresponds to the email addresses in SugarCRM.
  • Complete the process by clicking “Save + Finish”.

2. Salesforce
Salesforce example

By seamlessly connecting Salesforce, a leading CRM system, with Brevo (via Zapier), businesses can streamline their operations and enhance customer engagement. Such integration enables the effortless synchronization of contact data, allowing for targeted and personalized communication. 

Through this synergy, businesses can effectively nurture leads, automate marketing campaigns, and track customer interactions, leading to improved efficiency and a more cohesive customer experience.

Setup process
  • Create a new account on Zapier or access your existing one.
  • Choose the predefined Brevo integration for Salesforce.
  • Set up a connection between Brevo and Salesforce within the predefined integration.
  • Utilize the provided API key to link your Brevo account.
  • Verify the synchronization by testing the integration.
  • Once validated, authorize and enable the integration to make it operational.

3. Pipedrive
Pipedrive example

Pipedrive’s integration with Brevo (via Zapier) empowers businesses to efficiently manage their sales processes while effectively nurturing leads and engaging customers. By combining Pipedrive’s robust CRM capabilities with Brevo’s advanced marketing features, users can streamline their communication efforts, synchronize contact information, and automate personalized email campaigns. 

This feature enhances sales team productivity, optimizes lead conversion, and fosters stronger customer relationships.

Setup process
  • Login to Zapier or register for a new account.
  • Access the pre-configured zap.
  • Establish a connection with Pipedrive by selecting “Connect” within the opened pre-configured zap.
  • Retrieve your Pipedrive API key.
  • Choose the desired filter, such as “People who were contacted in the last month”.
  • Save your progress by clicking “Save + Continue”.
  • Sign in to Brevo.
  • Pick the list where you intend to include new contacts.
  • Navigate to the “Email” section, and click “Insert Fields” 
  • Pick the attribute that matches the Pipedrive email address.
  • Finalize by clicking “Save + Finish” on the Brevo platform.

4. Zoho CRM
Zoho CRM example

By combining Zoho CRM’s robust customer data management capabilities with Brevo, businesses can effectively target and engage their audience. This integration (via Zapier) enables users to synchronize contact information, track customer interactions, and create personalized email campaigns directly from their CRM platform. 

With features like automated workflows, segmentation, and detailed analytics, the Zoho CRM and Brevo integration empowers businesses to nurture leads, enhance customer communication, and drive better results in their marketing endeavors.

Setup process
  • Login to Zapier or register for a new account.
  • Access the pre-configured zap.
  • Establish a connection with Zoho CRM by clicking the “Connect” option within the pre-configured zap.
  • Select your API key.
  • Proceed by clicking “Save + Continue”.
  • Access Brevo and add the API key provided to log in.
  • Choose the specific list to which you intend to add new contacts.
  • Under the “Email” section, click on “Insert Fields” and opt for the attribute corresponding to the email address in Zoho CRM.
  • Complete the process by clicking “Save + Finish”.

5. Zenkit
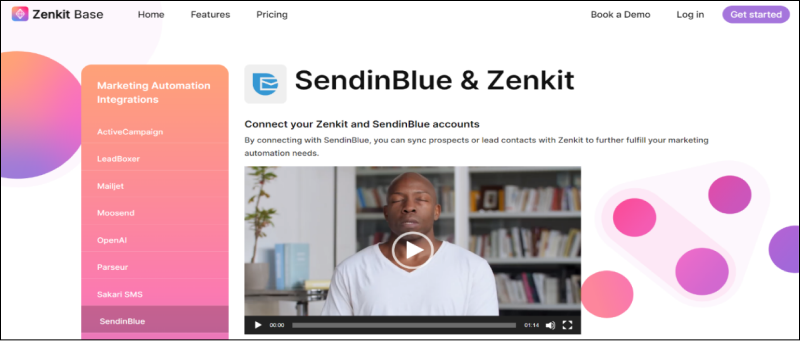
Zenkit example

Zenkit serves as a platform that enables both small and large groups within organizations to undergo digital transformation. Its integration with Brevo (via Zapier) allows the synchronization of potential customers or lead contacts with Zenkit, enhancing the capability to meet requirements related to marketing automation.

Setup process
  • Register for a Zapier account to gain its access.
  • Create a Brevo account.
  • Access Zapier, then navigate to the Zenkit + Brevo zapbook to discover pre-designed zap templates.
  • Alternatively, opt to generate a customized integration between Zenkit and Brevo by picking them when setting up a zap.

6. Microsoft Dynamics CRM
Microsoft Dynamics CRM example

Microsoft Dynamics’ CRM integration with Brevo (via Zapier) facilitates businesses to efficiently manage customer interactions, segment their audience, and execute targeted marketing campaigns. 

This feature further streamlines data synchronization, ensuring that the customer information remains up-to-date across both systems. 

Ultimately, the synergy between Microsoft Dynamics CRM and Brevo empowers companies to nurture leads, foster customer engagement, and drive personalized communication, leading to improved efficiency and customer satisfaction.

Setup process
  • Login to Zapier or register for a new account.
  • Access the ready-made zap.
  • Establish a connection with Microsoft Dynamics CRM by pressing the “Connect” button within the opened pre-configured zap.
  • Choose the domain (web address) associated with this CRM, typically mysite.crm.dynamics.com.
  • Click “Save + Continue”.
  • Sign in to Brevo and input the API key provided.
  • Pick the list where you intend to include new contacts.
  • Within the “Email” section, click “Insert Fields” and opt for the attribute that corresponds to the email address in Microsoft Dynamics CRM.
  • Finalize by clicking “Save + Finish”.

Payment Service Integrations

Brevo, offers seamless payment service integrations, allowing businesses to streamline their customer interactions. 

By incorporating payment gateways into its system, Brevo empowers companies to effortlessly handle transactions, whether it’s for product purchases, service subscriptions, or event registrations. These integrations not only simplify the user experience by centralizing communication and payment processes but also enhance efficiency and reliability. 

With Brevo’s payment service integrations, businesses can create a unified and convenient customer journey, ultimately fostering stronger relationships and driving growth.

1. Stripe
Stripe example

The integration of Brevo with Stripe (via Zapier) provides a powerful solution for businesses looking to streamline their online payment and communication processes. By seamlessly integrating Stripe’s secure and efficient payment processing capabilities with Brevo, businesses can enhance their customer experience.

This integration enables users to effortlessly send payment-related emails, such as order confirmations and receipts, while also leveraging Brevo’s marketing features to nurture customer relationships and drive engagement.

Setup process
  • Access Zapier or sign up for a new account.
  • Open the pre-configured zap.
  • Establish the connection with Stripe by selecting “Connect” within the opened pre-configured zap.
  • Proceed by clicking “Save + Continue”.
  • Login to Brevo by inputting the API key provided.
  • Designate the list where you intend to include new contacts.
  • Navigate to the “Email” section, then select “Insert Fields”.
  • Pick the appropriate attribute associated with the Stripe email address.
  • Finalize the process by clicking “Save + Finish”.

2. PayPal
PayPal example

PayPal’s integration with Brevo (via Zapier) marks a significant step towards enhancing e-commerce and email marketing synergy. This integration enables businesses to automate order confirmations, payment receipts, and personalized follow-up emails, creating a cohesive and efficient communication flow. 

Also, customers benefit from the convenience of using PayPal for transactions while staying engaged with relevant email updates.

Setup process
  • Login or Sign up for a Zapier account.
  • Choose the Brevo automation, preconfigured for PayPal.
  • Connect Brevo and PayPal within the automation.
  • Utilize the supplied API key for accessing your Brevo account.
  • Verify the synchronization of contacts by testing the automation.
  • Authorize and enable to initiate the plugin.

Lead Generation and Form Integrations

Brevo is a versatile email marketing platform renowned for its effective lead generation and seamless form integrations. With its comprehensive suite of tools, businesses can effortlessly capture and nurture leads. 

Brevo’s form integrations empower users to create custom forms and embed them on their websites, landing pages, or email campaigns. These forms act as powerful lead magnets, collecting valuable customer information. 

The platform’s user-friendly interface enables easy customization, allowing businesses to tailor forms to match their brand identity. Moreover, you can trigger Brevo’s automated workflows by form submissions, enabling timely follow-ups and personalized interactions with leads. 

Through these integrated solutions, Brevo streamlines the lead generation process, fostering meaningful customer relationships and driving business growth.

1. Facebook Lead Ads Integration
Facebook Lead Ads Integration example

Brevo’s integration with Facebook lead ads (via Zapier) streamlines lead generation on Facebook. It connects accounts, allowing direct lead collection from Facebook campaigns. This creates engaging capture forms within Facebook, enhancing user experience by reducing friction and increasing form completions. 

The feature also syncs captured data with mailing lists, saving time and minimizing errors. You can use such data for targeted email campaigns. The integration offers analytics, tracking form effectiveness and campaign success. Such insights can help you optimize lead generation strategies and Return on Investment (ROI).

Setup process
  • Login to Zapier or register for a new account.
  • Use the link to access the ready-made zap.
  • Establish a connection with Facebook Leads Ads by clicking the “Connect” option within the provided Zap interface.
  • Pick the desired Facebook page.
  • Proceed by clicking “Save + Continue”.
  • Sign in to Brevo. This requires you to input the API key provided.
  • Choose the list where you intend to include fresh contacts.
  • Within the “Email” section, select “Insert Fields” and opt for the attribute that aligns with the email address in Facebook leads ads.
  • Finalize the process by clicking “Save + Finish”.

2. Gleam
Gleam example

Integrating Gleam with Brevo streamlines the process of adding subscribers from Gleam applications like instant rewards, running competitions, and email capture to Brevo. This allows you to effortlessly categorize these new subscribers into different contact lists.

You can also quickly generate engaging contact forms and pop-ups and seamlessly incorporate them into your website, ensuring that the subscribers are seamlessly included in your chosen Brevo contact list. 

Lastly, the integration allows you to enhance your email list growth by hosting contests on social media platforms.

Setup process
  • Access your Gleam profile. You must possess a Gleam Pro account to connect with Brevo.
  • Navigate to the “Settings” section.
  • Input your API key from Brevo.
  • Upon successful integration, affix the “Subscribe” action to one or multiple Gleam campaigns. 
  • The lists you’ve generated in Brevo will be visible.
  • Effortlessly pick the desired list from Brevo to incorporate participants from the Gleam campaign.

3. OptinMonster
OptinMonster example

OptinMonster seamlessly integrates with Brevo, offering a range of powerful features to enhance your subscriber engagement. With this integration, you can elevate your subscription strategy through sophisticated forms and leveraging A/B testing to optimize its effectiveness. 

The integration enables a seamless process wherein you can effortlessly add all new OptinMonster subscribers to your chosen Brevo contact list, streamlining your workflow and ensuring efficient management of your subscriber base.

Setup process
  • Navigate to the “Campaigns Builder” and access “Integrations”. 
  • Proceed by selecting the option “Add New Integration”. 
  • From the “Email Provider” dropdown, opt for Brevo. 
  • Paste the API key you’ve generated into the designated field.
  • Initiate the connection to Brevo by clicking “Connect to Brevo”.
  • Pick the specific email list where you intend to include new subscribers.
  • Alternatively, return to Brevo to create a new list before moving forward. 
  • Once ready, save your selections.

4. WisePops
WisePops EXAMPLE

Brevo’s integration with WisePops seamlessly synchronizes new leads with your Brevo account in mere seconds, enabling swift utilization of your fresh contacts. 

You can captivate your website visitors, with timely, tailored messages, catalyzing sales growth and elevating revenue. This integration also facilitates precise surveys to fetch insights about your audience’s journey and preferences thereby eradicating conjecture.

Setup process
  • Access your Brevo account by logging in. 
  • Navigate to the “SMTP and API” section in the top-right menu. 
  • Locate and copy the API key labeled “v3”. 
  • Next, log in to your WisePops account. 
  • Either open an existing popup containing a sign-up form or create a new one. 
  • Select your sign-up form within the popup. 
  • On the left-hand menu, go to the “Sync” option and click on the Brevo icon.
  • Paste the previously copied API key into the designated field and click “Submit”. 
  • Within the “List” menu, indicate the specific list you want new subscribers to be added to.

5. Personizely
PERSONIZELY EXAMPLE

You can elevate your marketing strategy and achieve unprecedented success by seamlessly integrating Personizely and Brevo. The integration of these two platforms enables you to expand your email list and supercharge sales. 

You can captivate your audience with precision-timed interactions and compelling messages, igniting a surge in conversions. With this unified approach, revenue growth becomes effortless. 

This integration also provides experimentation and personalization to curate successful user journeys, delivering tailored communications, individualized deals, and optimal content recommendations.

Setup process
  • Navigate to the “Settings” section in your Personalized dashboard.
  • Proceed to the “Integrations” tab.
  • Locate the option for Brevo within the “Integrations” tab and activate it by clicking on the “Connect” button.
  • Access your Brevo account and, from the dashboard, access the dropdown menu.
  • Choose the “SMTP and API” option from the dropdown menu.
  • Copy the code beneath the “API Key” column.
  • Return to Personizely and input this key into the specified field. 
  • Subsequently, click on the “Connect” button.
  • In the “Widgets” tab, designate the specific widget you intend to link with your Brevo list. 
  • Edit the chosen widget by selecting the blue pencil icon.
  • Include an automated action in the process.
  • Opt for “Add Contact”.
  • Save your adjustments by clicking the “OK” button located within the settings window. 
  • Confirm and save the overall changes by using the “Save” option.

6. Poptin
pOPTIN EXAMPLE

Poptin’s intuitive builder allows the creation of engaging pop ups and forms in minutes. Its seamless integration with Brevo automatically syncs new leads with your CRM, streamlining email marketing and customer engagement. 

This integration allows you to gain qualified leads and connect with the right customers through precise targeting. You can also display pop ups at optimal times by detecting visitor browsing behavior, enhancing your sales and conversion rate. 

Overall, sending personalized Brevo emails upon visitor sign-ups via Poptin, fosters lasting first impressions and enables meaningful brand connections.

Setup process
  • Navigate to the “Design” section of your Poptin account.
  • Access the “Email and Integrations” category located in the left-hand menu.
  • Proceed by selecting the “Add Integration” option. 
  • In the ensuing dialog box, perform a search for Brevo, and opt for it. 
  • Log in to your Brevo account. 
  • Retrieve an API key (v3) from the SMTP and API page within your Brevo account. 
  • Identify the “List ID” by going to the “Lists” page, and making a note of the applicable ID. 
  • Insert the copied API key and list ID into the corresponding fields within the integration popup. 
  • Conclude by clicking the “Approve” button.

Helpdesk Integrations

Brevo’s Helpdesk integrations streamline customer support by seamlessly connecting its powerful marketing and communication tools with efficient helpdesk functionalities. 

With such integrations, businesses can consolidate customer inquiries, feedback, and support requests in one centralized platform. This enables customer support teams to efficiently manage and respond to queries while maintaining a cohesive view of customer interactions. 

By merging Brevo with a user-friendly helpdesk interface, businesses can enhance their customer experience, improve response times, and build stronger relationships with their audience. 

1. Intercom
INTERCOM EXAMPLE

The Intercom-Brevo integration (via Zapier) combines crucial customer engagement and marketing automation tools. By linking Intercom’s communication platform with Brevo businesses can enhance customer interactions. 

From lead nurturing to automating follow-ups, the integration streamlines marketing for improved customer experiences. This synergy allows personalized communication and sending relevant emails grounded in Intercom-gathered user data. 

From lead nurturing to automating follow-ups, the integration streamlines marketing for improved customer experiences.

Setup process
  • Login to Zapier or register for a new account.
  • Access the ready-made zap by clicking the link provided.
  • Establish a connection with Intercom by clicking the “Connect” option within the zap you’ve just opened.
  • Include the app ID and Intercom API key from Intercom’s App Settings / API Keys section.
  • Click “Save + Continue”.
  • Sign in to Brevo and input the API key provided.
  • Choose the list where you intend to place new contacts.
  • Navigate to the “Email” section. 
  • Click “Insert Fields,” and pick the attribute corresponding to the email address in Intercom.
  • Finalize the process by clicking “Save + Finish”.

2. Live Help Now

Live Help Now EXAMPLE

Live Help Now is a customer service and live chat platform that seamlessly connects businesses with customers in real-time. Its integration with Brevo enhances customer interactions. 

By combining Live Help Now’s chat with Brevo’s email marketing, automation, and CRM, businesses can craft personalized communication strategies. This integration captures leads from chat and transfers them to Brevo for nurturing through email campaigns. It empowers exceptional customer support and fosters lasting relationships.

Setup process
  • Sign up for a free account on Brevo. 
  • Once you’re logged into Live Help Now, access your application’s settings by clicking “Switch to Admin Panel”. 
  • Navigate to the “My Account” section, and proceed to the “Integrations” tab. 
  • Choose Brevo from the available options. 
  • Input your API key for Brevo and click the “Refresh” button. 
  • Specify the contact list you wish to synchronize on this page. 
  • You have the choice between a live chat room list or a list for messages sent by your contacts when you’re offline.
  • Mark the “Enable Brevo Integration” checkbox. 
  • Click “Save” to confirm the setup.

Email Creation Integrations

Brevo offers seamless and user-friendly email creation integrations that empower businesses to craft compelling email campaigns effortlessly. With its intuitive drag-and-drop editor, designing visually appealing emails becomes a breeze, even for those without extensive design or coding skills. 

The platform provides a wide range of customizable templates to suit various purposes, from promotional offers to newsletters. Users can easily personalize content, add images, and tailor the layout to match their brand identity. 

Brevo’s integrations also allow for responsive design, ensuring emails look stunning on any device. With its powerful segmentation tools, users can target specific audiences, enhancing engagement and conversion rates. 

Overall, email creation integrations of Brevo streamline the process of crafting impactful email campaigns, enabling businesses to effectively communicate and connect with their audience.

1. Google Analytics Integration
Google Analytics Integration EXAMPLE

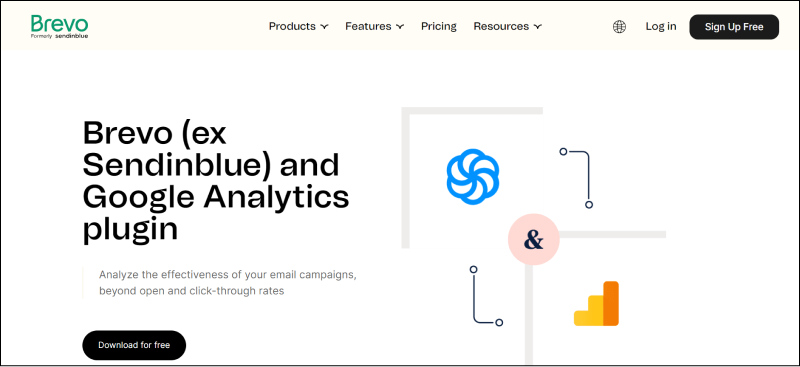
The Brevo-Google analytics integration is essential for businesses seeking deeper insights into email campaigns and website performance. It combines email campaign tracking with website metrics, allowing monitoring of open rates, click-through rates, bounce rates, website traffic, and engagement. You can also create custom tracking parameters and UTM tags for personalized content. 

The integration provides a comprehensive view of marketing efforts, revealing effective traffic sources and customer journey insights. Thus, combining Google analytics’ reporting with Brevo’s automation and segmentation facilitates targeted campaigns for better ROI.

Setup process
  • Access your Brevo account and navigate to the “Settings” section. 
  • From there, go to the “Google and Social Media” tab and opt for the “Setup” option. 
  • Enable the tracking for Google analytics by selecting “Yes”. 
  • After sending out your campaign, head over to your Google analytics account to assess both your website traffic and the outcomes of your campaigns.

2. Stripo
Stripo EXAMPLE

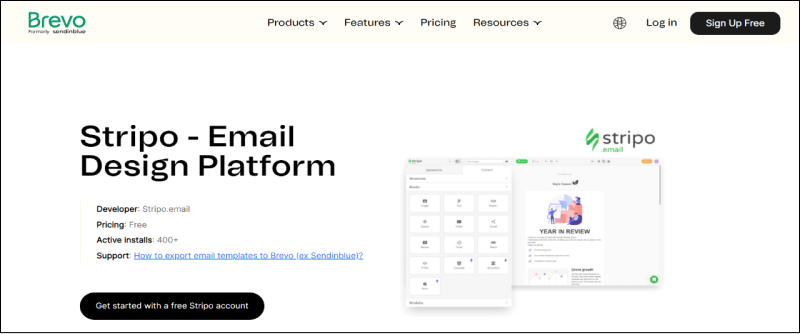
By combining Stripo’s user-friendly template builder with Brevo, users can effortlessly create, design, and send engaging emails. Such collaboration allows direct access to Brevo from the Stripo interface, simplifying template import. 

Marketers also benefit from Stripo’s visual editor and Brevo’s advanced delivery and tracking. This integration merges design flexibility with efficient email campaign management for a comprehensive email marketing experience.

Setup process
  • Sign in to your Stripo email account or create a new one.
  • After designing your template, select “Export” and opt for Brevo.
  • Navigate to your Brevo profile by selecting your name located in the upper right corner.
  • Proceed to the “SMTP and API” section. 
  • Generate a new API key. 
  • Copy and paste the key into the corresponding field within your Stripo account.
  • Locate your email and access the “Campaigns Folder”.

3. Nosto
Nosto EXAMPLE

The integration of Nosto and Brevo empowers businesses with a potent synergy, enhancing email marketing and customer personalization. 

Nosto’s advanced e-commerce personalization together with Brevo enables targeted and personalized campaigns. Their AI-driven algorithms analyze customer behaviors for tailored recommendations and dynamic content in their Brevo emails.

Overall, this integration boosts engagement, conversions, and fosters lasting customer relationships by delivering relevant content.

Setup process
  • Access your Nosto module or visit the Nosto website and log in.
  • Navigate to the “Emails” section, followed by “Email Widgets”.
  • Locate and click the option labeled “Create a New Email Widget”.
  • Choose the specific type of personalization you wish to incorporate into your email or Brevo newsletter.
  • Proceed by clicking the “Next” button.
  • Select Brevo from the provided dropdown menu.
  • Adjust your preferences, such as font size or product name color, as needed.
  • Utilize the “Copy to Clipboard” function and then confirm your changes by clicking “Save”.
  • Modify your Brevo newsletter to insert the Nosto code.
  • Access the “Source Code” option for your text block within the newsletter and insert the Nosto code copied earlier.
  • Complete the process by clicking “OK” to save your campaign.

4. Hyperise
Hyperise EXAMPLE

Hyperise, a potent personalization and dynamic image generation platform, smoothly integrates with Brevo. This fusion empowers marketers to elevate their email campaigns by incorporating personalized images, banners, and content for each recipient.

The synergy of Hyperise and Brevo’s email automation proficiency empowers businesses to craft targeted, visually captivating email campaigns, fostering resonance with audiences and enhancing engagement and conversions.

Setup process
  • Add Brevo as an integration.
  • After successful integration choose Brevo by clicking on it. 
  • Copy the “Image Code” provided. 
  • This copied image link will encompass all the necessary Brevo tags for email personalization.
  • In Brevo’s interface, generate a fresh email template using the “Drag and Drop” editor. 
  • Insert an “Image Design Element”.
  • Select “From” and insert the image link you copied in the initial step.

5. NiftyImages
NiftyImages EMAIL EXAMPLE

NiftyImages’ integration with Brevo adds dynamism to email campaigns.

By merging the visual prowess of NiftyImages with Brevo’s email platform, businesses can craft tailored emails with personalized images, timers, social feeds, and updates. Such personalization boosts engagement and conversions. 

Marketers can also use NiftyImages’ interface for captivating content, while Brevo ensures timely delivery. This synergy transforms emails into interactive experiences, fostering brand-subscriber connections.

Setup process
  • Upload the image you want to use.
  • Insert the desired text and make any necessary adjustments.
  • Include a contact detail to personalize the image. 
  • To utilize a Brevo contact detail, simply input the exact attribute name within curly braces, like this: {FIRSTNAME}.
  • Export the image using an image tag. 
  • Copy and paste it into the Brevo newsletter editor. 
  • Once copied, you will see a link. 
  • Copy this link.
  • Proceed to your email campaign and paste the code provided by NiftyImages.

6. AcyMailing
AcyMailing Example

The AcyMailing-Brevo integration combines the powerful features of these two industry-leading platforms for seamless email marketing. 

The synced subscriber lists enable personalized communication, while AcyMailing’s interface offers access to Brevo’s advanced tools, optimizing strategies for enhanced engagement. 

This integration is an invaluable asset for any organization’s digital marketing efforts.

Setup process
  • Create a Brevo account and generate your login credentials. 
  • Access your WordPress site, navigate to the “Plugins” section, and choose “Add New”. 
  • Search for AcyMailing, download, and install it. 
  • Open the AcyMailing configuration and locate the “Mail Settings” tab. 
  • Proceed to the section related to mail settings.
  • Opt for Brevo as your sending method. 
  • Input your API key and finalize the setup process.

7. Developer Tool Integrations

Brevo offers seamless integration with a variety of developer tools to enhance its functionality and flexibility. 

Through its robust API and integrations, Brevo allows developers to effortlessly connect and synchronize their preferred tools and applications, streamlining workflows and enabling efficient data exchange. This integration capability empowers developers to automate email campaigns, manage contacts, and track performance metrics, all while maintaining a consistent and personalized user experience. 

By enabling easy integration with popular developer tools, Brevo ensures that businesses can optimize their marketing efforts and engage with their audiences effectively.

8. Zapier
Zapier example

Brevo’s Zapier integration streamlines workflows, automating tasks and ensuring data consistency by linking web applications without coding. 

Users can easily connect email marketing to various tools like CRMs and e-commerce platforms through automation workflows called “Zaps”. These zaps allow trigger events in one app to prompt actions in another, such as adding new subscribers from Brevo to Google Sheets.

This user-friendly interface is accessible to everyone, regardless of coding skills, enhancing marketing, saving time, and reducing errors.

Setup process
  • Create a Zapier account or log in to your existing one.
  • Log in to your Brevo account to access your API v3 key.
  • Open Zapier and locate the “+ Create Zap” option.
  • Inside the “Trigger Block”, input the details or make the appropriate selection for Brevo.
  • In the “App and Event Section”, opt for Brevo.
  • Proceed by clicking “Continue”.
  • Paste your Brevo API key into the designated field within the “Account Section”.
  • Elaborate on the trigger details within the “Trigger Section” to initiate the zap.
  • Navigate to the “Test Trigger” section and select it. 
  • Zapier will make an attempt to locate recent Brevo data for zap use.
  • After successful data verification, click “Continue” to configure the action.
  • Within the “Action Block”, choose Brevo.
  • In the “App and Event Section”, decide on the action you wish to carry out using the zap.
  • Paste your Brevo API key into the field within the “Account Section”.
  • Offer additional information related to the intended action within the “Action Section”.
  • Proceed to the “Test Action” section and select it.
  • Once everything is in order, click “Publish Zap.”
  • Confirm by clicking “Publish and Turn On.”

9. Powerling
powerling example

Powerling’s integration with Brevo offers a seamless solution to enhance global email marketing. 

By using Powerling’s advanced language services within Brevo, users can effortlessly manage multilingual campaigns, ensuring effective communication with diverse audiences worldwide. 

This integration also allows for maintainings content tone, context, and cultural nuances, resulting in more engaging and personalized communications.

Setup process
  • Log in to your Brevo account.
  • Navigate to the integration or API section.
  • Find the option to add a new integration or API connection.
  • Select or input “Powerling” as the integration you want to set up.
  • Input the API key or access token you obtained from Powerling.
  • Follow the on-screen instructions to complete the integration.

Contact Management Integrations

Brevo’s contact management integrations offer a seamless and efficient solution for businesses seeking to streamline their communication strategies. With these integrations, users can effortlessly organize and maintain their contact lists, ensuring effective management of their valuable connections.

These integrations also facilitate easy data synchronization, enabling businesses to stay up-to-date with their contacts’ information and engagement preferences. 

By providing a comprehensive suite of tools for contact management, Brevo enhances efficiency, fosters stronger relationships, and ultimately drives better results in the realm of email marketing and customer engagement.

1. Bouncer
bouncer example

By combining Bouncer’s advanced email verification with Brevo, the integration ensures a clean, accurate, and up-to-date email list. 

Bouncer’s real-time verification eliminates invalid addresses, reducing bounce rates and enhancing deliverability. This integration empowers marketers to maintain sender reputation, improve engagement, and achieve better results through Brevo’s interface. 

From newsletters to transactional emails, Bouncer adds reliability and effectiveness to email marketing.

Setup process
  • Sign up for accounts on both Brevo and Bouncer.
  • Log in to Brevo and navigate to the “API and Forms” section to generate an API key.
  • Log in to your Bouncer account.
  • Enter your Brevo API key in the appropriate field within the Bouncer interface.
  • Choose the email list you want to clean and verify using Bouncer’s services.
  • After verification, Bouncer will indicate which email addresses are invalid, risky, or safe.
  • Update your Brevo contact list accordingly.

2. Lytics

lytics example

By seamlessly connecting Lytics’ customer data platform with Brevo, businesses can create highly personalized and targeted campaigns. 

This integration enables the utilization of rich customer insights and behavioral data from Lytics to segment audiences effectively and deliver relevant content through Brevo’s communication channels. 

The result is a more tailored and engaging marketing strategy that enhances customer relationships and drives better results.

Setup process
  • Access your Lytics account by logging in. 
  • Navigate to the “Data Menu” tab and choose “Integrations” from the submenu. 
  • Scroll through the options and locate the Brevo tile. 
  • Initiate the process by clicking “Add Account”.
  • Input your API key and provide a brief description.
  • With your account now authorized, you can proceed to import or export users. 
  • To export users, click the “Export Users” button. 
  • Choose the desired Brevo list for export and the corresponding Lytics audience segment for synchronization. 
  • Initiate the export by clicking the “Start Export” button.
  • For importing users and activity, select the specific Brevo list(s) you intend to import.
  • Click the “Import Users” button. 
  • Activate the import process by clicking the “Start Import” button.

Automation Platform Integrations

The automation platform integrations offered by Brevo allow businesses to streamline their processes, automate email campaigns, nurture leads, and engage with customers more effectively. 

Such integrations empower users to create personalized workflows, segment their audience, and trigger targeted messages based on user behavior and preferences. 

1. Make
make example

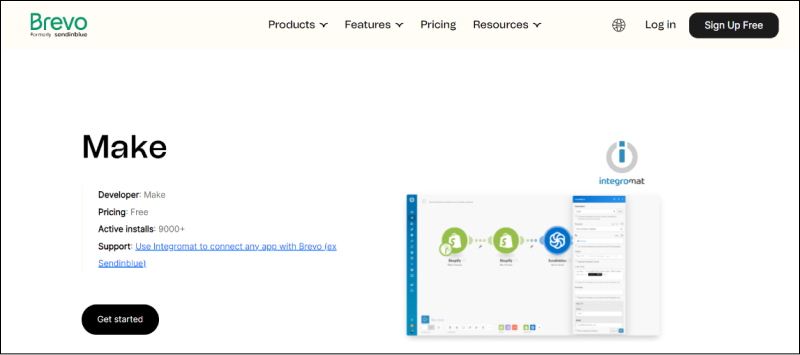
Brevo’s “Make” integration feature streamlines connecting and synchronizing third-party apps with its platform. 

It effortlessly integrates email marketing, SMS campaigns, and automation with CRM, e-commerce, and more. This enhances workflow efficiency, maintaining a unified marketing approach.

Whether linking CRM, e-commerce, or other software, the Brevo-Make integration empowers targeted campaigns through simplified cross-platform functionality.

Setup process
  • Sign up or login to your Make account.
  • Build your initial scenario by selecting the “+” symbol and opting for Brevo. 
  • Navigate to your Brevo profile. 
  • Proceed to the “SMTP and API” section. 
  • Generate a fresh API key. 
  • Copy and paste it into the corresponding field within your Make-Brevo’s scenario. 
  • Employ an existing scenario or develop one according to your preferences.

Benefits of Integrating Sendinblue (Brevo) With Other Tools

Seamless Data Synchronization 

Integrating Brevo with other tools, such as CRM systems or e-commerce platforms, allows for smooth data synchronization. You can automatically update contact information, customer interactions, and purchase history across systems, ensuring you have the most up-to-date and accurate data available.

Enhanced Automation 

By integrating Brevo with different marketing automation tools, you can create more sophisticated and powerful automated workflows. This can save time, increase personalization, and improve customer engagement by delivering targeted messages based on specific actions or triggers.

Expanded Reach 

Brevo’s integration with various communication channels like social media platforms or advertising tools allows you to extend your marketing reach. You can engage with your audience on multiple platforms simultaneously, ensuring a consistent message across channels.

Improved Customer Segmentation 

Integrating Brevo with tools that provide advanced customer segmentation capabilities enables you to create highly targeted and relevant marketing campaigns. This can lead to better engagement and conversion rates as you reach the right audience with the right message.

Streamlined Workflow

When Brevo integrates with other tools, it helps streamline your marketing workflow. You can manage multiple aspects of your marketing strategy from a single platform, reducing the need to switch between different tools and saving time.

Enhanced Reporting and Analytics 

Integrating Brevo with analytics and reporting tools can provide deeper insights into the performance of your marketing campaigns. You can track key metrics, measure ROI, and identify areas for improvement more effectively.

Personalization and Customization 

Brevo’s integration with tools that offer customer data enrichment or personalization capabilities allows you to tailor your marketing messages to individual preferences, increasing the chances of engagement and conversions.

Reduced Manual Efforts

Automation through integrations can significantly reduce manual tasks like data entry and campaign execution. It frees your marketing team to focus on strategy and creativity rather than repetitive tasks.

Cross-Channel Marketing 

Integrating Brevo with various communication channels enables you to execute cross-channel marketing campaigns. For example, you can coordinate email marketing with SMS or social media efforts, creating a cohesive and impactful marketing strategy.

Better Customer Experience 

By integrating Brevo with customer support tools, you can provide a better customer experience. These integrations allow you to respond promptly to customer inquiries and engage with customers based on their preferences and behavior.

Wrapping Up

Brevo’s robust integration capabilities empower businesses with a seamless and versatile platform for optimizing their marketing and communication efforts. By effortlessly connecting with a wide array of third-party applications and services, Brevo enables users to streamline their workflows, enhance customer engagement, and drive overall efficiency. Whether it’s CRM systems, e-commerce platforms, or other essential tools, Brevo’s commitment to integrations underscores its obligation of providing a comprehensive solution that caters to the evolving needs of modern businesses.

 With the power of these integrations at your fingertips, you can truly unlock the full potential of your marketing strategies and achieve lasting success.

It can be frustrating to notice a sudden (or even gradual) uptick in the number of Klaviyo emails going to spam, especially if you have a history of healthy deliverability and engagement rates with your audience.

You may be wondering if Klaviyo (or whatever email marketing platform you use) is somehow causing this uptick. But the truth is, Klaviyo is only responsible for sending the emails you construct. If those emails get marked as SPAM, it’s because your subscribers’ email clients are marking them as such due to their own complex algorithms.

Email clients (like Gmail, Yahoo, Outlook, etc.) use complex algorithms to determine which emails to flag and which to allow into a user’s inbox. Since these email clients don’t share information about these algorithms, the only sure way to decrease SPAM rates is to understand the three key deliverability factors that govern whether your emails make it to subscribers’ inboxes and optimize your emails to meet them.

In this article, we’ll break down the three key deliverability factors as well as the specific tactics we use to ensure our clients’ emails avoid SPAM filters. After reading this article, you’ll have everything you need to maximize the deliverability of your Klaviyo emails.

InboxArmy is an email marketing agency that helps clients develop and execute profit-driven email marketing strategies. We’re a Klaviyo email marketing agency with a team of experts on Klaviyo as well as 40+ ESPs. To learn more about how we can help increase your deliverability rates, schedule a free consultation.

The 3 Key Deliverability Factors You Need to Avoid SPAM Filters

The key to avoiding SPAM filters can be summed up in just two words: trust and quality.

Email clients are trying to protect their users from fraudulent emails (i.e., scams) and emails that they don’t enjoy. To avoid SPAM filters and maximize deliverability, you need to send signals that tell email clients that your emails can be trusted and users will enjoy them.

To accomplish this, you need to optimize these three key areas:

  • Domain reputation
  • Email authentication
  • Sender reputation

While email authentication and domain reputation are simpler fixes, optimizing your sender reputation is a more involved process and requires its own section. We’ll start by breaking down each of the three areas, then follow with a section sharing 16 tactics we use to optimize our clients’ sender reputations.

1.) Build a Positive Dedicated Domain Reputation

When sending emails, you can either use a shared or dedicated sending domain.

Shared sending domains are hosted on an IP address that’s shared with other users, such as Klaviyo.com. When using Klaviyo’s shared domain, your sender information will end with the phrase “via Klaviyo.com”.

If you’re using a brand new domain or have no email sending history/reputation, it may be a good idea to use a shared domain at first. Email clients are less likely to trust emails coming from a brand new domain with little/no sending history.

But be careful which shared domain you use. A shared domain’s reputation is impacted by all the people using it. So if other users are engaging in poor or fraudulent email practices, it can hurt your email deliverability rates (though Klaviyo works to ensure users are engaging in positive sending practices, so their shared domain maintains a positive reputation).

It’s best to set up your own dedicated domain so you can:

  • Use your brand’s domain name in your emails
  • Cultivate your own positive sending reputation
  • Avoid any negative impacts from other senders 

Once you’ve set up you’re own dedicated domain, build a positive domain reputation by ensuring your emails are aligned with your domain, using email authentication protocols, and utilizing the tactics we describe in the next section to optimize your sending reputation.

Resources: To learn how to set up a dedicated sending domain in Klaviyo, use their guide.  

2.) Use Email Authentication Protocols and Domain Alignment

In order to protect you and your subscribers from email fraud, email clients use email authentication protocols — such as DKIM (Domain Keys Identified Mail), SPF (Sender Policy Framework), and DMARC (Domain-Based Message Authentication, Reporting, and Conformance).

These authentication protocols ensure that incoming emails are actually coming from a brand’s domain, and aren’t being spoofed or tampered with by malicious 3rd-party actors. 

If your emails aren’t properly authenticated, then email clients are more likely to reject them or send them to SPAM boxes. Email clients also want to see that your sender email address is aligned with your dedicated domain.

To pass this test, you must:

  1. Set up a DMARC policy on your domain.
  2. Connect your dedicated sending domain to your account
  3. Ensure that your root domain of your dedicated sending domain matches the root domain in your sender email address. For example, if your website is business.com (and it has a DMARC policy), your sender address should be something like sender@business.com and your dedicated sending domain should be something like example.business.com.

Use Email Authentication Protocols and Domain Alignment

3.) Sender Reputation

The two factors above are purely about sending trust signals to email clients. But building a positive sender reputation tells email clients that your emails are both trustworthy and enjoyable – which makes optimizing your sender reputation the most important element of avoiding SPAM filters.

Email clients use algorithms that evaluate your reputation as a sender. As stated earlier, they don’t reveal all of the criteria that these algorithms use.

But ultimately, they’re trying to determine how much your current subscribers are enjoying the emails you send so they can ultimately determine how much their users will enjoy your emails.

The path to building a good sender reputation can be summed up simply: send great emails to your subscribers.

More specifically, you want to optimize the following key metrics:

  1. Engagement
  2. Bounce rates
  3. Spam complaints
  4. Unsubscribe rates

In the next section, we’ll break down the specific tactics we use to optimize each.

How to Optimize Your Sender Reputation

By optimizing your email campaigns and strategy according to the four metrics listed above, you will send signals to email clients that their users will open, engage with, and enjoy your emails — which will improve email delivery for Klaviyo or any other ESP (email service provider) you use.

While it’s important to understand these key metrics and how to optimize them, focusing on these metrics isn’t a very effective way to go about improving your sender reputation and deliverability. Especially since some of the tactics we’re about to discuss improve multiple metrics.

The process of improving your sender reputation is easier to understand and apply when broken down into the following objectives:

  • Getting to the inbox
  • Getting your emails opened
  • Increasing email engagement

In this section, we’ll share the 16 tactics and best practices we use to accomplish all three objectives and cultivate positive sender reputations for our clients.

Getting to The Inbox

The first step to increasing email deliverability is to understand the key factors email clients use to spot SPAM so you can remove/reduce them in your emails and sender reputation.

In short, this means:

  • Reducing/avoiding SPAM complaints
  • Reducing/avoiding unsubscribes
  • Reducing bounce rates
  • Eliminating SPAM triggers from your emails

To determine whether to mark your emails as SPAM, email clients evaluate the emails you send and your history as a sender. They look for content in your emails that looks spammy. And they check your history as a sender to see how many SPAM complaints, unsubscribes, and bounces you have.

You can apply the following tactics to eliminate these issues.

Reducing SPAM Complaints, Unsubscribes, & Bounces

Lots of SPAM complaints and unsubscribes indicate to email clients that people aren’t enjoying the emails you send and increase the odds that your emails end up in SPAM folders. Luckily, there are some easy steps you can take to reduce both.

Add unsubscribe links

Ultimately, you want to reduce both SPAM complaints and unsubscribes. But SPAM complaints have a much stronger negative impact on your sender reputation.

So, while it may seem counter-intuitive, you should make it easy for subscribers to unsubscribe from your email list. If someone wants to unsubscribe but can’t easily figure out how, they’re much more likely to mark your emails as SPAM.

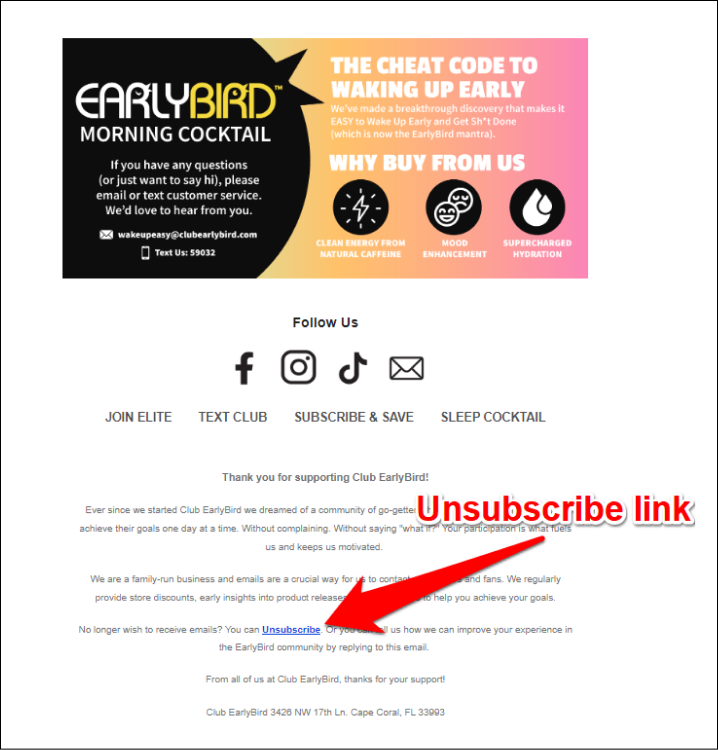
Make it easy for people to unsubscribe by adding an unsubscribe link to the bottom of your email. And make sure the unsubscribe link is clear and easy to find.

Add unsubscribe links to klaviyo spam emails

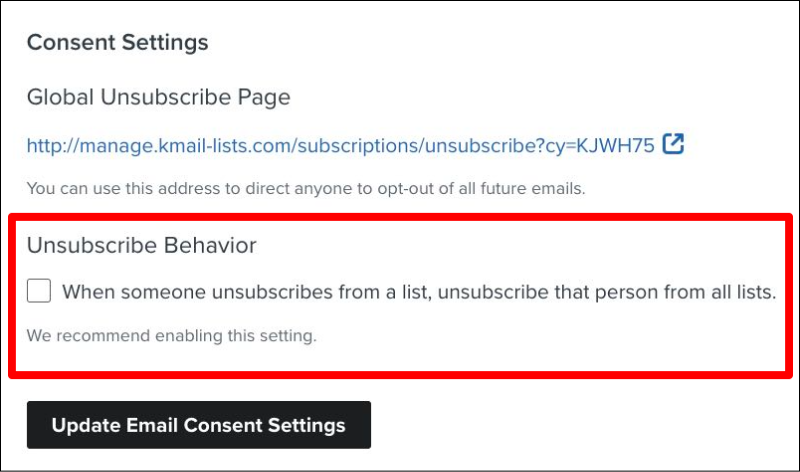
You should also enable “global unsubscribes” in Klaviyo if you have multiple email lists. With “global unsubscribes” enabled, anyone who unsubscribes from one list will be unsubscribed from all.

To enable global unsubscribes in Klaviyo, go to your Email Consent settings and check the box for global unsubscribes.

Unsubscribe behaviour

Enable double opt-in

With a double opt-in, new subscribers will receive an email asking them to confirm that they’d like to subscribe to your email list.

Using a double opt-in has multiple advantages, including:

  • Double opt-ins reduce your bounce rate by automatically filtering out fake email addresses
  • Double opt-ins ensure new subscribers are serious about joining your email list (and are more likely to engage with your emails)
  • Double opt-ins enable you to preempt SPAM designations. In some cases, email clients will automatically send your first email to a new subscriber’s SPAM box. When you set up a double opt-in, you can tell new subscribers to check their SPAM box for your email and mark you as a trusted sender.
  • Double opt-ins prompt immediate engagement. By having new subscribers open your first email and click the confirmation button, you can initiate engagement right away and improve the metrics associated with your sender reputation.

So create a double opt-in automation that tells new subscribers to check their SPAM folder for your first email, mark you as a trusted sender, and click the confirmation link.

To enable double opt-ins in Klaviyo, go to your Consent Settings and click the double opt-in box.

Enable double opt-in in klaviyo email spam

Create responsive emails

Subscribers should be able to view your emails on any device they choose to use. Many people choose to view their emails on mobile devices. If these subscribers can’t see your email because the content won’t load or isn’t optimized for mobile devices, then they’re more likely to unsubscribe — which negatively impacts your deliverability.

Make sure your emails are mobile responsive so subscribers can view them on any device.

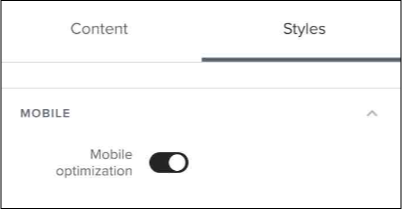
Klaviyo allows you to easily optimize your emails for mobile devices. To enable mobile optimization, navigate to your email template’s Style tab and toggle on mobile optimization.

Create responsive emails

Klaviyo also gives you control over how your email is adjusted for mobile devices. You can adjust content margins, text and heading size, text and heading spacing, and block padding.

By default, Klaviyo will stack all content blocks when rendering your email on mobile devices. But you can change this to suit your needs. You can also choose to hide any content block when an email renders on desktop, mobile, or both.

Clean your lists

Clean your email lists by removing:

  • Emails that bounce
  • Unengaged subscribers (people who rarely/never open or engage with your emails)

If your emails regularly bounce for a specific email address, it’s a good indication that the email is fake. While there may be more benign reasons an email bounced (such as the person’s inbox being full), a high bounce rate will harm your sender reputation.

Emails that bounce too often should be purged from your lists. Klaviyo will automatically suppress any email that hard bounces and exclude them from future emails. It does the same for any emails that soft bounce more than 7 times in a row.

But since bounces are harmful to your deliverability, you should create an automation that suppresses soft bounces earlier. We suggest creating a Klaviyo segment that targets anyone who has soft-bounced four times

Similarly, you should remove unengaged subscribers. Unengaged subscribers may eventually mark you as SPAM or unsubscribe from your list. 

Even if they don’t, email clients evaluate your engagement rate among your subscriber list. If a large number of subscribers aren’t engaging, your sender reputation will take a hit. Rather than trying to build a large list of subscribers, your goal as a sender should be to create a large list of engaged subscribers.

For unengaged subscribers, you should create a sunset automation that aims to re-engage them before automatically purging them from your lists.

Create a Sunset Automation

A sunset automation is a series of emails designed to re-engage inactive subscribers before they’re automatically removed from your lists.

Klaviyo enables users to create automated sunset flows for unengaged subscribers based on their behavior over the past 30, 60, 90, 120, and 180 days.  For example, you can create a sunset flow aimed at people who haven’t opened an email in the last 60 days.

The timeframe for triggering a sunset automation will depend on your business and how frequently you send emails. If you send daily emails, then 2-3 months of inactivity is a good timeframe.

Your sunset flow should contain just 1-3 emails — any more risks triggering an unsubscribe and hurting deliverability. These emails should attempt to re-engage subscribers by:

  • Telling them that you noticed they haven’t been engaging with your emails and are attempting to bring them back
  • Asking them why they haven’t engaged with your emails and if there’s anything you can do to bring them back
  • Giving them a special incentive to win their business back, like a discount on their next purchase
  • Letting them know that you will remove them from your list if they don’t respond in a given timeframe, and including a CTA that they can click to stay on your list

To create a sunset flow in Klaviyo, you’ll need to create a segment for each email. For example, your first segment triggers an email to be sent after 60 days of inactivity. Then your second second triggers an email after 90 days, and so forth.

Eliminating SPAM Triggers

There are a few commonalities among SPAM emails that email clients look for when assessing your emails. By removing these, you can significantly increase the odds that your emails end up in the inbox.

Avoid spammy subject lines

It’s tempting to use spammy subject lines to get your subscribers’ attention, but they should be avoided. Not only do they trigger SPAM filters, but 69% of recipients are likely to report an email as SPAM based on the subject line alone.

Use the following tips to avoid creating spammy subject lines:

  • Never use all caps
  • Avoid using excessive exclamation points
  • As often as possible, avoid these SPAM trigger words
  • Make your subject lines consistent with the content of your emails
  • Keep your subject lines at or below 50 characters
Use at least 500 characters

Image-heavy emails may trigger SPAM filters, as spammers often use images to avoid using SPAM trigger words. Make sure your emails contain a proper balance of images and text.

Email on Acid performed a study testing if the text to image ratio of an email affected deliverability. They found that all of the emails they tested that contained 500+ characters successfully avoided SPAM filters.

So make sure your emails contain at least 500 characters.

Don’t add too many URLs

SPAM emails often contain a large number of links. Large amounts of hyperlinked text will trigger SPAM filters.

Don’t include too many links in your emails, and ensure the ones that you do use are well-placed.

Avoid unnecessary code

If you’re manually coding HTML emails, ensure that your code is clean. Unnecessary coding (e.g., extra tags) and coding errors can often trigger SPAM filters.

If you use certain word processors and tools like Microsoft Word to write your code, be careful when copying it over to Klaviyo, as it can often include extra styling. But Klaviyo’s drag-and-drop template editor uses clean code and shouldn’t create this issue.

Getting Your Emails Opened

Now that you made it to a subscriber’s inbox, your next objective is to get your emails opened.

Getting subscribers to regularly open your emails depends largely on your content and the relationship you build with them. If you regularly send emails they enjoy, then they’re more likely to open future emails.

Beyond that, you subject lines and preview text are your second greatest tool for increasing opens. 

Optimize subject lines and preview text

No matter how good your emails are, your subscribers won’t engage if they never open them. Your ability to encourage opens depends almost entirely on how good your subject lines and preview text are.

Invest some time into these areas. For each email, create 5-10 versions of subject lines and preview text. Then pick the best ones.

The same copywriting tactics that work with email copy and landing pages work with subject lines and preview text. We’ve compiled a list of such tactics you can apply immediately. Over time, you’ll get a feel for which work best with your audience.

Informational

The simplest path is to simply tell recipients what the email is about. Share a short fact about the contents of your email. The more intriguing the fact, the more opens you’ll get.

Curiosity

Curiosity is a powerful tactic because humans feel compelled to answer open questions. Use your subject lines and preview text to provide some information about your email, but not all.

Think of it like comedy. Your subject line and preview text are the set up. To get the punch line, recipients will have to open the email. The more intriguing the set up, the more people will feel compelled to get the punch line.

Urgency

Compel your subscribers to take action now by creating a sense of urgency. The easiest way to create urgency is to give them something they want, but only for a limited time.

Exclusivity

Exclusivity is another tactic for creating urgency. But rather than using a time limit, you’re applying the concept of scarcity.

Humans like rare things. Rare things are more valuable. And possessing something rare is a sign of status.

If your email contains an exclusive offer, be sure to let subscribers know in the subject line and preview text.

Fun

Most emails are boring. Making your emails fun helps them stand out from other emails, boosts engagement, and helps build a strong relationship between you and your audience over time.

Make your subject lines and preview text fun by incorporating playfulness and humor.

Increasing Email Engagement

Engagement is a measure of how often your subscribers interact with your emails (i.e., open your emails and click on email elements), and it may be the most crucial metric of all to optimize.

Engagement is the most direct measure of how much your subscribers enjoy your emails, making it the most direct way for email clients to evaluate the quality of your emails.

While there are many ways to boost engagement, the eight tactics below will have the greatest impact.

Enable subscribers to control their email preferences

If subscribers receive too many emails or emails that they don’t want, they’re less likely to engage with your emails and more likely to mark them as SPAM — which will harm your email deliverability.

One of the best tactics for preventing this is to give subscribers the ability to choose their own email preferences when they sign up.

Your opt-in form should include preference settings, such as:

  • Email Lists: If you have multiple email lists, let subscribers choose which they want to sign up for.
  • Email Frequency: Let subscribers control how often receive emails from you (i.e., daily, weekly, monthly, etc.)
  • Other Email Preferences: If there are any other criteria subscribers can use to personalize their emails, give them the option. For example, if you’re an eCommerce business, you can give subscribers the choice to only receive emails about certain products or categories.

You can create property options in your Klaviyo sign-up forms that allow subscribers to select their preferences.

Be sure to include a link to their subscription management page in your emails so they can adjust their settings when they want.

Segment your lists

In addition to allowing subscribers to segment themselves when they sign-up, you should segment your subscribers into separate lists in order to personalize the content you send them.

Personalizing your content through segmentation can help increase open rates, click rates, conversions, and ROI. It can also potentially decrease email marketing costs by reducing the number of emails you send — i.e., rather than sending every email to every subscriber, you send personalized emails to specific groups.

How you segment your lists will depend upon your business and subscribers. But here are a few strategies you can use:

Demographics:

If there’s any demographic criteria that you can use to segment your audience and increase engagement, you should apply it. For example, if you sell clothing for men and women, you can separate your lists by gender.

Purchase/Website Behavior:

You can combine website analytics with email marketing campaigns to segment lists and personalize emails. Subscribers that buy or click on certain products can be placed in specific lists and receive emails containing content they’re more likely to be interested in.

Engagement Behavior and Frequency:

One of the best ways to avoid SPAM complaints that hurt your deliverability is to segment subscribers by engagement. Separating by engagement enables you to send fewer emails to people who don’t engage with your emails often and send more emails to people that do. 

With Klaviyo, you can create email segments based on:

  • Which email lists they’re on
  • Which actions they’ve performed (i.e., open or click on an email)
  • How many times they performed that action
  • How recently that action was performed (i.e., in the last 30 days)

For example, you can create a segment for Newsletter subscribers who clicked on an email at least 3 times in the last 30 days. These subscribers are more engaged, and likely won’t mind receiving emails more frequently.

But subscribers who haven’t opened or clicked on emails in that last 30 days should probably receive emails less frequently to avoid unsubscribes and SPAM complaints.

Survey your subscribers

Surveys are one of the best email marketing tactics for understanding what your audience wants. Surveys can reveal lots of information you can use to optimize your emails, boost engagement, and grow your sender reputation. And you can use survey results to segment and personalize your email content.

Some areas you can optimize include:

  • Frequency: Ask subscribers how frequently they want to receive emails from you.
  • Timing: Ask subscribers what time of day they prefer to send emails.
  • Content: Ask subscribers what kind of content they enjoy receiving most.
  • Products: Ask subscribers what kind of products they like so you can promote products that align with their interests.

When optimizing your emails, you should always focus on your most engaged subscribers. They’re more likely to respond to surveys. And since you’ll never be able to please everybody, you should focus on the people who engage with your brand the most.

You can use a tool like Typeform to create surveys and send them to your customers. Their responses will be integrated with their profile in Klaviyo as custom properties. You can then create segments that target people with these custom properties with specific emails.

For example, if you’re an eCommerce store that sells shoes, you can create a survey asking subscribers what their favorite type of shoes are. Then create a segment so you can target people with shoes that match their preferences.

Personalize email content

The more relevant your emails are, the more subscribers will engage with them.

We’ve already discussed a few tactics you can use to personalize your emails, such as segmenting subscribers into targeted lists, surveying subscribers to learn what they want, and letting subscribers choose email preferences.

But you can take things a step further by applying the following tactics:

Personalization tags: Personalization tags enable you to create email content that will display different for each recipient. For example, you can use personalization tags to ensure your emails use the recipient’s name in the subject line and at the beginning of an email. Doing so can have a positive impact on open rates and click rates.

Dynamic content: Dynamic content is email content that changes for each subscriber. You can create dynamic content blocks that display products that are unique to each subscriber or segmented list. For example, you can create dynamic content blocks that display products based off a recipient’s purchase history or demographic info.

Create effective CTAs

Compelling CTAs will generate more clicks and help you improve your sender reputation.

Compelling CTAs:

  • Can be easily spotted: Make sure your CTAs are positioned prominently and large enough that recipient’s will see them easily.
  • Stand out: Make your CTAs stand out by creating CTA buttons (rather than hyperlinked text) that pop. Your CTAs should also use colors that contrast from the rest of the email.

Your CTA text should also be optimized for clicks. Use short, direct phrases such as “Buy Now”, “Shop Now”, “Add To Cart”, or “Yes, I Want One”. You can also make them more powerful by including an incentive, such as “Buy For 20% Off”.

Solicit responses

Responding to an email is a strong form of engagement, one that let’s email clients know that subscriber like your brand and the emails you send.

While this tip may not apply to all, you should include content that solicits a response from your subscribers by:

  • Asking for their feedback or opinions on products they purchased
  • Ask the for their input on a new product or initiative
  • Ask them what they enjoy/want more of from your emails
  • Include an incentive for responses, such as a discount or free product

By occasionally creating emails that solicit responses, you can boost your engagement and sender reputation in a very positive way.

Avoid Klaviyo Emails Going To Spam

By applying the tips above, you can enhance your sender reputation, reduce the number of klaviyo emails going to spam folders, and improve the results of your email marketing strategy. 

If you want help improving your Klaviyo email deliverability, Inbox Army provides a team of email marketing experts (including Klaviyo Certified Experts) that can:

  • Identify deliverability issues and determine their cause
  • Create a clear, prioritized list of recommendations to improve deliverability
  • Support your implementation of deliverability improvement recommendations.

To learn more about how Inbox Army can help you improve email deliverability and the other email marketing services we provide, schedule a free consultation.

With over 100+ expertly crafted pre-built Klaviyo email templates, Klaviyo is one of the most prominent email marketing platforms. While they are perfect for novice email marketers, experienced professionals might find these templates restrict their creativity. 

In such cases, brands can create custom email templates using HTML and CSS codes. These templates are built from scratch and perfectly align with the brand’s guidelines and design philosophy. 

We have compiled a list of custom HTML templates that we created for our clients. These designs cover holiday campaigns, nurturing, promotional, seasonal, brand building, and customer appreciation emails. 

Let’s have a closer look at these designs. 

SixThreeZero’s Carefully Crafted Email Campaigns 

Father’s Day Discount Promotion 

Father’s Day Discount Promotion 

SixThreeZero designs a well-rounded email for their Father’s Day campaign. To begin with, the email is concise and straightforward. They do not beat around the bush with their value proposition for the special day. The hero image shows a dad riding a bicycle, which aligns with their current promotion. 

SixThreeZero offers two discount codes for two different product lines. To make things easier, they have displayed the product photos under the email fold. The best part about the email is that all the CTA buttons below the fold carry a gradient color that makes the email look more appealing. 

High-Ticket Product Nurturing

Customers can not be expected to make impulsive purchases when it comes to premium goods and expensive products. Instead, the organization needs to nurture these leads and convince them to purchase their high-ticket products. SixThreeZero does it wonderfully with their lead-nurturing email. 

First, they showcase their product in the hero image itself. This klaviyo email template focuses on the features of these bicycles and how the user benefits from them. Lastly, the blue CTA button contrasts with the black-and-white background of the template.

Pre-Order Promotion 

Exclusivity and FOMO are a few of the major driving forces of high engagement rates in emails. SixThreeZero combines both of them in their pre-order email campaign template. To begin with, SixThreeZero mentions how these limited edition bikes can only be pre-ordered. Next, they have created a false sense of urgency to capitalize on the reader’s fear of missing out. 

To top it off, they offer an exclusive discount code to incentivize the subscriber to make the purchase. SixThreeZero goes on to display all the limited edition colors below the email fold. The background color also reflects the color of these limited-edition bicycles, making the reading experience more immersive. 

Nada’s (previously Grin) Sustainable Pitch Through Emails

Product Highlight Email 

Product Highlight Email 

Grin, now Nada, relies on its email campaigns to build product awareness. Above the email fold, Grin highlights the problem statement and mentions how it can be tackled. They immediately follow it up with an effective CTA. In the next section, they showcase the natural ingredients that are included in their product. It builds product awareness and positions itself as a healthier alternative compared to its competitors. 

In the final section, they cross-promote their other products, such as tongue scrappers and toothbrushes. 

Brand Building

Brand Building

Nada’s business values and long-term goals are all based on sustainability and environmentalism. On the occasion of World Oceans Day, Nada suggests that we can conserve our oceans by reducing plastic usage. Then, they immediately follow it up with their eco-friendly product range. The white email background with pops of azure blue makes the email maintain a clean look

Product Promotion Email 

Product Promotion Email

In this email, Nada directly markets their product. The major highlight of this klaviyo email template is their assorted toothpaste pack that contains three different flavors. They have also promoted their range of dental floss and toothpicks.

Each of their promoted products carries a picture and short description. The CTA buttons embedded below the product description redirect the readers to the webpage. In addition, they are promoting a social cause by offering a 15% discount to people donating $2 to Ukraine.

London Store’s Seasonal Campaigns

Seasonal Discount Email 

Seasonal Discount Email

The London Store uses a summer-themed seasonal email to promote their t-shirts, beach towels, trousers, beachwear, waist bags, and more. Since it is a summer-themed email, the template is filled with summer colors, like blue, yellow, and orange. Additionally, the beach and the surfer in the hero image add to the summer vibe.

London Store also incentivizes its subscribers by offering an extra 15% discount coupon. The Polaroid frames to showcase their product makes their email look more summer appropriate. 

Pain Point/Seasonal Email 

Pain point email

London Store creates its monsoon email with a similar approach. They have used dark clouds, rain droplets, and an umbrella to represent the pain point during the season. Then, it positions its products as a solution to help people cope with the weather. And, of course, they have added a discount code to incentivize the customer. Overall, London Store managed to hit two birds with a single stone, addressing the pain point while also conforming to the seasonal theme. 

Orivet’s Cute Email Template 

Customer Loyalty Email

Customer Loyalty Email

Orivet uses an engaging and colorful email design to promote its loyalty program. They have used an animated image in the hero image to make their template look more amazing. The loyalty program promotes double points for its loyalty program members. But that’s not all. 

Orivet promotes its mobile app by including a small section in its email. Below that, they have included a customer testimonial as a social indicator of their stellar performance. In the very last section of their email, they also promote their referral program. 

Product Highlight Email

Product Highlight Email

Orivet’s product highlight email is truly a sight for sore eyes. The moment the reader opens the email, they are greeted by three utterly-cute furry friends. The email copy is concise and promptly describes the services offered by the company. 

The next section of this klaviyo email template highlights the product of the month. The other products and DNA testing kits are also promoted in the highlight section. Finally, they wrap the product highlight email by advertising their loyalty program.

Event Promotion Email

Event Promotion Email

Orivet promotes The Houston World Series of Dog Shows and also mentions their pop-up stand there. It offers a chance for the virtual subscribers to see the product in action. Furthermore, they are offering a whopping 50% discount for one of their services. 

The one-time discount code is time-limited and creates a false sense of urgency. They also introduce their genetics specialists, who will be present at the event. 

Steinel Ammunitions’ Rugged and Straightforward Email Designs

Customer Testimonial Email

Customer Testimonial Email

Instead of tooting its own horn, Steinel prefers to let its customer promote the brand. They have shared the top customer testimonials in their email to signal that they are indeed a trustworthy brand that deals with high-quality ammunition. After all, customer testimonials are the greatest form of social proof. 

Steinel highlights three glowing reviews for their 3 top products. Each of the product reviews also carries a “Shop Now” CTA button to make it easier for the subscribers to reach the product page. The black and wood-colored scheme represents the color of the gun’s barrel and handle. 

Restock Reminder Email

Restock Reminder Email-min

Back-in-stock emails are a great way of reminding old customers to refill their leads. Steinel keeps its restocking notification emails quite simply. The hero image carries the image of the 10mm bullets that have been restocked. In the same image, they have also added the guns that usually carry these rounds to make it easier for the user to identify their instruments. 

Similar to their previous email, Steinel has included customer reviews in this one as well. 

Promotional Email

Promotional Email-min

In their promotional email, Steinel informs the subscribers about the introduction of their Cowboy Loads. The email advertises their 44mm and 38mm special rounds in the same black and brown color scheme to maintain brand consistency. The hero image is also quirky as it shows a cowboy getting all excited for these new cowboy rounds. 

QuietKat’s Beautiful Gradient Emails

Customer Appreciation Email

Customer Appreciation Email

Appreciating customers for their continued support builds the brand’s relationship with your subscriber. Customer appreciation email also fosters brand loyalty and encourages customers to make repeat purchases. 

QuietKat thanks its subscribers for their continued support before offering updates about their expanding businesses. QuietKat also shares a list of resources to help new subscribers get into cycling. In addition, they have also promoted a few of its top-selling products that are appropriate for people just starting their cycling journey. 

Abandoned Cart Email 

Quietkat Abandoned Cart Email example

QuietKat follows all the best practices while crafting its cart abandoned email. First, they share the product image and its price to help the customers recall what was abandoned in the carts. Next, they have included a testimonial GIF that cycles through a few of the top reviews to build more trust with the customer. This is the highlight of their klaviyo email template that makes them stand out from the competitors. 

Apart from that, they also mention the perks of purchasing their cycles, such as a 30-day risk-free test ride policy, 0% financing, and sales support. 

QuietKat Welcome Email

QuietKat Welcome Email

QuietKat welcomes its new subscribers with a wonderfully designed email template. After thanking the customer for subscribing to their newsletter, they share some educational resources to help the new readers. Sharing their other social links also helps QuietKat build it following through its newsletters. 

PK Grills Holiday-themed Email Designs

4th of July Themed Email 

4th of July Themed Mail

American summers are all about barbecues and outdoor activities. And, when you add the 4th of July to the mix, it becomes a golden opportunity for grill companies to establish their presence in the market. PK Grills does the same with its Independence Day-theme sales emails

The email’s color palette does justice to the American event. Blue, red, and white colors dominate the template design. They are also offering hefty discounts on their product range. PK Grill has also shared a scrumptious recipe to reward the readers who scrolled till the end. 

Memorial Day Themed Email 

Memorial Day Themed Email

It is only natural for grill and smoker manufacturers to share recipes for special occasions. PK Grills shares a couple of delectable recipes for the upcoming Memorial Day celebration, along with a heavily discounted product line-up. 

Father’s Day-Themed Email

Father’s Day-Themed-mail

With a quirky caption and heavy discounts, PK Grills easily comes up with an incredibly well-designed Father’s Day email. The email also contains a recipe video which makes it more interactive and engaging than any of its other themed emails. Similar to its previous holiday-themed emails, PK Grills continues offering high discounts on its product. 

Whitehorse Colorful Email Designs

Labor Day-Themed Email 

Labor Day

Whitehorse promotes its flavourful vapes with amazing Labor Day-themed email templates. To start with, the hero image celebrates the American workers. The image is clad with the American flag and animated images of workers from different professions. Following the hero image, the readers can find the product images. Each product is accompanied by an individualized CTA button that leads the subscribers to a dedicated landing page. 

At the end of the email, Whitehorse Vapor has included a small teaser for their upcoming flavor line-up.

GIF Carousel Email

GIF Carousel Email

Whitehorse’s inventive GIF carousel cycles through all the available flavors. The email copy persuades the customer to try their flavors and devices. Whitehorse also incentivizes the readers by offering them free shipping of products on orders above $59. If we take a closer look, Whitehorse makes excellent use of white space to highlight its products and vibrantly colored CTA button. Overall, Whitehorse Vapor managed to create a simple yet effective Klaviyo email template. 

Personalized Product Recommendation. 

Personalized Product Recommendation.

Personalized product recommendation emails always have higher engagement and open rates. Whitehorse creates a highly impactful product recommendation email. They analyzed the customer’s past purchases and curated a bunch of products that would suit their taste. 

The email also looks very appealing, thanks to the color wheel arrangement. They also incentivize the subscriber by offering them free shipping. 

Falcon Strike Klaviyo Email Designs 

Informative Email 

Informative Email

In a similarly informative email, Falcon Strike explains trap shooting with great detail. They have linked an article in its CTA button. For this article, they interview Bruce Buck, an International Skeet and Sporting Champion, about the shooting game. 

Following the article, they promote multiple recoil pads from their product line-up. As you can see, they have managed to slyly insert a promotional pitch in an otherwise informative email. 

Falcon Newsletter

Falcon Newsletter

Falcon Newsletter continues to keep the subscribers updated about what’s going on in the Youth Shooting Sports community. They share a video describing the experience of one of their patrons and his son. 

The email is simple, effective, interactive, and engaging. The email is thorough and informative and not at all sales-y. Consequently, it creates a better reading experience for the email recipient. 

Holiday Themed Email 

Holiday Themed Email

Falcon Strike’s Independence-themed email is also a testimonial email. The email contains multiple testimonials from satisfied customers. And immediately after the testimonial, they plug in their recoil pad line-up. 

Conclusion 

All the above email templates are designed using the HTML codes, and then uploaded to Klaviyo’s editor. Of course, if you are struggling to create effective Klaviyo email templates like these, you can always reach out to us. Our Klaviyo agency experts will guide you through all the processes. we’ll help you design one according to your brand guidelines.

Klaviyo Integrations are powerful tools that allow users to help bring together data from two or more siloed systems.

Klaviyo is a powerful ecommerce marketing platform that offers a variety of integrations to help businesses improve their customer experience. Klaviyo’s integrations provide users access to tools and data that can help them increase conversions, reduce costs, and create personalized customer experiences.

Since the Klaviyo database integrates smoothly with your tech stack, it helps your businesses leverage data most effectively with custom analytics that enables you to make informed business decisions.

With easy access to comprehensive data about every customer visit, you can use those insights from the same platform to automate personalized email and SMS communications. As a result, it is easier to reach out to your customers with tailored messages and offers.

This article will discuss the advantages of 30 best klaviyo integrations and why they benefit businesses.

Top 30 Klaviyo Integrations For Businesses

1) WordPress

Klaviyo integration with WordPress

It’s one the most popular publishing platforms, used by millions to create and manage websites and blogs using only an email address.

WordPress advanced suite of features enables aesthetic designing, content upload, storage, creating photo galleries, embedding audio, streaming video, and other capabilities.

In addition, WordPress users can share new posts or content through built-in social sharing, leverage SEO tools, and access in-depth statistics and analytics to understand visitor demographics and related information.

Benefits of Klaviyo integration with WordPress:

  • Analytics about site visitors without using a third-party service enables publishers and marketers to send relevant emails based on user actions.
  • Marketers can develop targeted content and blogs relevant to a lead’s interests.
  • Ideal for publishers and marketers seeking to improve engagement rates.
  • Flexibility to choose when and how to engage with leads through numerous user-friendly options.
  • Promotes personalized and relevant content for target audiences, which in return helps boost ROI.

2) Google Forms

Klaviyo integration with Google Forms

This popular, free, form builder tool lets users create online surveys and questionnaires and collate and organize simple or complex information.

Regardless of the number of respondents, Google Forms works on the web and mobile. It is typically used by freelancers, large enterprises, SMEs, and non-profit and public administration.

Google Forms boasts of superior, user-friendly UI. Its enhanced personalization and editing tools help you send professional-looking surveys and questionnaires to individuals or customers.

Also, live response data, charts, and automatic summaries facilitate data analysis and can be accessed and analyzed via Google Sheets or other platforms.

Benefits of Klaviyo integration with Google Forms:

  • Quickly identify customers who have completed the survey and thus auto-personalize future messages.
  • Lets customers fill out surveys, thereby boosting engagement quickly.
  • Easily segment customers into Klaviyo lists based on survey answers.
  • Automate marketing campaigns based on collected data.
  • Conveniently monitor customer feedback and survey completion rates.

3) Shopify

Klaviyo integration with shopify

Shopify is one of the finest website builders that lets you conveniently run your business on one unified platform. It is easy to use, offers value for money, and is recognized for its excellent customer service. 

Shopify lets you conveniently run your business on one unified platform.

You can fully customize your online store, incorporate new sales channels, manage a vast range of products and inventory, have user-friendly fulfillment of orders in a single step, and track sales visitor traffic, growth trends, and more.

Benefits of Klaviyo integration with Shopify:

  • Conveniently sync critical data events, such as canceled and fulfilled orders, refunds, checkouts, and for analysis and campaign use.
  • Powerful audience segmentation enables rich personalization and more targeted campaigns.
  • Automated workflows allow quickly setting up messages for broadcast when triggered by specific events.
  • Klaviyo lets you implement SMS campaigns alongside email marketing, as Shopify email is restricted to email marketing only.

4) Adobe Commerce

Klaviyo integration with Adobe Commerce

A highly advanced e-commerce development platform AdobeCommerce aims to enable companies to achieve growth based on exceptional customer experience.

It encompasses superior business intelligence dashboards, email segmentation, content management and marketing tools, customer loyalty tools, and other features to support online businesses.

It has become an omnichannel solution for B2C and B2B merchants seeking an enterprise edition.

Benefits of Klaviyo integration with Adobe Commerce:

  • Implement email automation across all stages of the customer lifecycle. For example, sending trigger emails for abandoned cart reminders, post-sales follow-up, product recommendations, seasonal discounts, and other events.
  • Create segmented customer lists based on demographics, geographical location, user behavior, items viewed, and almost anything else.
  • Access detailed reports and predictions on customer lifetime value, web page visits, page abandonment, purchase volume, and other shopper behavior.
  • High level of personalization based on customer data and configurable products. Specialized emails tailored to individual customers improve conversions.

5) Salesforce Service Cloud

Klaviyo integration with Salesforce Service Cloud

This customer relationship management (CRM) platform for customer care and support. Salesforce marketing Cloud provides businesses a comprehensive view of their activities and interactions. The insights help deliver faster, more efficient, and personalized services.

With a platform for customers to connect with businesses across multiple digital channels such as mobile messaging, AI-powered live chat, email, and social media, the SalesforceService Cloud provides the ultimate customer care experience.

Benefits of Klaviyo integration with Salesforce Service Cloud :

  • Quick and hassle-free integration that can be set up within a few minutes.
  • Modern architecture principles enable customers to earn revenue within 1-2 weeks of implementation.
  • Cutting-edge automation and segmentation tools help businesses conveniently communicate with customers at an enterprise scale while offering personalized experiences.
  • Access to data science tools such as churn risk, send time optimization, purchase frequency, customer lifetime value, personalized product recommendations, and more. 
  • Capture custom data leveraging Klaviyo’s APIs.

6) HoneyBook

klaviyo integration with HoneyBook

This cloud-based CRM solution typically caters to small businesses to manage projects, create contracts, book clients, send invoices, receive payments, and manage other client management processes.

It also includes custom templates and notifications that help businesses offer customers automated appointment requests and follow-ups.

HoneyBook is very easy to use and has an intuitive UI. As a result, businesses can effortlessly track customer behavior and respond quickly with marketing campaigns tailored to each customer.

Simply put, these combined tools help companies provide top-tier service in an organized way.

Benefits of Klaviyo integration with HoneyBook:

  • Integrates with Klaviyo in a few clicks. Efficient Klaviyo flow automation (no code) ensures you focus on your core business.
  • Automatically synchronization of customer data between HoneyBook and Klaviyo facilitates sending personalized emails to customers based on their activity in HoneyBook.
  • Easily track the effectiveness of campaigns and automated emails sent out through Klaviyo.
  • Grow your customer base and increase customer retention through targeted marketing campaigns.

7) WooCommerce

WooCommerce

WooCommerce is a free, open-source flexible software solution typically built for WordPress-based websites. It is one of the leading e-commerce platforms worldwide and is commonly used to create online e-commerce shops.

The WooCommerce solution allows anyone to transform a regular website into a fully-functional online store. It is designed to be very beginner-friendly and can be set up even without prior experience in IT or coding.

WooCommerce has all the necessary features and tools to manage an e-commerce store, from setting up product displays to order management and multiple payment gateways.

Benefits of Klaviyointegration with WooCommerce:

  • Instal plugins directly from WooCommerce.
  • Flexibility to develop custom integrations, templates, and automation ensures control of form fields, tech stacks, and templates.
  • Seamless integration enhances the quality of email campaigns and track website activity, and send more targeted emails based on customer behavior.
  • Minimize complexity and boost retention, irrespective of inventory size.

8) Trustpilot

Trustpilot

A customer review management tool that’s free and open to all businesses and consumers. It allows companies to engage and build trust with customers and potential customers by gathering reviews and feedback on a product or service they purchased or contacted customer service.

Trustpilot enables organizations to improve their overall customer experience, enhance their online presence and reputation, and drive conversions and sales. 

Some of Trustpilot’s key features include high-quality review reporting and analytics, review invitations and reminders, on-site review widgets, rich snippet stars, and Google seller ratings. 

Benefits of Klaviyo integration with Trustpilot:

  • Highlight your Trustpilot stars, reviews, and ratings in your Klaviyo newsletter directly with a dynamic widget.
  • Filter reviews in Klaviyo emails based on star rating, content, and type (service or product reviews).
  • Automatically features the most recent reviews matching the chosen settings, enabling consumers to see the latest scores and reviews.

9) Wix

Wix

It’s a user-friendly website builder that helps you easily set up an online presence using the drag-and-drop interface. Even if you have prior coding or FTP knowledge, you can get started with web hosting – all that you need is your email address! 

The web builder’s robust customization capabilities, e-commerce tools, and intuitive interface let you build beautiful sites without breaking your budgets. Further, rich web store features, superior customer service, and excellent uptime make Wix an attractive business option.

Benefits of Klaviyo integration with Wix:

  • Order and contact information sent to Klaviyo supports advanced email segmenting and win-back emails.
  • Predict your customer’s next purchase date and future spending to tailor marketing campaigns and automate email messaging.
  • Calculate the customer lifetime value for insights into the profitability of customers.
  • Leverage email pop-ups to collect newsletter subscribers and expand your customer base.
  • Plan your buyer’s journey from beginning to end for a seamless customer experience.

10)  Sisense

Sisense

Sisense is a business intelligence platform that embeds analytics seamlessly into any workflow.

Its data & analytics platform facilitates a potent mix of data from across the entire data landscape while converting it into significant, actionable analytics applications that can be embedded anywhere.

From manufacturing to retail to life sciences, it helps improve customer experiences by enhancing user adoption and supporting innovative business initiatives that accelerate innovation and drive digital transformation.

Whether your data is cloud-based, on-prem, or combines both, Sisense empowers businesses with the tools and technologies to implement your analytics application strategy successfully.

Benefits of Klaviyo integration with Sisense:

  • Quickly load your Klaviyo data to a database or cloud data warehouse and analyze it using Sisense for powerful insights about customers and campaigns.
  • Integrate Sisense with Klaviyo without writing ETL scripts and customize data pipelines to suit your needs.
  • User-friendly data visualization tools to quickly analyze and track Klaviyo events and metrics in real time.

11) Kixie PowerCall

Kixie PowerCall

This sales engagement platform helps the sales team improve performance with reliable, easily-automated calling and texting service providers and leading CRMs.

The cloud-based can be set up in a few minutes with no hardware. It leverages advanced technology, including AI, to help sales representatives make sales calls quickly and conveniently, engaging with more prospects.

Kixie helps transform your CRM into an automated sales powerhouse with an intelligent autodialer, seamless integration, and enterprise phone service.

Benefits of Klaviyo integration with Kixie PowerCall:

  • Single-click integration eliminates 80% of sales busywork, leaving more time to close deals.
  • Uninterrupted dialing, sending follow-up emails and moving deals to the next stage – all in a single click.
  • Never forget a new lead – create and update contacts automatically when you call Kixie.
  • Automatic logging of calls, texts, recordings, and outcomes.
  • Boost productivity and win rate when phone calls and texts are integrated with Klaviyo.

12) Poptin

Poptin

A free lead capture platform that interacts with your visitors and helps convert them into leads, subscribers, and sales, leveraging popups, embedded forms, and autoresponders.

Poptin in-line forms and popup plugins track the behavior of your site visitors and display the relevant message at the right time.

From increasing engagement and recovering abandoning website and cart visitors with suitable exit strategies and technologies and many other triggers, Poptin helps optimize conversion rates and grow your business.

Benefits of Klaviyo integration with Poptin:

  • Use enhanced email marketing to disseminate customized pop-ups, inline forms and boost based on greater engagement with prospects.
  • It can be easily integrated without prior coding knowledge, allowing you to start creating your business flow.
  • Collect any data from Klaviyo’s Advanced Fields, and view it under Custom Properties on the Klaviyo dashboard. 
  • Quickly identify where Poptin is the source of news leads from your Poptin forms and popups.

 13) Okendo

 Okendo

It’s a review management software for businesses that use Shopify. It helps manage user-generated content (UGC), post customer reviews on websites and/or social media platforms, and collect actionable product data.

This enables streamlining of decision-making processes for the buyers while delivering more personalized customer experiences. 

Businesses can then improve their overall email click-through rates (CTRs) and ranking across search results by showcasing the review metadata and the product’s page links.

Benefits of Klaviyo integration with Okendo:

  • Enhance emails with social proof, create advanced flows to optimize campaign performance, and create new engagement possibilities.
  • Consolidate customer communications by sending Okendo-triggered automated review requests through email or SMS in Klaviyo.
  • Demonstrate ratings and reviews in triggered emails such as product recommendations and cart abandonment to accelerate performance.
  • Implement advanced segmentation and personalization by syncing zero-party customer data in Okendo to customer profiles in Klaviyo and leveraging it to create targeted and effective email campaigns.

14) Unbounce

 Unbounce

Unbounce is a valuable tool for building, refining, and publishing new landing pages to test. It helps businesses generate significant leads, signups, and sales. The easy-to-use builders are designed for any skill level, even if you’re not a designer or developer.

Email Marketing experts can combine their expertise with AI insights to create and optimize effective marketing campaigns using Unbounce Conversion Intelligence.

From building landing pages to creating a high-converting copy or maximizing conversion rates, Unbounce’s platform is suitable for all business types.

Benefits of Klaviyo integration with Unbounce:

  • Seamless integration to use landing pages to add new customers to your newsletter list.
  • Automatically target a series of flow messages before sending out newsletter campaigns.
  • Advanced email segmentation for targeting audiences per your requirements, leveraging behavior, location, profile, list, predicted LTV or order date, and other criteria.
  • Behavior-based automation sends messages automatically based on channel engagement, profile/event data, predictive analytics, and other relevant platform data.

 15) LiveWebinar

LiveWebinar

This cloud-based solution offers live video streaming, superior screen sharing, recording features, social media broadcasting, customized branding, and audience engagement analytics.

It also has full customization templates and features for positive audience interactions, a variety of formats, advanced Klaviyo integration api, multiple-device compatibility, and other relevant features to host video events and webinars. 

The software integrates with marketing automation and CRM tools to deliver insights on the number of participants, devices used, location, and session timings. 

For this reason, it’s the preferred choice of thousands of entrepreneurs and business leaders looking for a superior real-time platform to engage with target audiences. 

Benefits of Klaviyo integration with LiveWebinar:

  • Collate and process highly resourceful email lists that you build based on your webinar registrants, which can be used for future promotions.
  • Webinar leads are automatically delivered to Klaviyo.
  • Facilitates customized marketing communication.
  • Ensure your subscribers are notified about your marketing activities.

16) BigCommerce

Klaviyo integration with BigCommerce

BigCommerce is one of the leading open SaaS ecommerce platforms worldwide. It empowers businesses of different sizes to build, innovate and expand their businesses online. 

Its superior enterprise-grade functionality, excellent customization, performance capabilities, and ease of use make it one of the preferred solutions for B2C and B2B companies across different industries looking to create engaging online stores.

The app allows you to manage orders, view buyer details, and access key performance metrics for managing a business on the go. It is also accessible from mobile devices.

Benefits of Klaviyo integration with BigCommerce: 

  • Enhance your email and SMS lists, leveraging quality data for improved segmentation and personalized messaging.
  • Quick and easy to integrate 
  • Access 2,000+ proven email designs and texts developed by Klaviyo users with a vast range of filters to match your requirements
  • Personalize at scale with one-to-one attention for customers 
  • Access to AI-driven estimates of a customer’s potential next order date, gender, churn risk, and lifetime value for personalized marketing.

17) PayKickstart

PayKickstart

It is an affiliate management and subscription management platform supported by advanced revenue retention tools, robust technology, and a hassle-free customer experience.

Ecommerce businesses, including digital product and digital creators, software and SaaS companies, consultants, agencies, and physical product sellers, rely on PayKickstart to convert leads, accept payments, track affiliate partners, handle taxes, and other tasks. 

The key features of the platform span shipping, promotions, commission and refund management, data security, recurring billing, and product configuration. PayKickstart is available on monthly and annual subscriptions and offers comprehensive customer support.

Benefits of Klaviyo integration with PayKickstart: 

  • Conveniently manage your email marketing campaigns easily by integrating Klaviyo with PayKickstart.
  • Leverage Klaviyo’s expertise in processing billions of consumer activities or data events for more accurate targeting, thorough analysis, and effective marketing.
  • Add segment leads and customers automatically to a specific list/tag in the Klaviyo account at purchase, cancellation, cart abandonment, refund, and more.

 18) Orderhive

Orderhive

Orderhive is an ecommerce platform that lets you easily automate tasks within your operations and across your apps. In this way, you can simplify back-end tasks and improve operational efficiencies.

The workflow automation can be set up easily and quickly- It enables you to generate invoices, pick/pack lists, low-stock alerts, track and manage inventory across different sales channels, and lots more using the auto mode. In addition, the seamless back-end workflow gives you the support needed to grow your business.

Benefits of Klaviyo integration with Orderhive:

  • Conveniently import/export subscriber lists and automate your marketing workflows.
  • Store critical customer information such as forms and profiles vital for building strong relationships to drive growth.
  • Analyze new trends and gain richer customer insights through segmentation, analytics, reporting, and data science. 
  • Add subscribers to Klaviyo lists automatically, in real-time, leveraging a wide range of conditions to trigger the additions.
  • Facilitates informed action leveraging different resources, social advertising, SMS, and email campaigns.

 19) Agency Analytics

AgencyAnalytics

This user-friendly marketing reporting platform specifically enables agencies quickly provide clients with insightful reports and live marketing dashboards to highlight the total marketing outcomes.

Further, you can also give clients access to the interface or app as if it were an in-house platform.

Agency Analytics’ comprehensive suite of SEO tools helps streamline and automate your agency and track the competitive landscape. You can monitor daily rankings and backlinks and implement technical SEO audits to enjoy a competitive advantage.

Benefits of Klaviyo integration with AgencyAnalytics: 

  • Track campaigns, lists, segments, and event analytics to monitor campaign performance.
  • Analyze segments and list engagement by scanning individual subscriber behavior. 
  • Access detailed delivery reports to track and monitor all contacts who received, opened, and clicked on your email campaigns on a single dashboard.
  • Configure automated email marketing reports with metrics significant to each client. 
  • Compare the open and click history for advanced optimization of campaigns.

20) Wufoo

Wufoo

This user-friendly, cloud-based form builder simplifies creating forms for registration, application, contact, payments, surveys, and more.

You can easily create the forms needed for collecting data, files, and payments without any prior skills and knowledge in writing code. Likewise, you can easily embed forms into a website or share them using direct links to process online payments. 

From designing engaging forms that reflect the brand or website values to automating workflows for form data to seamlessly transfer to CRM, marketing automation system, and more, Wufoo lets you spend less time on tedious tasks and focus on growing your business.

Benefits of Klaviyo integration with Wuffoo:

  • Streamlines your data management process 
  • Integrates in just a few clicks and automates your work without code. 
  • Subscribers get automatically added to Klaviyo, allowing you to start nurturing contacts via email marketing immediately. 
  • New subscriber entries in Wufoo are instantly replicated in Klaviyo.

21) Attentive

Klaviyo integration wih  Attentive

As a conversational commerce platform, Attentive seeks to offer business users all the tools needed to deliver timely text message marketing that their customers want to receive. 

It facilitates personalized text messaging, which helps engage high-value mobile subscribers with relevant messages.

Moreover, you can enhance your SMS list faster, and integrate more easily with the rest of your tech stack while ensuring that your SMS program is compliant and helps drive business revenues. 

Benefits of Klaviyo integration with Attentive:

  • Automatically send info between Attentive and Klaviyo without the need for code
  • Leverage Klaviyo’s built-in customer database and 200+ integrations to access highly relevant real-time data.
  • Extensive data enables more effective segmentation leading to higher conversion rates.
  • Superior segmentation tools help maximize outreach to the ideal audience at the right time.
  • Get complete marketing control and gain actionable insights through Klaviyo’s multichannel and email reporting tools and advanced technology.

22) Convertful

Convertful

It is one of the best-in-class lead capture software that enables businesses to convert users into new email subscribers and/or sales. 

Designed as an on-site conversion tool, it helps marketers create and target personalized offers matching the visitor’s needs using email marketing integration, responsive templates, sign-up forms editor, targeting, lead recovery, A/B testing, and more. 

Overall Convertful is easy-to-use with no coding skills required. The customizations and settings can be performed through the user interface and the drag-and-drop form builder. Finally, real-time analytics allow businesses to track conversions accurately.

Benefits of Klaviyo integration with Convertful:

  • Organic growth of the contact list enables businesses and brands to create highly-targeted email campaigns.
  • Customizable form fields to access relevant data, seamless data transfer to appropriate fields, and filters for personalizing email campaigns.
  • Accurately-timed and relevant offers based on behavior and interest-based triggers
  • Intelligent leads recovery to capture and add subscriber data correctly.

23) Emailable

Emailable

This email checker SaaS is designed for bulk validation to help marketers and developers manage their email campaigns and filter contact database suitably. 

Email addresses can be categorized as deliverable, undeliverable, duplicate, risky, and unknown. Features such as email detection, mail server validation, domain, and syntax check, SMTP server monitoring, and reporting enable the business to optimize campaign outcomes. 

Emailable comes with an API, so developers can easily integrate with a website or mobile app and import email list data. 

Benefits of Klaviyo integration with Emailable:

  • Seamlessly automate email verification with Klaviyo Integration.
  • Easily store, access, and use transactional and behavioral data to facilitate highly-relevant customer and prospect communications. 
  • In-built autoresponders allow automation of triggered email flows to segmented audiences based on specific circumstances, for instance, abandoned carts and order follow-ups.
  • Measure the efficiencies of segmented lists and marketing campaigns through reporting and analysis with key metrics. 

24) Mailfloss

Mailfloss

This cloud-based, fully-automated bulk email verification platform enables small and large businesses to automatically protect, filter, filter, and verify email lists. 

Users can connect their email marketing platform with Mailfloss to customize preferences and automate the verification and protection processes.

In addition, automatic decay protection tools help prevent outdated email addresses from affecting the domain reputation, improve email deliverability, and boost ROI on marketing campaigns.

As it does not need developers or spreadsheets, it presents a unique approach to email verification.

Benefits of Klaviyo integration with Mailfloss:

  • Seamless integration as Klaviyo collects and stores all the relevant data from Mailfloss.
  • More accurately targeted campaigns based on pre-made templates and dynamic data facilitate personalization.
  • AB testing to optimize the performance of segmented campaigns. 
  • Access to an experienced and supportive team during business hours to provide necessary resources and streamline the integration.
  • Dynamic web signup forms of Klaviyo help businesses capture additional customer data and enhance the database.

25) Neon CRM

Klaviyo integration with Neon CRM

This constituent management software caters to small to midsize nonprofits helping manage members, donors, members volunteers, events, fundraising, and grants on one user-friendly platform. 

With all the essential data and tools in one place, in quick, simple clicks, you can create online forms, interact with your donors, plan events, and manage members and volunteers, while leveraging insights from in-built key metrics dashboards. 

The relationship-centric approach ensures that donor management retains a personal touch sans the tedious manual work.

Benefits of Klaviyo integration with Neon CRM:

  • Personalize and target email campaigns based on donations by each contributor and event registration activity.
  • Seamless sync of data from NeonCRM to Klaviyo for enhanced growth opportunities based on access to various marketing channels, including email, SMS, in-app notifications, and web. 
  • Support highly-targeted customer and prospect engagement through data access, management, and analysis. 
  • Accurate reporting and analysis leveraging key metrics to measure the outcomes of marketing campaigns. 

26) Databox

Databox

This cloud-based business analytics platform helps marketers, CEOs, decision-makers, and analysts check out various key performance indicators (KPIs) and develop reports using a single interface. 

Users can connect with various sources of cloud-based data and leverage their databases to import data using Databox’s REST API and SDKs. In addition, the Databox Designer lets users build custom dashboards with the drag-and-drop editor for displaying multiple data sources. 

Further, the Databox mobile app allows real-time access to company performance through daily scorecards, alerts, and weekly summaries.

Benefits of Klaviyo integration with Databox:

  • Boost your ecommerce sales by analyzing and aligning your ecommerce strategy to deploy accurately targeted and relevant mail.
  • Implement powerful segmentation and advanced integrations with an e-commerce platform, point-of-sale software, and other critical marketing tools to boost sales.
  • Make smarter marketing decisions leveraging the user-friendly setup to access data.
  • Create custom reporting dashboards and track them on any device.

27) Shopify Plus

Shopify Plus

It’s a fully hosted, multi-channel ecommerce platform and website builder for fast-growing wholesalers and enterprise-level online marketplaces who want greater control over their online stores without compromising quality.

Shopify Plus’ high level of customization and scalability, along with its intuitive CMS navigation, enables businesses to manage content, products, content, and pricing without code. 

Businesses can create different store versions for international marketplaces, customize storefronts, checkout pages, and backend systems, and implement tagging and segmentation.

In addition, it can facilitate personalized services and offers with discounts for specific products or collections, easily automate custom campaigns and flash sales, and much more.

Benefits of Klaviyo integration with Shopify Plus:

  • Drive sales automatically through custom automation with unlimited conditions, splits, texts, and emails
  • Implement advanced segmentation and personalization compared to most other platforms by syncing historical and real-time data across Shopify Plus and other tech tools.
  • Track critical performance metrics and identify growth opportunities using predictive analytics.

28) OpenCart

Klaviyo integration with OpenCart

OpenCart is a free, open-source ecommerce platform that facilitates the sale and purchase of online products. In addition, it provides users access to its source code for modifying and customizing the online store. 

The key features include an administration dashboard for an overview of your OpenCart website performance, customizable reporting tools, and user access to simplify tracking, security, and enhancements for your business.

You can sell unlimited products online without any additional fee. Moreover, OpenCart is a mobile-responsive and SEO-friendly platform. With excellent payment processing options, it combines the ideal feature of an ecommerce platform.

Benefits of Klaviyo integration with OpenCart:

  • Product feeds display unique and suitable content for the individual email recipient.
  • Klaviyo email templates for well-planned newsletters and emails are automatically generated.
  • Segmentation to fine-tune lists for greater relevance.
  • Superior abandoned cart follow-ups and automated order post-purchase follow-ups to keep customers returning
  • Signup pop-ups to collect new emails on your site 

29) Re:amaze

Reamaze

A web-based helpdesk platform enabling businesses to interact with customers, Re:amaze offers multi-channel support at scale for all conversational channels, including chat, email, social media, push notifications, VoIP, and mobile. 

You can easily manage customer conversations from multiple storefronts or websites, automate routine tasks using MI, create natural language macros, and collaborate with teammates using notes, assignments, and shared views. 

In short, Re:amaze helps your support team engages with customers by leveraging a shared team inbox to optimize the customer experience.

Benefits of Klaviyo integration with Re:amaze:

  • Visual integration of workflows helps save time and resources without coding. 
  • Create custom workflows by selecting the triggers, actions, and searches.
  • Know the lists your customers are subscribed to and their email ids.
  • Seamlessly manage lists, with the ability to add contacts to an existing list, remove them from a list, or transfer them to another list.

30) Supermetrics

Supermetrics

Supermetrics streamlines the delivery of data from more than 80 sales and marketing platforms into the analytics and reporting tools marketers use. This helps them make informed decisions. 

Supermetrics enables businesses to aggregate siloed data from marketing and sales platforms into their respective reporting, storage, and analytics platform, for example, BI/data visualization tools, spreadsheets, data lake, or data warehouses.

As a result, the analysts, marketers, and engineers who use them get richer insights into their marketing data, enhanced marketing outcomes based on data-driven decisions, and considerable time and cost efficiencies.

Benefits of Klaviyo integration with Supermetrics:

  • Track and compare campaign performance in a single view. 
  • Optimize customer insights and accelerate revenues using one of the leading marketing platforms worldwide.
  • Personalize outreach communications by segmenting audiences efficiently and automatically implementing target-triggered campaigns based on analytics and reporting tools.
  • Monitor online marketing communications and email autoresponders accurately using A/B testing and real-time tracking technology.

FAQs

Q1. How many stores can I integrate with one Klaviyo account?

You can only implement one integration of any type within your Klaviyo account. For more than one ecommerce store of a similar kind, you’ll have to create a Klaviyo account for each store.

At the same time, where a different platform supports multiple stores, you can integrate all stores with the same Klaviyo account. However, we do not recommend this as it impacts data analysis and metrics.

However, Magento users can integrate a Magento server with multiple stores. In that case, Klaviyo syncs all profiles and order data from each store into your account, as well as your ‘Magento Store Name’ and ‘Magento Website ID’ properties for each profile created.

Q2. How many integrations does Klaviyo have?

Klaviyo has over 300 data integrations to help optimize your digital ecosystem quickly and easily.

Q3. How do I integrate Klaviyo into my website?

Once you publish an embedded form from your Klaviyo account, and after selecting publish, you will get a popup with the embed code of your form. 

You can also get this code by clicking the Behaviots tab on opening the form in the editor. Copy this code and utilize it to add the form to your site.

Q4. Is there any specific listing of possible Klaviyo integrations?

In your Klaviyo account, click on your account name, and select the Integrations tab at the lower left corner. Once you click All Integrations, the list of all Klaviyo-supported built-in integrations will be displayed. Sort by Category or search for integrations as per your requirement.

Q5. Can I send custom event data to Klaviyo?

Yes, you can, as Klaviyo has a very flexible API.

Have you ever wished you had a crystal ball to help you create the perfect email campaign? While having a magical tool might be nice, there’s a solution along the same lines. Mailchimp! It’s an easy-to-use platform for creating, running, and measuring the success of your campaigns. In this blog, we’ll explore how to use Mailchimp to create a successful email campaign so that, just like with a crystal ball, all you have to do is sit back and watch your results roll in.

What Is Mailchimp?

Mailchimp is the ultimate email marketing tool, giving you the power to communicate easily with your clients, affiliates, and other essential contacts. With a web-based platform, there’s no need to download bulky software or install anything on your computer – navigating around the site is as easy as scrolling through a webpage. Streamline your workflow and let Mailchimp handle all your email correspondence needs.

With Mailchimp, you can maximize the impact of your email campaigns – and get real-time insights into how they’re performing. Take advantage of powerful features like mailing list management, template creation, segmentation, automation, and more to get the most out of your digital outreach. In addition, detailed analytics allow you to measure results and fine-tune strategies for maximum success.

Email marketing isn’t just about hitting ‘send’ and hoping for a response. Crafting the perfect campaign involves stringing together many intricate pieces. Mailchimp gives you the power to create the optimal marketing strategy – one that can yield tangible results and long-term success. This helps you take advantage of its comprehensive suite of tools to plan, personalize, and track your emails, ensuring maximum impact along the way.

How does Mailchimp work?

How does Mailchimp work_Blog Banner

With Mailchimp, you have the power to create and execute an email marketing strategy like no other. Easily write, send, and manage newsletters at a cost determined by your subscriber base size.

Crafting a message for your followers or customers? You can create stunning emails in no time at all! Simply start with a blank canvas, design it to your liking, add the content you want, and then hit send.

Mailchimp campaigns can be scheduled to arrive exactly when you need them. On the other hand, automation will take action on its own based on cues – like a welcoming message after someone joins your list, a receipt when they purchase something online, or bonus material after they complete a survey. All these can help you build meaningful connections with the people that matter most!

Mailchimp gives you a lot of exciting possibilities. You can design custom landing pages, set up automatic email broadcasts for your RSS feeds, and create targeted ads on Google, Facebook, and Instagram that send out whenever you post something fresh to your site.

And let’s not forget the highlight – segmentation! This powerful tool ensures that emails only reach the people most likely to be interested in them – by sending content at exactly the right time for each individual. It’s a great way to customize messages and get maximum impact from every one of your campaigns!

When it comes to Mailchimp’s newsletters feature, you can:

  • Send a newsletter to customers who have not yet purchased your goods.
  • Send a newsletter to people who requested a specific content upgrade you provided.
  • Send a newsletter to those who request to be informed whenever a new blog article is published.

These and many other features make Mailchimp the perfect tool for any business looking to take its email marketing campaigns to the next level. Also, In case if you are stuck anywhere in using Mailchimp the best alternative is to contact Mailchimp experts who can sort everything for you from basics to scratch.

Why Mailchimp might be the right ESP for you

Why Mailchimp might be the right ESP for you_Blog Banner

1. Easy-to-use Platform

When it comes to utilizing any ESP, it’s of utmost importance to evaluate how straightforward it is to get two must-haves done:

  • Setup
  • Generate a new campaign

Mailchimp’s setup takes no time at all, and you only need to provide some basic information to gain access. However, selecting a payment option is necessary before you can create a profile and use their platform.

There’s now a free option that allows up to 2,000 contacts and 10,000 emails sent. When setting up an account in Mailchimp, you’ll need to provide your company details such as address and phone number – this is so they can make sure you comply with the global anti-spam regulations.

When setting up your profile, the Mailchimp wizard will direct you through a few prompts to get started. You’ll be asked the following:

  • How many contacts do you have?
  • What type of products or services do you offer online?
  • How do you sell them?

Once done, you’ll be taken to your dashboard and asked for subscription confirmation for their tailored newsletters based on your replies.

Joining Mailchimp is fast and straightforward – it’ll take you less than 5 minutes to get set up! Plus, there’s no shortage of design options with the wide selection of themes available. With each theme, you can find templates explicitly crafted for your business needs and marked accordingly. And when it comes to creative control, choosing a layout provides access to customizing photos, colors, and more. Once you’ve picked a block, just click on it and change any settings in the new menu. If you’re looking for something extra special, try out the layout builder – with this feature, you’re sure to create a unique look that speaks to who you are as a company.

2. Comprehensive Segmentation

Creating an email segmentation plan for your clients is essential to ensure success. Differentiating between customers allows you to craft more complex and tailored marketing strategies that could take your business to the next level. Every customer relationship is unique and requires its own individual approach, so finding the right strategy should be a priority. Segmenting your customers properly opens up access to creating tailored marketing campaigns, increasing the chances of leads turning into sales.

Mailchimp allows you to segment your contacts by location, gender, or age – but that’s not all. You can even group them by purchase history and preferences. That way, you can easily target the right people with the information they’re most interested in.

3. Automated Responses

Mailchimp offers fantastic tools that make email marketing effortless and efficient. With their automated triggers, you can visualize the entire customer journey and personalize user experience – all without adding extra personnel to your team! The platform offers everything from marketing emails to transactional emails, from Google ads to Instagram posts and postcards. Plus, you don’t need to manually send emails one by one; with the programmatically-generated ones, you can reach out to customers about their shopping carts or give them special discounts for their birthdays. Whether your contact list is sizable or not, Mailchimp’s automation tool is a beneficial asset for companies with limited staff.

4. Customizable Templates

With your HTML code, you can create a Mailchimp template entirely tailored to your needs. All you have to do is copy and paste the code into Mailchimp’s custom builder, and it’ll turn the code into a stunning email design. You can also import the zip file or retrieve the code from a website directly, taking your HTML skills to new heights without ever needing to go through any manual labor. Mailchimp’s customization options make it easy for anyone – even those with limited coding abilities – to craft extraordinary emails.

5. Comprehensive Analytics

With Mailchimp’s Visual Report Dashboard, you can easily analyze how your emails perform – from users who open and click them to those who respond. Both mobile users and web browsers can view these reports, and you can even share them with other team members. Thanks to its integration with Google Analytics, Mailchimp gives you further insight into your subscribers while providing valuable data on how your campaigns influence website traffic and sales. So not only do you get real-time information, but you also have the ability to identify recurring trends!

6. Multiple Integrations

With Mailchimp, you can customize your marketing strategy with a variety of powerful third-party integrations. From Squarespace and WordPress to social media networks, developer-friendly tools, chat assistance, subscription data, designer tools, and beyond – there’s an app for everyone! Not to mention the convenience of manually connecting a website or an e-commerce store that is supported. With such a wide range of options at your fingertips, you can easily tailor your marketing efforts and create powerful campaigns with ease.

7. Free to Start

With Mailchimp’s free account, you can get your email marketing efforts up and running quickly. As part of the package, you’ll get access to a range of powerful tools – from 2,000 contacts and 10,000 email sends per month to 1-step automation and Line Helper. Plus, there are basic email templates to get you started! Even though the feature set is limited to the free version, it’s still a fantastic way to test Mailchimp without breaking the bank.

8. Hassle-Free Design and Launch

With Mailchimp, you can craft personalized email campaigns without coding skills. Their user-friendly WYSIWYG web builder lets you create campaigns from the front end with minimal effort. Plus, a wide range of features and ready-made layouts make it easy to customize email templates for any occasion – from holidays, events, and notifications to subscription alerts and bulletins. Even if your team lacks in-house web developers, Mailchimp’s pre-made themes give you the power to craft professional emails without writing any code.

9. Lead Generation Tool

Lead generation is an essential part of any successful business, and Mailchimp makes it easier than ever with its range of features. With their funnel technology, you can map out the entire process from start to finish – from how potential customers discover your company to how they make a purchase. Plus, you’re free to customize your lead generation strategy and tactics to suit your specific needs better, whether optimizing your landing page for conversions or creating special rewards for loyal customers. And email outreach plays a massive part in this process as it helps maintain relationships with current and former customers by delivering tailored content that speaks specifically to them.

Basic Steps To Get Started With Mailchimp

If you’re new to Mailchimp, it can be overwhelming at first. But don’t worry – getting started is actually quite simple! With some basic knowledge of the platform, you’ll quickly find yourself in the driver’s seat and ready to launch your own email campaigns. In this section, we’ll run through the essential steps for navigating Mailchimp and ensuring you have everything set up correctly.

Simply follow these steps:

Step 1: To get started with Mailchimp, click the “Sign Up for Free” button in the top right corner of their website. After that, you’ll be directed to a signup page where you must provide your email address, username, and password.

Sign Up for Free in mailchimp

Step 2: Mailchimp will send you an email with the “Activate Account” button after providing all the required information. Click this to complete your account setup!

Activate Account in mailchimp

Step 3: This will take you to the ‘Account Set up’ page. Select the type of Mailchimp Plan that you want to go ahead with in this step based on the number of email contacts you want to target.

Account setup in mailchimp

Step 4: Next, you’ll be guided through a series of setup screens with prompts for additional information, such as your name, business details, and physical address.

additional information form

Step 5: Take the “Let’s Find Your Marketing Path” questionnaire to give Mailchimp the information they need to make future marketing recommendations. Once you’ve completed the questionnaire, you’ll be ready to create your first email and complete the onboarding process.

Marketing Path questionnaire in mailchimp

Step 6: Add contacts to your mailing list by importing them from a file or gathering subscriptions through a pop-up form. Once the contacts are in place, you’ll be ready to send your first email.

add your contacts in mailchimp

You’ll receive a list of recommendations for what to do next, such as building a landing page, growing your Facebook audience, and setting up an automated welcome email.

recommendations list in mailchimp

The registration and onboarding processes are straightforward. Once completed, you will be ready to kickstart your first Mailchimp campaign.

Understanding the Mailchimp Dashboard

With Mailchimp’s intuitive dashboard, you can easily keep track of your email campaigns and make the most of your Mailchimp account. From segmentation to scheduling to analytics, plenty of features are available to take advantage of. Let’s take a closer look!

1. Create and Send Campaign: This is where you set up your campaigns. Mailchimp refers to this as an email broadcast.
2. Draft a list: It is here that your subscribers will be kept.
3. Start Building Your Audience: This involves creating online forms that permit users to subscribe to your list(s).
4. Get Your Co-workers Involved: Several people can collaborate on a single Mailchimp account very efficiently.

Creating Your First Email List

Simply follow these steps to create your first email list (now known as
Mailchimp Audience.

1. In your Mailchimp Dashboard, click on ‘Audience’.

Mailchimp Dashboard steps

2. Navigate to ‘Audience Dashboard’.

Mailchimp Audience dashboard

3. To begin creating your first Audience, click on ‘Add Your Contacts’.

grow your mailchimp audience

4. Select the manner in which you would like to import the contacts.

import the contacts in mailchimp

5. Organize your contacts by specifying their status such as Subscribed, Unsubscribed, Not Subscribed, etc.

organize your contacts in mailchimp

6. Mention any relevant tags for your contacts that would help make segmentation easier later.

relevant tags in mailchimp

7. Match column labels to contact information to finish the setup.

Match column labels in mailchimp

8. Click on ‘Complete Import’ to finish the process.

Complete Import in mailchimp

Adding a Custom Sign-Up Form

1. Generate a Signup Form

Subscribers can sign up for your newsletter via a signup form on your website. Access the form through ‘Audience’, then select ‘Signup forms’ from the drop-down menu on the left.

When you access the menu, you are presented with the following choices:

  • Form builder
  • Embedded forms
  • Subscriber popup
  • Form integrations
  • Contact form

Adding a Custom Sign-Up Form in mailchimp

Before constructing your Signup Form, Mailchimp may require you to confirm your “From” email address. You’ll be redirected to the settings page as soon as that is done. Send the verification email, click the link or copy and paste the verification code, then hit ‘Verify domain’ on the page.

2. Customize the Form

You can customize the look of your forms in ‘Form Builder’, as well as emails for double opt-in, unsubscribe, and profile updates. Click ‘Select’ on the right to get started.

The website has a drop-down menu at the top, which includes all forms and emails that will be sent to your subscribers. You can customize them further by using the tabs located at the top of the field.

customize the dorm in mailchimp

Build It: You can customize your sign-up forms here. Easily add radio buttons, drop-down menus, picture fields, and more by dragging them there. You can toggle visibility, edit text and add a help text for each element by clicking on it. You can also remove items by activating them and selecting the subtract button.

Design It: This menu determines the styling of forms. You can modify text sizes, colors, and other elements. Please note that changes are applied globally, not on a per-page basis. This means any alterations made to the regular form will also be reflected in emails sent out.

Translate It: If MailChimp is used in a different language, you can customize the form messages (such as errors) here. MailChimp comes with pre-made translations for a variety of languages. In addition to English, you can also tailor things to your native language.

In addition to customizing the forms, you can allow your subscribers to choose whether they want to receive their emails in HTML or plaintext and if they wish to use reCAPTCHA to protect your form against spam bots.

Creating An Email Template

Before gathering subscribers, we should be ready to send them emails. Crafting an HTML template for our email campaigns is the first step of this process. This will guarantee that our content looks neat and professional when it arrives in our subscribers’ inboxes.

The convenience of this process is one of MailChimp’s most significant advantages. With a few clicks, you can easily create customizable HTML email templates that are mobile-ready and tailored to your needs.

MailChimp offers a straightforward way of creating HTML templates tailored to your needs and optimized for mobile.

First, look for the ‘Templates’ menu item at the top of the dashboard. Once there, select the ‘Create Template’ button to begin crafting your template with the drag-and-drop editor.

create an email template in mailchimp

When crafting your email template with MailChimp, you have three options to choose from:

Layouts/Basic: Create a template from scratch using the drag-and-drop editor. This approach is the most popular choice since it allows full customization and control over your emails’ appearance.

Themes: MailChimp also offers a range of pre-made email templates designed for different topics, such as e-commerce, birthdays, and fitness, for those short on time. These templates come in two variations – drag & drop and classic – with the former offering more customization options than the latter, which only allows editing of content and colors.

Code Your Own: If you already have a newsletter template, you can easily import it to MailChimp in HTML or .zip file format. Alternatively, you can paste custom code into the editor as well. It is important to note that MailChimp must adhere to the MailChimp Template Language (MCTL) to accept your custom template.

Using Merge Tags

MailChimp has an intuitive user interface that makes it simple and easy to use, and the more you use it, the more accustomed you’ll become. However, Merge Tags are one key concept that must be mastered from the start and is essential for successful use.

Using Mailchimp to craft your emails? You can take them up a notch with the use of merge tags. These tags are dynamic tokens that help make your emails look and sound more personalized by collecting information from both your account and audience (including audience merge tags and system merge tags).

Looking to add a personal touch to your emails? Mailchimp has you covered with merge tags. For example, the |FNAME| tag inserts your recipient’s first name into emails. By including it in greetings (e.g., “Hey |FNAME|!”), you can send customized emails that will make a great impression!

Mailchimp offers a range of merge tags to help you personalize emails and tailor them to different audiences. For example, with the right tags in place, you can easily automate sequences and segment audiences. These tags allow you to:

  • Insert custom information (such as names) into emails
  • Automate follow-ups according to recipient interactions
  • Set up effective audience segmentation one step at a time

Autoresponder Series

Email autoresponders allow you to set up a series of automated emails that are sent out in response to the rules and conditions you specify. This is particularly useful for tasks such as:

  • Sending welcome emails when someone signs up for your mailing list.
  • Following up with customers after they purchase something from your website.
  • Automating responses to customer surveys.
  • Users that ordered an ebook, a cheat sheet, or any other freebie from your website will receive a content upgrade email series.
  • Automated responses for potential customers who asked you for a quote.
  • And more!

Automating emails with an autoresponder series can be a great way to send out multiple personalized emails over a set period of time. To set up an automated Welcome Email in Mailchimp, you can follow these steps:

1. Navigate to the ‘Overview’ tab under Automations.

automations in mailchimp

2. Click on ‘Get Started’.

3. In the next step on ‘How do you want to welcome new contacts?’, select ‘Welcome Automation’.

How do you want to welcome new contacts in mailchimp

4. On the next page, define the journey that you want customers to take before they receive the welcome email.

5. Once you have defined the journey, click on ‘Use this Journey’ to get started.

You can also send a test message to yourself to ensure everything is just how you want it before finally launching your autoresponder series.

Consider including a question like “What are you struggling with right now?” in your welcome email. Asking this question can have multiple benefits – it allows you to tailor content based on the answers received and helps build a better understanding of who your customers are.

Once you’ve completed your welcome email, you can set up an onboarding (if the new subscriber is also a new client) or educational email series.

If you’re feeling uncertain about how to structure your series, Mailchimp provides a helpful template. You can easily customize it by adding your own content, increasing the number of emails in the series, and setting up triggers – like tags, subscriber activity, ecommerce/purchase activity, date-based, API calls, and custom settings or you can engage an email marketing automation agency

Automated email series are essential for successful email marketing. They help you maintain a relationship with your subscribers, leads, and customers without sending emails manually. Remember that the content of these emails will be used to gauge your performance, so try to create emails that are as useful and informative as possible.

Broadcast Emails

If you need to send a one-time message, like announcing a new feature, you can easily create a broadcast email in Mailchimp. To do so, follow these steps:

  • Click the “Create” button in the top right corner of the window.
  • Go to ‘Regular Email’ and click on ‘Design Email’.
  • On the next screen, select the type of Builder you want to use – Classic or New.
    Broadcast Emails in mailchimp
  • Select the type of template you want as a starting point to create your email.
    select the type of template in mailchimp
  • For instance, we selected the ‘Make an Announcement’ template. In the email builder that comes up, define the content of your email along with the design elements.Make an Announcement’ template
  • Once done, click on ‘Continue’.
  • Select the recipients you wish to send this email to, make any necessary changes to the “From” line, “Subject” line, and email content, and then click “Send” (or “Schedule” if you want it to be sent at a later time).
  • The layout will establish your email’s basic structure, allowing you to feature your content any way you like.

Mailchimp’s drag-and-drop interface makes it easy to customize your layouts exactly how you want. You can move pieces around and arrange them however you like, giving you ultimate control over the look and feel of your emails.

Mailchimp has plenty of pre-made themes available to browse through if you need a fresh start. Simply click the “Themes” button on the top to search for one that fits your needs.

Steps To Set Up Email Automation In Mailchimp

Here are some essential points to note before you begin:

1. To access Mailchimp’s classic automation feature, your account must have a history of creating traditional automation.

2. Depending on your package, you may not have access to the automated email series. To learn more about each plan’s features, please visit the pricing page of Mailchimp. If you want to modify your plan type, please visit the plans tab in your account.

3. Ensure that you understand how traditional automation operates.

4. The construction of some automations may vary slightly, so we recommend that you consult our detailed instructions for creating order notifications, product retargeting emails, and abandoned cart messages.

5. Emails in classic automation, apart from date-based automation, abandoned cart emails, order notifications, and product retargeting emails can only be sent and triggered to subscribers once.

Create a Classic Automation in Mailchimp

If you have familiarity with traditional automation terminology and structures, you can create an automation. You can choose to make a single email or a set of emails for most predefined automations. Automated email series may be subject to limited pricing plans. Additionally, you can craft custom automation from the ground up.

To construct a new classic automation, follow these steps:

1. Click the Automations icon on the account dashboard.

2. Now click on ‘Choose Pre-built journey’.

3. Find and select the automation you want to use.
4. Can’t find what you need? To start from scratch, select ‘Build from scratch’.
5. Select either a single email or a series.

6. Choose an audience from the drop-down menu after entering the campaign name.
7. Click on ‘Begin’.

What Can You Do With Mailchimp?

Now that we have a better understanding of Mailchimp let’s look at what this powerful platform can do for you. Here are the primary uses and applications:

1. Manage Subscription Lists

As your email list continues to grow, managing subscribers becomes increasingly important – especially if you’re considering the cost of Mailchimp. Thankfully, Mailchimp provides a simple way to manage your contacts. You can easily add and delete subscribers from your list in no time at all.

If you need to delete contacts, simply go to the Audience > All contacts > Manage contacts page. You can then select the ‘Unsubscribe addresses’ option from the dropdown menu. Before clicking ‘Unsubscribe’, enter the names of those you’d like to remove from your list. Furthermore, Mailchimp also allows you to manage subscriber preferences, import contacts, add new subscribers and manage texts received via the app.

2. Establish Campaigns

Mailchimp is an excellent choice for creating email campaigns with ease, even if you don’t have any coding or graphic design experience. By using Mailchimp, you can easily create both landing pages and emails that include several customization options – including the ability to upload your own graphics and logos.

Mailchimp provides users with the option to create embedded and email pop up forms. When you’re ready to start producing a new piece of media, click Create in the top left corner to get started. Alternatively, you can use the Creative Assistant feature to generate campaigns quickly and easily.

3. Analyze the Data

With Mailchimp, you can easily track the success of your email marketing campaigns. To view your email click-through rate, go to Campaigns > Email Analytics. You can also check how many people opened your message to gain further insight into your campaign’s performance.

Mailchimp also allows you to access additional analytics that provides valuable insights. For instance, you can determine how much revenue was generated from each email and how many users unsubscribed from your communications.

4. Design and Automate Client Journeys

With Mailchimp, automating the manual work of your expanding business is a breeze. Simply open the Automations tab, and you’ll find a range of tools that can help you send welcome emails, abandoned cart emails, Upsell emails and win back emails order confirmations, and other types of emails with ease.

Mailchimp also allows you to create custom emails and sequences that can be triggered by user actions, such as signing up for a newsletter or adding an item to a cart. You can also create custom automation using the visual automation editor, which provides a guided workflow for creating automated emails.

What Are Mailchimp Limitations?

Mailchimp is a powerful and versatile automation tool. However, it is essential to understand its limitations. In this section, you’ll learn more about what Mailchimp can and cannot do so that you can decide if it’s the right tool for your business.

1. Is Mailchimp a decent CRM?

If you’re using Mailchimp, it’s essential to consider whether or not it is a suitable Customer Relationship Management (CRM) tool. While Mailchimp does store customer names and emails, its capability as a CRM is limited. For robust CRM capabilities, you must supplement Mailchimp with a standalone CRM product such as Pipedrive.

2. Is Mailchimp capable of SMS messaging?

Mailchimp does not currently have the capability to send out SMS messages. If you’re looking into text marketing, you’ll need to either use a dedicated text marketer or an all-in-one solution like Keap.

3. Can Mailchimp automate marketing and sales?

Mailchimp has some basic automation capabilities for email but does not offer the same level of comprehensive sales and marketing automation that you’ll find in all-in-one solutions. This is because Mailchimp does not have tools such as invoicing, text messaging, and a sales pipeline that are necessary for full automation.

4. Can Mailchimp be used to design a sales funnel?

Even though Mailchimp offers an easy way to design simple funnels with landing pages, email drip campaigns, and online stores, it doesn’t have the advanced capabilities you’d expect from a sales team such as Kanban boards or a CRM. The features of Mailchimp are better suited to e-commerce and content-focused businesses rather than service-oriented or B2B companies.

5. Can quotations and invoices be sent using Mailchimp?

While Mailchimp enables you to set up an online store, it does not offer the ability to generate and send personalized quotes, invoices, or contracts.

Frequently Asked Questions (FAQs)

1. Does Mailchimp have appointment scheduling?

Yes, you can plan and manage appointments in a single location thanks to the appointment scheduling feature of Mailchimp’s all-in-one marketing platform. The best aspect is that you may begin providing single services and one-on-one appointments without charge! This is the ideal choice for small enterprises that only offer a few services.

2. Can You Use Mailchimp on Different Devices?

Yes, you can use Mailchimp on multiple devices. Just sign in to your account on any device, and you’ll be able to access your campaigns and lists. Keep in mind that the experience may vary slightly depending on the type of device you’re using.

3. How easy is it to use Mailchimp?

Mailchimp is easy for anyone to use – no experience needed! You can quickly set up an account, create campaigns, and design attractive emails in no time at all.

4. Does Mailchimp have a free plan?

Yes, Mailchimp does have a free plan. The Free plan includes all the basics you need to start marketing with Mailchimp, such as up to 500 contacts and 2,500 sends per month, with a daily send limit of 500. This plan is perfect for those starting out and looking to expand their reach while exploring Mailchimp’s various tools and features.

5. Can Mailchimp be used only for emails?

Mailchimp started out as an email broadcast platform. Although that’s still its core competency, in recent years, it has expanded to include things like web pages, ecommerce sites, social media posting, and surveys.

Abandoned carts are one of the most significant banes of the digital era.  It represents a loss of potential sales opportunities and costs your business money. Fortunately, Our Mailchimp experts can help you to recover those lost purchases with Abandoned Cart Email feature. In this article, we’ll discuss everything you need to know about setting up and using Mailchimp Abandoned Cart Emails. We’ll also include a deep-dive case study to illustrate how effective this tool can be for your business.

Setting the Precedence

One of our clients, a global fashion retailer, witnessed an average of 56% cart abandonment rate. They had a good understanding of their customers, knew the value of one-to-one marketing, and had been working on their email marketing for months, trying to find ways to reach out to their customers and boost sales.

They’d already attempted traditional marketing methods, but it just wasn’t enough. That’s when they reached out to us to explore possible solutions. 

First, we identified the customers that may be at risk of abandoning their carts. Then we set up automated emails that would be triggered when customers abandoned their carts. Finally, we customizable templates so each email was tailored to the product the customer had previously been looking at.

The client was thrilled by how quickly their sales increased as soon as we implemented the new email campaigns. With such dramatic results in a short time frame, it was clear Abandoned Cart Automation emails on Mailchimp were worth the effort!

Let’s explore further to understand how everything panned out.

What Is a Mailchimp Abandoned Cart Email Series?

If you’ve ever abandoned a shopping cart online, you may have already received abandoned cart emails, which frequently arrive in phases.

1) The first usually serves as a friendly reminder for you to finish your purchase.

2) The second email may relay that your order is about to expire!

3) And a coupon or discount is typically included in the third to entice you back all the way to the payment page.

Mailchimp Abandoned Cart emails are designed to do the same. They use automated engagement campaigns that are triggered when a customer adds items to their shopping cart but fails to complete the purchase.

Mailchimp is a widely used marketing automation tool that focuses on email marketing and is a popular service for automating email marketing activities, such as subscription lists, content templates, and abandoned cart emails, with paid and freemium versions.

This helps you save time by utilizing their email marketing tools to assist you in running an effective Mailchimp abandoned cart email campaign. The tool does most of the heavy lifting while you focus on creating excellent, engaging emails and improving your products.

The ideal number of emails in a Mailchimp cart abandonment series is three. Any less might not work, and any more might irritate or alienate them. (For some clients, we use 5 emails and 7 emails too depending on the price, their audience etc).

A built-in system in Mailchimp abandoned cart emails automatically sends emails at the ideal moment based on the following triggers:

  • One hour after a customer has abandoned their shopping cart.
  • One day after the delivery of the first email.
  • If the consumer hasn’t finished their transaction, the third email can be sent three days after the “Day One” email was issued.

Things to Consider  Before Setting Up Your Mailchimp Abandoned Cart Emails

Before setting up a Mailchimp Abandoned Cart Email series, it’s important to understand the customer journey and your objectives. You should also be aware that the abandoned cart email feature in Mailchimp is only available to users who have connected to a supported e-commerce store or deployed a custom API 3.0 interface.

You can learn more about whether your site satisfies these requirements on the Connected Sites page that lists the possible integrations. Each connected store is limited to a single abandoned cart email. If you run numerous stores, this essentially means you may make one Mailchimp abandoned cart email for each one. 

Things to Consider Before Setting Up Your Mailchimp Abandoned Cart Emails

Once you have decided to go ahead with Mailchimp, you must disable any previous cart abandonment emails that you might have set up through other platforms. Multiple emails to a customer for the same abandoned cart might become a nuisance and prevent customers from returning to your store.

It can also be helpful to keep track of the outcomes, such as the open rate, click-through rate, and purchase conversions. This will help you determine the success of your abandoned cart emails and provide insights on optimizing them for better performance.

You should also keep an eye on email kpis such as unsubscribe rate, bounce rate, and spam complaints to ensure that your emails are not going to be marked as spam.

Other key points :

  • The Mailchimp abandoned cart series is a Classic automation feature. Only accounts with a history of traditional automation creation are eligible to use classic automation.
  • Depending on your package, you might not have access to the automated email series. Visit Mailchimp’s pricing page to learn more about each plan’s features.
  • Customers who provide you with their email addresses through your connected store but choose not to subscribe to your marketing emails are added to your Mailchimp audience as non-subscribed contacts. These recipients will only receive the first email in the abandoned cart due to compliance issues.

The Pros and Cons of Using Mailchimp for Your Abandoned Cart Email Series

Pros and Cons of Mailchimp for Abandoned Cart Email Series

Email marketing can be difficult and complicated. But thanks to Mail Chimp, you can set up a professional abandoned cart email campaign without going through the grueling task of learning how to code or design emails. Instead, with so many features and capabilities at your disposal, you can put together a successful campaign in a matter of minutes and keep improving it until you find the perfect balance of triggers, content, and design.

Here are some advantages and disadvantages of MailChimp that you should consider if you haven’t used it yet.

Pros of MailChimp For Cart Abandonment Email Series:

1. Your own email templates are importable

Signing up for MailChimp grants you access to a selection of user-friendly email templates. But you can take it a step further and upload your own. The clickable editor, no HTML or CSS skills when editing the template design. You can tweak existing one or create a new email design  from scratch without any technical know-how.

2. There are several ways to integrate your current web presence

MailChimp’s integration with Facebook makes it possible to set up subscription forms and testing and scheduling tools that can enhance open rates. Plus, with their free, unlimited image hosting feature, your marketing efforts will appear as perfect as you imagined them.

3. Access to comprehensive comparison metrics is available

With the ability to track your progress and compare it against other MailChimp campaigns, you can clearly gauge the success of your email marketing. With comprehensive comparison metrics at your disposal, understanding whether your efforts are making an impact is easier than ever.

4. You can remove The MailChimp logo (if Required)

With MailChimp’s free service for up to 2,000 contacts comes the added logo on your campaigns and subscription forms. You can always upgrade your account if you’d like to omit it from your outgoing mail. Importing a wide range of spreadsheet files simplifies contact management, making this feature hard to ignore.

Cons of MailChimp For Cart Abandonment Email Series:

Mailchimp has been around for over twenty years and is now considered one of the pioneers of email marketing automation. Still, like any other service provider, Mailchimp has its own drawbacks. Let’s take a look:

1. Maintaining a membership-based website can be tricky

MailChimp’s integration with WordPress and PayPal may not always work the way it should, making it hard for users to advance their goals when creating subscription or membership sites.

For example, although autoresponders can be configured, they won’t be activated until someone has joined your email marketing list via one of your online forms. Furthermore, using imported contacts for this purpose is simply not effective.

2. Some plans don’t allow access to automated emails

With the limited features of the free or basic plans by Mailchimp, you may not be able to access automated emails or take advantage of all the customization and user feedback options. You will have to upgrade your account for access to such features.

3. You may have to make your own templates

Mailchimp’s templates are basic and might not impress your readers. To compensate for this, you may have to invest in  creating mobile friendly email templates.  These investments will be worth it in the long run as they could help grow your business.

4. Some users may find the UI to be a little clumsy and awkward

MailChimp’s user interface can be confusing and awkward, especially if you’re used to other email marketing solutions. Crafting an effective campaign could take additional time and effort that might not be necessary if you plan on sending out occasional information or newsletters. For businesses with heavy email activity, this added burden of learning the system may lead to wasted time.

5. It Does not display the percentage of sales that were brought in by emails sent to abandoned carts

While a percentage might provide more insight than a dollar value, MailChimp delivers only the latter. This means that you may be unable to accurately gauge the impact of emails sent to abandoned carts in terms of the percentage of sales they generated.

6. MailChimp has the authority to revoke or suspend your account.

Email marketing may be hard work, with low open rates and decent conversion rates of 1-2 percent. However, MailChimp holds the authority to revoke or deactivate your account as necessary if you receive a large number of unsubscribe notifications or spam reports about your emails. To avoid such issues, it’s advised to test all emails before sending them out.

How to Set up an Abandoned Cart Series With Mailchimp

How to Set up an Mailchimp Abandoned-Cart Series

Setting up a Mailchimp abandoned cart series is reasonably straightforward. Here are the steps that you can follow based on your goals.

Create an abandoned cart Customer Journey map

Leveraging the Customer Journey builder, those who abandon their shopping cart can be invited to finish their purchase with an automated email. To provide a personalized experience, start by setting an abandoned cart beginning point and add additional steps in your map that correspond to each contact’s behaviour. This ensures every contact has their own tailored journey and is guided through the checkout process.

To create a comprehensive Mailchimp abandoned cart Customer Journey map, follow these simple steps.

1. To begin the Customer Journey building process, go to Overview on the Automations menu and click on ‘Build from Scratch’.

Mailchimp abandoned cart Customer Journey map

2. Give your journey a name and if you’re targeting more than one audience, select one from the dropdown.

Starting point in mailchimp abandoned cart

3. Once done, click Start Building.

4. Click on choose a starting point.

Starting point in mailchimp abandoned cart

5. Click on ‘Shopping Activity’ on the left panel. Then select out of ‘Abandons cart’ or ‘Abandons cart with particular products’ from the menu.

Choosing Shopping activity in mailchimp

6. From the Store Name drop-down menu, select which store you’d like to connect with the abandoned cart customer journey.

Selecting stores in mailchimp abandoned cart

After that, decide on Any Products or Specific Products from the Customer Cart Contains drop-down menu.

7. Should you choose Specific Products, specify whether to include or exclude them in your carts.

8. Once done, set a waiting period before sending an abandoned cart email via the Abandoned Cart Wait Time option.

9. To target a specific section of your audience, click Get more specific about who can enter this map.

10. Select up to five segment conditions before pushing the Save button.

11. Once done, press the Save Starting Point button.

Add an Mailchimp Abandoned Cart Email to the Journey Map

Once you have saved the Abandons cart starting point, add a Send email journey point and pick your abandoned cart email template. With this email, you can provide a link to their basket, allowing them to complete their checkout process.

1. You can add a journey point in your customer journey map by going to the ‘Marketing Activity’ tab on the left panel.

Marketing Activity in Mailchimp

2. From there, click ‘Send an email’ and make adjustments to the name of your email, the To and From details, the subject line, the schedule, and tracking options.

schedule, and tracking options in Mailchimp Abandoned cart series

3. Choose the abandoned cart template that fits your needs.

4. When that’s complete, you can start designing your abandoned cart email.

How to Set Up Your Single Mailchimp Abandoned Cart Email

On many plans, Mailchimp offers a default abandoned cart email. It’s easy to configure for timing, content, and design. They also have several helpful resources that cover what you should consider, how to get it set up, and more – so you can make sure your abandoned cart email is as optimized as possible.

When a single email doesn’t cut, abandoned cart techniques usually include a series of emails timed based on when the customer left the shopping cart. This way, you can craft a more targeted approach to recovering lost sales.

How to Configure a Single Abandoned Cart Email

Follow the steps below to create a single abandoned cart email:

1. Go to the “Automate” menu on the left panel.

Automations menu in mailchimp

2. Select “Pre-built journeys’ from the list.

3. For example, if you want to set up a single welcome email, select the ‘Welcome new contacts’ tab.

4. Select ‘Single Email’ and then click on ‘Continue’.

Single Mail In Mailchimp

5. Give a Campaign Name, select your audience, and then click on “Begin.”

last step in Single Mailchimp Abandoned Cart Email

Confirm Settings in Checklist

Setting up your abandoned cart emails doesn’t have to be complicated. Double-check the settings, make any needed alterations and then validate them. You can personalize the name, email address, subject line, and time delay for the message here. You can even choose a wait time of 1 hour, 6 hours, or 24 hours when sending out a single abandoned cart email.

Here’s how you can change the time delay of abandoned cart emails:

1. From the checklist page, pick “Edit Recipients”.

2. Visit the Abandoned Cart Notification page and select a time delay from the ‘hours’ drop-down menu.

3. Confirm your changes by pressing the “Save” button.

Now that you’ve chosen your customized delivery preferences for the emails sent to customers, your abandoned cart emails are all set up to be automatically distributed. You can design, arrange and style your abandoned cart emails in accordance with your desired look.

Design Your Customized Mailchimp Abandoned Cart Emails

When creating your abandoned cart emails, you’ll find them similar to those in the Campaign Builder. A Cart content block must be used to ensure that customer and product information is accurate. There are a range of abandoned cart templates for you to pick from and drag-and-drop options. Plus, the logos you choose will already have been incorporated into the design, displaying your brand logo automatically. Be sure to take the time to understand how everything works and what choices are available to you!

To design a customized Mailchimp abandoned cart email, here are the steps you can follow:

1. To get your abandoned cart email underway, select the “Email Template” option in the left hand panel under “Campaigns.”

Email Template option in Mailchimp

2. From there, you can go to the Template portion of the Email Designer process by clicking on ‘Create Template’.

Template portion in mailchimp

3. Find the suitable template that suits your needs by clicking on it.

layouts, themes & custom templates in mailchimp

4. Moving on to the Design stage will let you create your email campaign and preview how it will appear when shared with customers before proceeding.

Previewing email design in Mailchimp

5. After that, click “Save and Exit” to save any modifications made – then you’ll be asked to give a name to your template.

last step to create desiggn your mailchimp mail

6. When everything is ready, select your template from the Templates Page and click on ‘Create Campaign.’ Then, your abandoned cart emails are ready for launch!

Create a campaign in mailchimp

Get your abandoned cart emails off and running by enabling the campaign. Now, you’ll be able to reach out to customers who left their carts before completing a purchase.

Create an Mailchimp Abandoned Cart Series

Simply follow these instructions to make the abandoned cart series:

1. To get started on activating your abandoned cart email campaign, click the Automations icon from the dashboard.

2. Select ‘Pre-built Journeys’ from the list that appears.

Pre-built Journeys in mailchimp abandoned cart series

3. Scroll to the Nurture Leads section and click on Abandoned Cart Reminder (new vs. returning).

Nurture Leads section in mailchimp
4. Click on ‘Use this journey’ on the top right.
Use this journey option in mailchimp

5. Here, provide a name for your campaign, pick your store, and hit the Begin button.

Use this journey option in mailchimp

Now it’s time to edit the content of your emails and make them look exactly how you want them!

Confirm and Start

Before you send out your automation, be sure to review it in the Confirm step.

1. Double-check everything using the checklist and test each email first.

2. If there’s a part of the automation you still want to change, click Resolve or Edit.

3. And when everything looks good, hit Start Sending!

That’s all! Customers will automatically receive your abandoned cart series if they leave an item in their shopping cart without checking it out! This way, you can encourage them to come back and complete their purchases and boost your sales!

Your abandoned cart emails are now ready to be sent out. They will be delivered with the appropriate time delay, content, design, and look you have selected.

Frequently Asked Questions (FAQs)

Why does Mailchimp Abandoned Cart Emails work?

Firstly, Mailchimp is a seasoned platform for setting up and delivering Abandoned Cart emails that customers can easily access and respond to. It also provides an automated workflow for delivering emails based on customer behavior, ensuring that customers receive relevant messages on time and in the correct order.

Finally, Mailchimp offers customizable abandoned cart emails that can be tailored to match your brand image and content. This allows customers to have an enjoyable experience that reflects your brand’s values, encouraging them to purchase from you in the future.

What is the best way to send Abandoned Cart Emails on Mailchimp?

The best way to send Abandoned Cart Emails on Mailchimp is to create a fully customized email template that contains relevant information, product images, and an enticing offer. Additionally, the emails must also be well-timed and personalized to increase their effectiveness. Also, offering customers multiple methods of communication such as email, phone, or chatbot so that they can get the answers to their questions quickly is essential for successful abandoned cart emails.

How many emails should an Abandoned Cart Email series in Mailchimp have?

Typically, an abandoned cart series in Mailchimp should include 3 emails. The first email should be sent within 24 hours of the cart being abandoned, the second email should be sent a few days later, and the third email should be sent after 1 week.

This will ensure that customers are reminded of the items in their cart without getting overwhelmed. Additionally, each email should incentivize customers to complete their purchases. This could be a discount, free shipping, or other promotional offers.

How does Mailchimp handle bounced email addresses?

Mailchimp handles bounced email addresses using an automated system to detect invalid or blocked emails. When an email is detected as invalid, the system will mark it as undeliverable and remove it from the list of recipients.

This ensures that their abandoned cart emails are only sent to valid, active addresses. Mailchimp can also notify users when an email address bounces so they can take the necessary steps to correct it. This ensures that the campaigns remain effective and efficient.

Summary

Overall, it’s important to remember that cart abandonment is a normal part of any online business. But with the proper techniques and strategies, businesses can turn this challenge into an opportunity to engage customers and increase their bottom line. Businesses can significantly improve their success rate in cart recovery by creating compelling emails that re-engage potential customers and incorporating personalized product suggestions and limited-time promotions. Give it a try and see what kind of results you can get!

No marketing platform drives as much ROI as email. With ROIs as high as $42 for every $1 spent, every marketer should be using it.

Besides commanding insane ROIs, the email also has a unique advantage over other marketing platforms – versatility. Whatever business goal you have, be sure email can play a role in its fulfilment. From building strong relationships with your customers to new product announcements, email plays a central role in your success.

But for email marketing to give you the mouth-watering ROIs others boast of, there’s one crucial element you need to master – email list management.

This article will discuss the importance of email list management and some of the best methods for doing it.

Defining Your Email Marketing Strategy

Before you embark on an email marketing campaign, it’s crucial that you always define your strategy at the outset. This involves identifying your objectives and your path to achieving them. It is from this strategy that you can then consider how to segment your email lists. Segmenting your list is a critical component of email list management that helps your campaign become targeted and thus more effective. This is because segmentation helps you send personalized emails. And yes, that is important as research shows that personalized emails enjoy 26% higher open rates than those that lack personalization.

To pull off a highly effective email marketing strategy, therefore, you need to identify and process relevant data. This is data that helps you target the right people with the right message. You should factor in everything you have learned from previous marketing campaigns while developing your strategy.

What is Email List Management?

In its simplest form, email list management is the practice of organizing and managing your email list into relevant segments and lists. It involves (among other things):

  • Segmenting your list
  • Identifying inactive subscribers
  • Re-activating dormant subscribers

If you have experienced high opt-out rates, this also suggests that your email marketing should be more targeted. People are more likely to opt-out if they do not feel the information that they are receiving is relevant or useful to them. The more you work to understand your customers, the more effective your marketing to them will be.

And that is why it’s important that you understand email list management and follow email list management best practices.

Benefits of Email List Management

Managing your email lists comes with many benefits. The main benefit being that it allows you to target your messaging more effectively. As a result, your customers will find your information relevant, thereby leading to a pleasant and more effective customer journey. Targeted messaging also leads to higher levels of personalization, which results in your customers feeling more connected to your business. Customers are much less likely to opt-out of your communications if those communications are providing them with useful information.

One of the best examples of sending targeted messages is one that is employed in e-commerce – the cart abandonment email. When a customer loads an item into their cart but don’t go through with the purchase, an email is sent out to the individual to remind them of the abandoned cart. This is a great way of providing relevant communication and encouraging customers to complete a purchase.

Another great example of targeted messaging is the recommended products email. This is an email sent to recommend similar products to the ones a customer viewed or bought. It can also be used to encourage customers to purchase items that complement those they have already purchased. For example, if a Home Depot customer purchases a set of drawers, the company may send an email about matching furniture items. This is a good way of maintaining a customer’s engagement and building brand loyalty. These kinds of personalised communications are only possible with good email list management.

If you put in the time and effort to develop an advanced email management system, you can efficiently arrange these kinds of communications. Customers will feel more valued if they receive emails targeted to them specifically rather than generic ones. If customers receive regular, generic emails, they are much more likely to lose interest or become irritated. This will increase your opt outs. Customers receiving engaging, targeted communications are far more likely to remain on your lists and engage with your company.

List Segmentation – The Pillar of Email List Management

Email list segmentation is one of the core elements of email list management. This is because list segmentation allows you to keep your entire list organized. Essentially, it helps you streamline your email marketing campaigns, thereby helping you to achieve your marketing objectives. Need proof? According to a study conducted by Mailchimp, segmented email campaigns have a 14.31% higher open rate than non-segmented ones. And more importantly, they command a whopping +100% higher click rate.

There are several methods you can use to effectively segment your list. In most cases, a combination of these methods will be more effective. You can also test different forms of segmentation from one campaign to the next. This will help you identify the most effective forms of segmentation for your marketing purposes.

Below are some of the different methods you can consider using to segment your email list, making for highly effective email marketing campaigns.

Customer Behaviour

Segmenting your customers based on their behaviour is one of the most effective methods of managing your email lists. You can gather information on your customers’ purchasing history, the amount they have spent, and their engagement with your marketing communications. Engagement with previous emails can also be useful data to use as it will help you to place them on the right email list.

You can identify if they have responded to previous types of products or particular deals in the past.

Apart from engagement with your emails and products, another great way to segment your list is by observing how they engage with your website.

  • What pages do they frequent?
  • Which links have they clicked?
  • Which channels bring them to your website?

All these pieces of data can give you a good picture of who your customer is and what they are looking for. As a result, you can easily place them on a relevant list.

Position in Sales Funnel

Identifying where your customers are in the “sales funnel” will help you to market to them effectively. By segmenting your list according to your customers’ position in the sales funnel enables you to tailor messages that specifically address them according to where they are in the customer journey. This will make it easier for them to convert into a paying customer or move further along the funnel.

Source of Sign Up

Some companies segment lists based on where customers have visited their website from. It is possible to track where visitors have accessed your website. For example, you can see if they have visited from a social media advertisement or from an affiliated website. This can give you useful information on their online behaviour and an insight into their interests and preferences.

Surveys

Surveys are a great way to get information about your customers. And you can use this data to know how to segment your list. This is because surveys can help you identify what specific customers want from your business. While not everyone may respond to your surveys, the ones who do will give you a wealth of data that can be used to manage your email list more effectively.
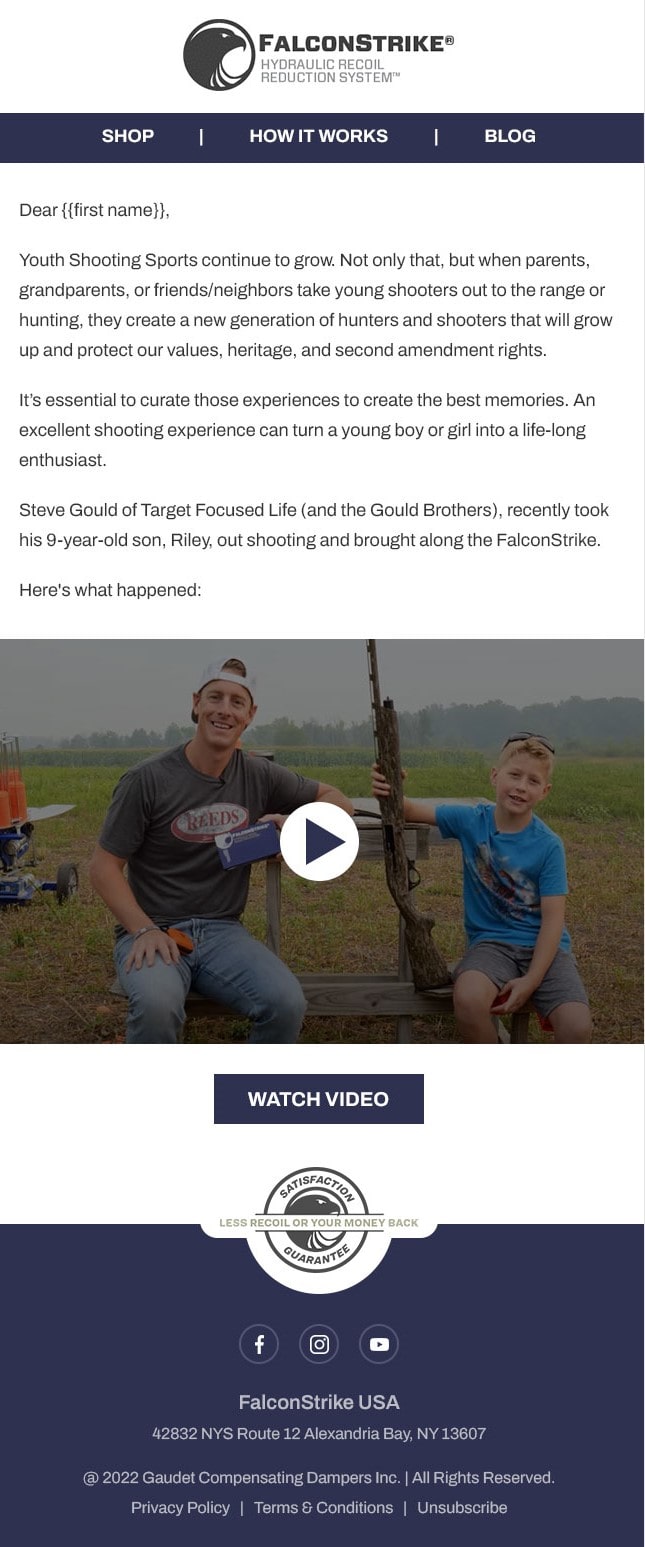
Geography

Knowing where your customers are physically located can help you have a good email list segmentation strategy. For example, if you have customers in different time zones, segmenting them according to geographical location will help you increase the chances of your emails being seen and opened. This is because you will be able to send your emails when your recipients are awake as opposed to sending them at a time when they’ll be asleep.

Geographical location can also help you market products that are relevant according to:

  • Season
  • Terrain
  • Culture

For example, Adidas market different kinds of products depending on geography. They will promote heavy outdoor wear in locations where the weather is colder at the time. In areas where the weather is warmer, they promote lighter wear.

Brands can also promote different products based on regional preferences. You can track which products do well in which regions and promote them accordingly.
Age and Gender

Some of the most common methods of segmentation are also among the simplest. Two such are age and gender. These demographics can help you ensure that you not only market the right products to certain demographics, but also helps ensure you craft the right message. To pull this off, you’ll either have to gather this data on sign up or through a survey. Knowing a customer’s age and gender can also help you understand their interests and preferences.

Email List Cleaning – The Necessary Evil of Email List Management

Another aspect of email list management that you need to take seriously is list cleaning. Sure, having a huge email list is great for bragging rights, but keeping inactive subscribers will cost you as you will experience high bounce rates and low open rates. This is dangerous as it can adversely affect your sender reputation. In essence, list cleaning will help you to run an efficient, targeted campaign.

Apart from segmenting your email lists, you should thoroughly clean them. Yes, as much as you may want to have an email list that is bursting at the seams, email list management best practices demand that you clean your list regularly.

Email list cleaning involves (among other things) identifying and removing:

  • Duplicate email addresses
  • Inactive subscribers
  • Defunct email addresses

Removing these kinds of subscribers is important as it helps ensure that you to avoid spam complaints and reduce your bounce rates. It will also help to maintain the efficiency of your marketing strategy.

How to Deal with Inactive Subscribers

An inactive subscriber is one that has not engaged with your emails for:

  • A certain period
  • A number of emails

For this type of subscribers, you have two options. First, you should try to re-engage them with targeted emails and incentives such as discounts or deals. Some will respond to your re-engagement campaign while others won’t. For those who don’t respond to your re-engagement campaign, you can take the second route – removing them from your list.

Defining Objectives for Each Segment – The Key to a Wildly Successful Email Campaign

When segmenting your email lists, it is important to consider your objectives or desired outcome of your marketing campaign – particularly for each segment. The strategy for each section should also fit in with your overall marketing strategy. You should consider the type of customer in each segment and what they need from your company. Some common objectives you can set for your segments can include (but are not limited to):

  • Inform
  • Engage
  • Drive sales
  • Onboard new customers
  • Re-engaging inactive subscribers
  • Scheduling a demo

Defining your objectives will help you create an effective email marketing strategy and craft a message that will inspire the right response.

Using Data for Future Campaigns

Every time you send a marketing email, you can use it to gather the information you can use to fine-tune future emails. You can learn a lot of very useful information that you can then use to improve future marketing communications. If you carry out effective segmentation for one campaign, you will gather more information that you can use to segment future lists even more successfully. If you get disappointing returns from one campaign, you can still use the data to build a better campaign.

This is why email list management is crucial to the success of your email marketing campaigns.

Email List Management – The Lifeblood of Every Marketing Campaign

A healthy email list is essential to achieving your business goals and increasing your ROI. Therefore, never, under any circumstances, send run an email marketing campaign on a stale list. Proper management of your email list will ensure that your business enjoys a healthy growth and an increased bottom line.

So, go ahead and start implementing email list management best practices.

What is a Holdout Testing?

Holdout testing is the process of reviewing your email marketing program to quantify if the campaigns being sent are generating increased engagement metrics/conversions vs not sending anything. Are these email campaigns/automation really giving an incremental increase in engagement metrics/conversions/increase in revenue that would otherwise not be realized.

This holdout test is like an A/B test, as it has two segments, but one segment receives no emails.  They are excluded from the mailings.  You then measure the purchase/conversion behaviour of the two segments to define the level of increased engagement that the segment being emailed has over the segment being excluded.  In most cases (one would hope), the group receiving email will have a higher conversion rate.

For additional needs, you can also contact email marketing experts and get the results to the fullest.

More to think about:

There are many costs to factor in after you get the results.  You need to weigh the email marketing packages of the program you are testing.  Cost of the ESP to send the campaigns, cost to design, code, test, and setup/deploy the email campaigns, count your manhours.  Use that as part of the cost of doing campaigns.  A small increase in revenue may be outweighed by the costs of that program.

Depending on your list size, type of email campaigns/automation and mailing frequency, this type of holdout test may take 30-90 days to complete.

Why you should do Holdout Testing?

The main reason for running holdout group tests is to understand if you are cannibalizing natural sales that would have happened if no marketing email were sent. For a company that regularly sends discounts and/or offers to its customers via ecommerce emails, this process enables you to determine if those discounts/offers are in some way cannibalizing the profits of your business.

The worst-case scenario for the company would be the segment of customers who did not receive an email end up purchasing your products at the same or higher rate. That essentially means you’re giving away your profit margin when it’s not needed.

Let’s use a Cart Abandonment program as an example:

If you are doing testing, running a cart abandonment program or really any email marketing campaigns you should have a holdout group.  A holdout group is a group that does not get that specific type of mailing.  That’s your baseline of “what if we didn’t send them anything?  What is there natural progression through the buyer journey if not prodded by email.

For example: If you run a cart abandonment program, you should first know what your natural cart abandonment return rate is with no program running.  In other words, how many people come back on their own, with no messaging to buy what’s in their cart.  How many come back the first day, the second day, the third and so on.

Read More about browse abandonment email & it’s examples.

Once you know your natural return rate you can then measure the true value of a program.  If your natural return (conversion) rate is 5% and when running your program, you see a total of an 11% return rate, then you know the program generated an additional 6% return.  The program didn’t create 15% because you now know your natural return is 6%.  Those percentages will change month-over-month so reviewing your programs regularly is imperative.

Now you can measure true decrease or increase in revenue (to a point, as there will always be variables out of your control that will affect results) from that program as well.  If over a 12-month period the natural returns delivered an average of $10,000 per month, and the Program total delivered $22,000 per month, you know the programs value over the baseline natural return.  These numbers will vary over time with some peaks and valleys and will be influenced by sales and holidays, so adjust as needed.

Wrapping this up:

Some companies hold out 10% of subscribers (sometimes using a dynamic segment of subscribers for each holdout test process) as a complete blackout during testing or all year.  If you have a very effective and robust email campaign management program, it seems silly to ignore the increase in revenue to that 10% group, so I suggest doing your testing a few months each year but shift the test months each year.  If you are an e-commerce company and do heavy volume/revenue during the holidays, don’t test then, grab all the revenue you can during the holidays.  Test throughout the rest of the year.

It should be noted that if you are going to Holdout test or do a holdout group, your segment or list size should be at very least 50,000 subscribers.  Anything less would be statistically irrelevant.  Also, make sure your holdout group matches the sending group.  If you are sending to actives, the hold group should be actives.  Don’t use a random segment process, random tends to be anything but random.  Try to give fair advantage to each group to succeed/fail equally.

Thanks for stopping by our blog and if you’ve found this valuable, please share it on your social channels.

———————————————-

If you need help with this type of testing or looking for an email marketing agency, we offer a free 30-minute phone consultation.  No hard sell just a call to see if we might be a fit for your needs.

Multi-ESP Support

We support 50+ ESP vendors. Be it enterprise platforms such as SalesForce and Oracle Marketing Cloud or small and medium sized business platforms such as Mailchimp, Klaviyo, Aweber, and ActiveCampaign, we’ve got you covered.

Top